
How I installed a 50 kWh battery for cheap on Black Friday with Government discounts and synced it with Home Assistant.
Background
Up until the 1st of July 2025, home batteries in Australia didn't make financial sense.
The easiest comparison is the Tesla Powerwall 3. It is a solid product, but it was (and still is) expensive. Rough numbers at the time were about $13,000 installed, with a payback period around 10 years. The catch is that the warranty is only 10 years, so you are basically hoping it's still healthy right when it starts to make sense.
Everything changed on the 1st of July 2025 when the Australian Federal Government introduced the Cheaper Home Batteries Program. It offered roughly a 30% discount on the upfront cost of installing a battery connected to a PV solar system. Uptake was immediate, with a record 183,245 home batteries sold in the second half of 2025, according to a Clean Energy Council report.
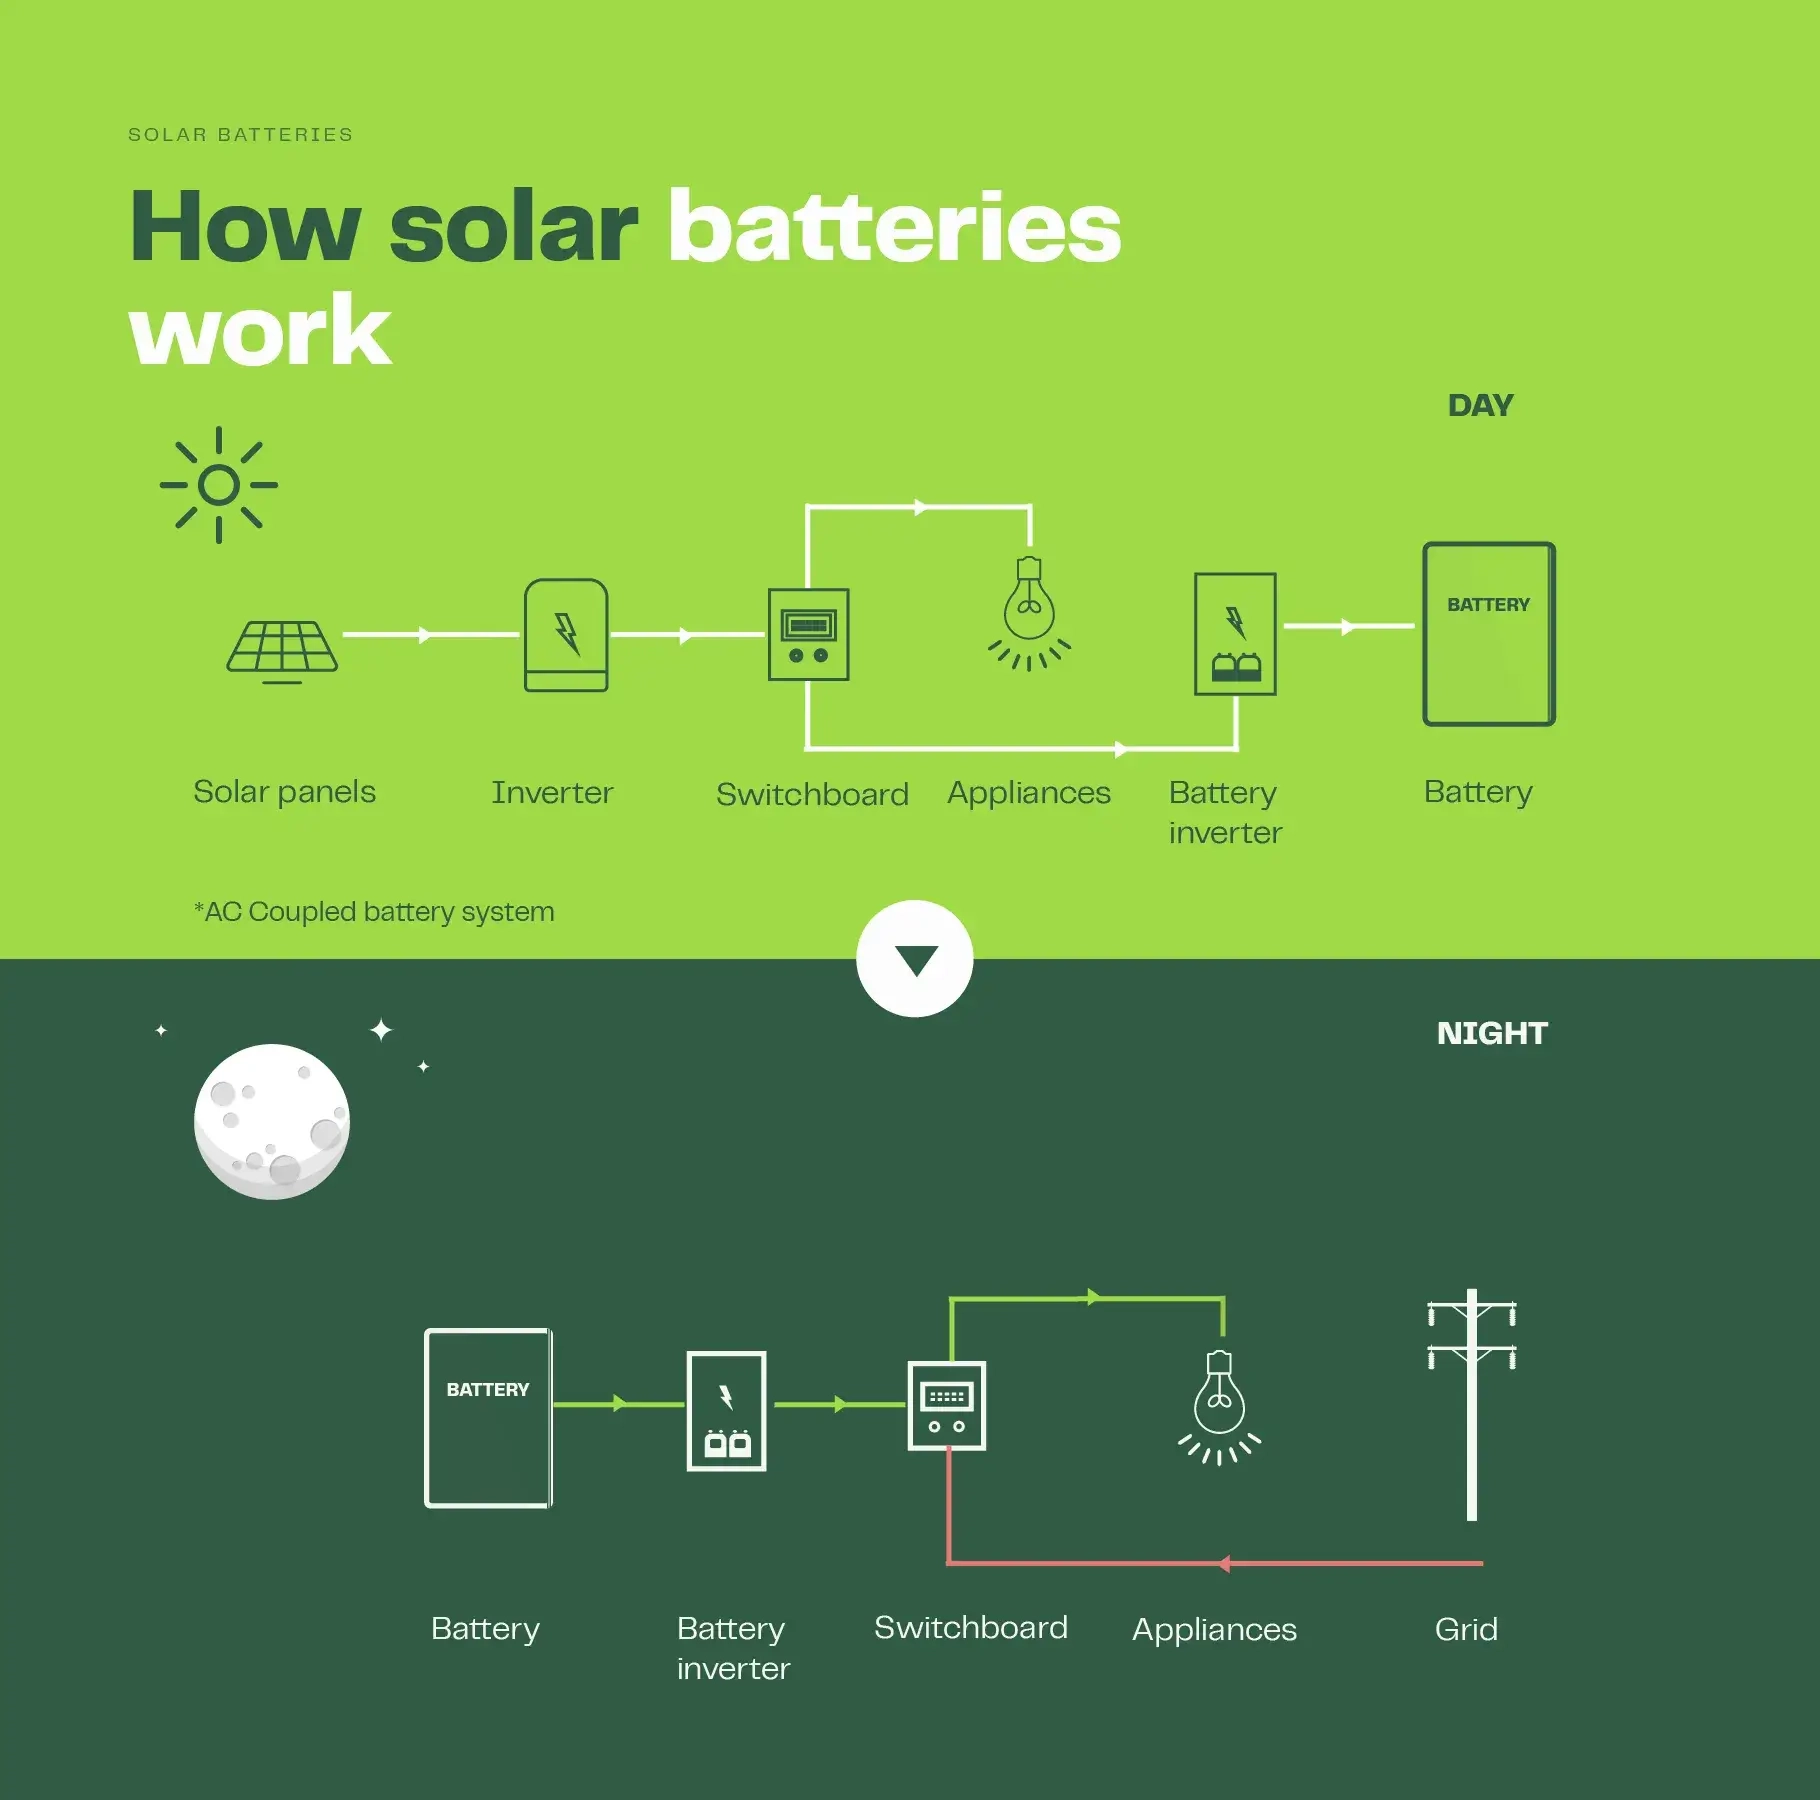
How Batteries Work
I mentioned my battery to a few people, and a bunch of the same misconceptions came up. So here is the basic version:
- A home battery provides power to the house, basically like a giant power bank.
- It is normally charged during the day using solar panels.
- It can also be charged from the grid.
- Charging the battery from solar is usually better than exporting that energy back to the retailer for a few cents.
- Charging from the grid can also make sense with time-of-use plans where off-peak or shoulder rates are cheaper.
- During a blackout, the battery can power the house, but only if it is wired with blackout protection (not every system includes it by default).
- When the battery runs out, the house falls back to pulling from the grid (and solar, if the sun is out).
I found this great diagram from Solar Calculator:
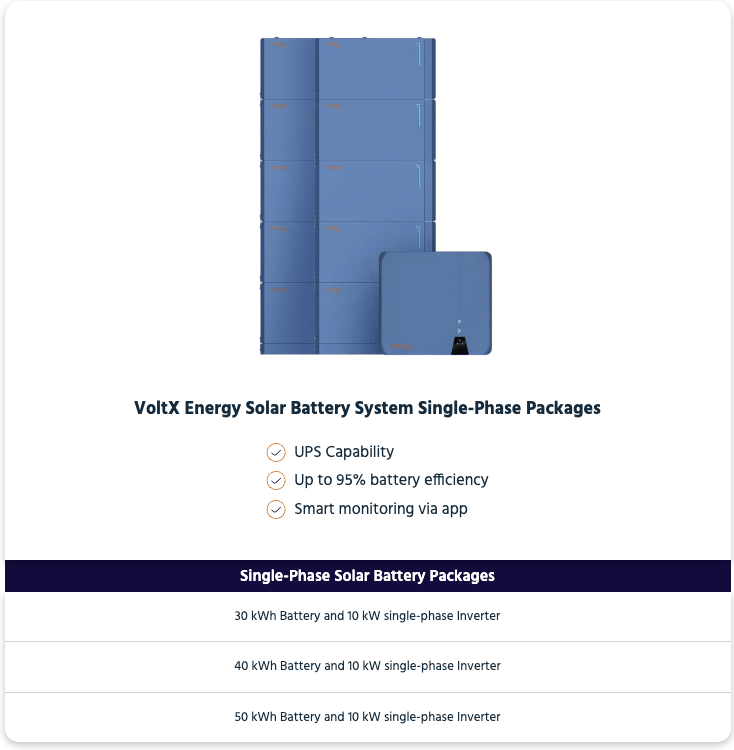
VoltX Energy
At the time, the Government's battery scheme did not interest me. Batteries were still a lot of money, and I had already been down the rabbit hole of spreadsheets and payback calculations.
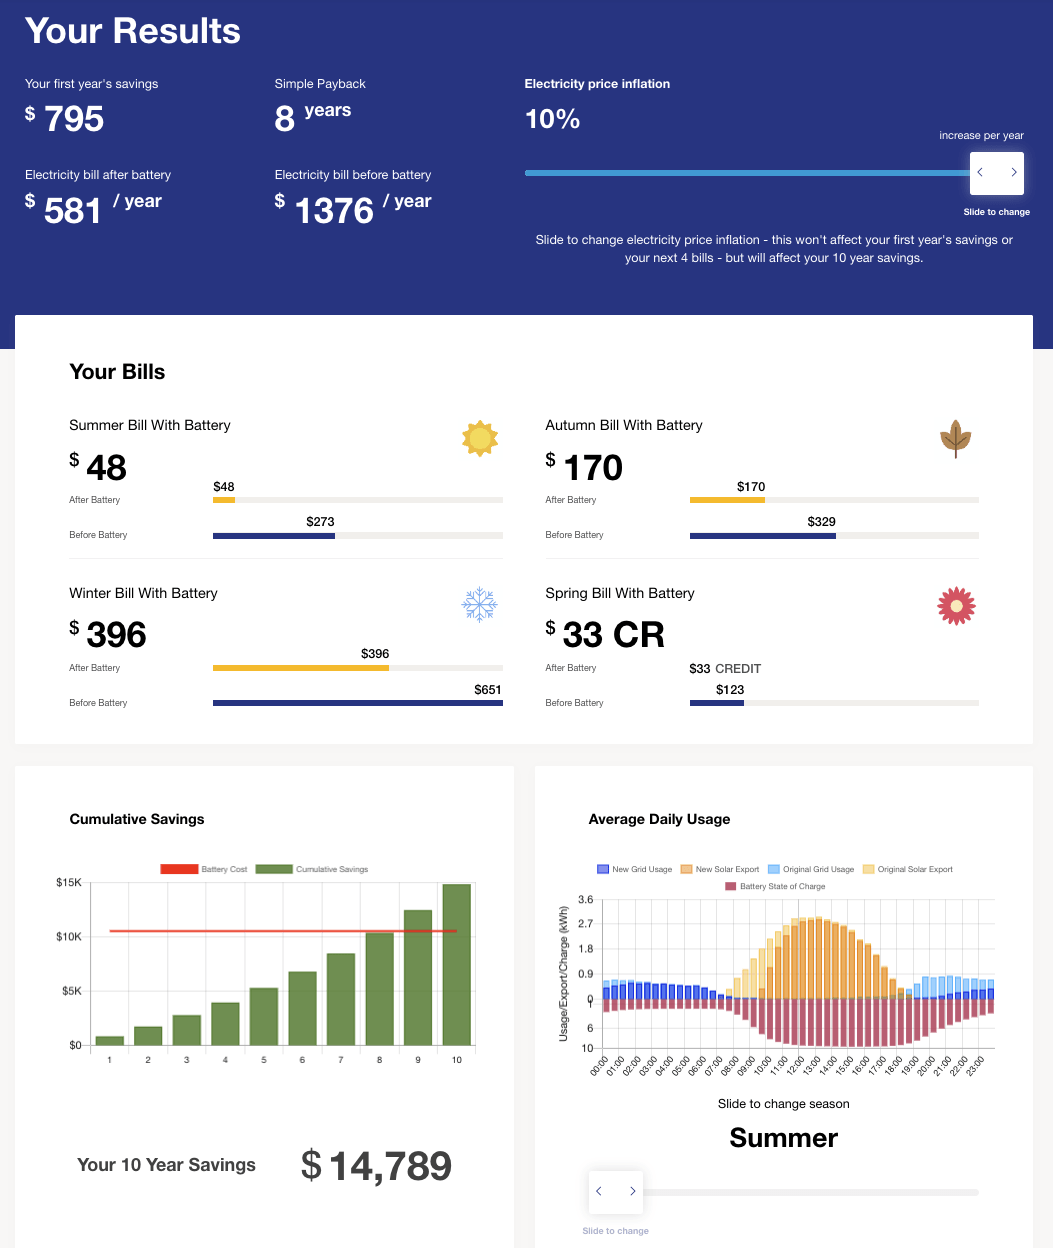
I ran the numbers using the Solar Quotes battery calculator and my NEM12 data from Ausgrid. The result was what I expected: a Tesla Powerwall would break even in about 8 years.
Then this deal popped up on OzBargain. VoltX Energy were advertising a 50 kWh battery and 5 kW inverter package for $3,999 installed for Black Friday.
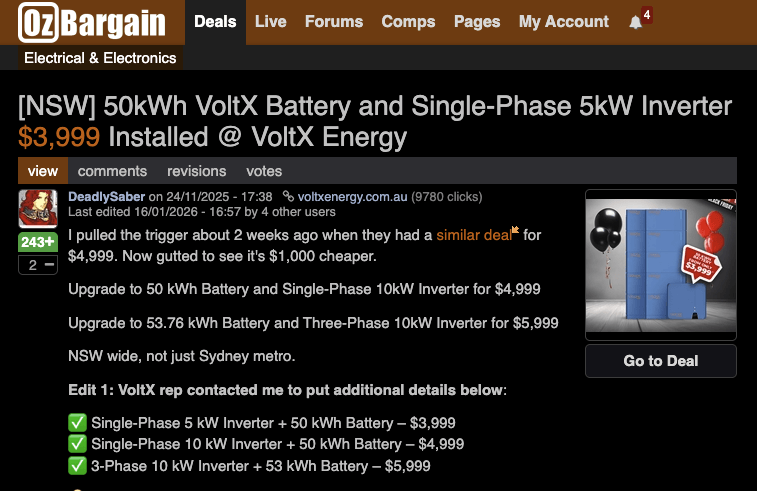
There was an option for a 10kW inverter for $4,999, which I picked because my existing system is 12.76 kW of panels.
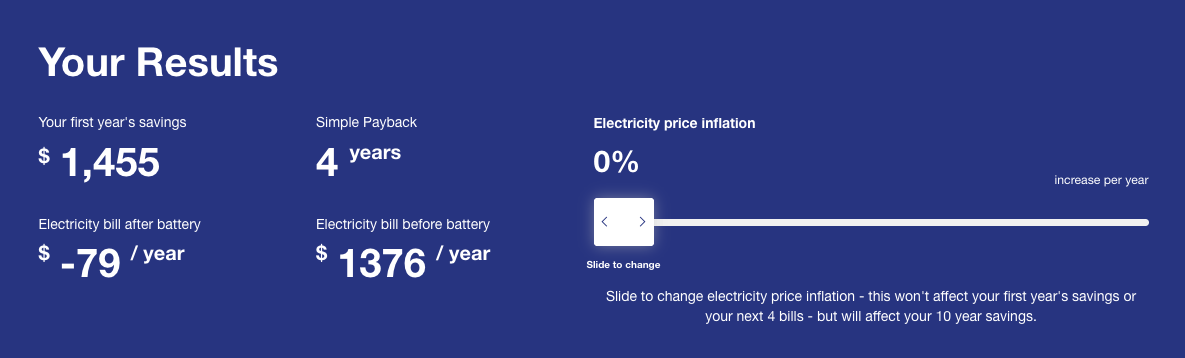
Compared to Powerwall pricing, it felt like the deal of the century. For roughly half the price of a Tesla Powerwall 3 installed, I was getting about four times its capacity. Doing the calculations again, the payback period was now 4 years. Changing the inflation slider made no changes to the result.
The obvious negative is that VoltX is not an established household name in the same way Tesla is. With batteries or solar panels, the product is only as good as the warranty and service behind it. The main reason I was willing to roll the dice is that there were a lot of people jumping in via OzBargain, so there was going to be plenty of noise if anything went wrong.
VoltX also sponsors the Manly Sea Eagles, and their COO, David Sedighi, shows up on TV occasionally to talk about battery storage, which at least suggests they are trying to be visible.

System Details
The VoltX inverter and battery are rebranded from Solplanet, manufactured and owned by AISWEI, which is formerly known as SMA's China subsidiary.
| Component | Model |
|---|---|
| Inverter | Solplanet ASW010K-SH (10 kW) |
| Battery Modules | 10 x Solplanet ASW5120-LB-G3 (5 kWh) |
There are 2 stacks of 5 battery modules at 5 kWh each, so 50 kWh total.
This system is AC-coupled. In simple terms, that means the battery system sits on the AC side of the house and works with your existing solar inverter. The alternative is DC-coupled, where the battery shares the DC side with the solar panels (usually via a hybrid inverter). AC coupling is a common retrofit approach because it does not require replacing an existing solar inverter.
The total cost of the battery system, blackout protection and installation was $5,499.
| Component | Cost |
|---|---|
| 10 kW Inverter + 50 kWh battery | $4,999 |
| Chint Automatic Changeover | $100 |
| 2 Circuits of blackout protection | $500 |
| 2 additional blackout protection circuits | $200 |
| Discount for disposing of the packaging materials myself | -$50 |
| Discount for helping others in the OzBargain comments | -$250 |
Timeline
- 25/11/25 Night - Signed up for the deal and paid the $100 refundable deposit.
- 26/11/25 Day - Asked to send photos of my bill, switchboard, meter, solar inverter, and proposed battery locations with measurements.
- 26/11/25 Night - Signed the contract over the phone. Added blackout protection and 2 additional circuits onto the backup side.
- 8/12/25 Day - Received a call that they could install the next day. I accepted.
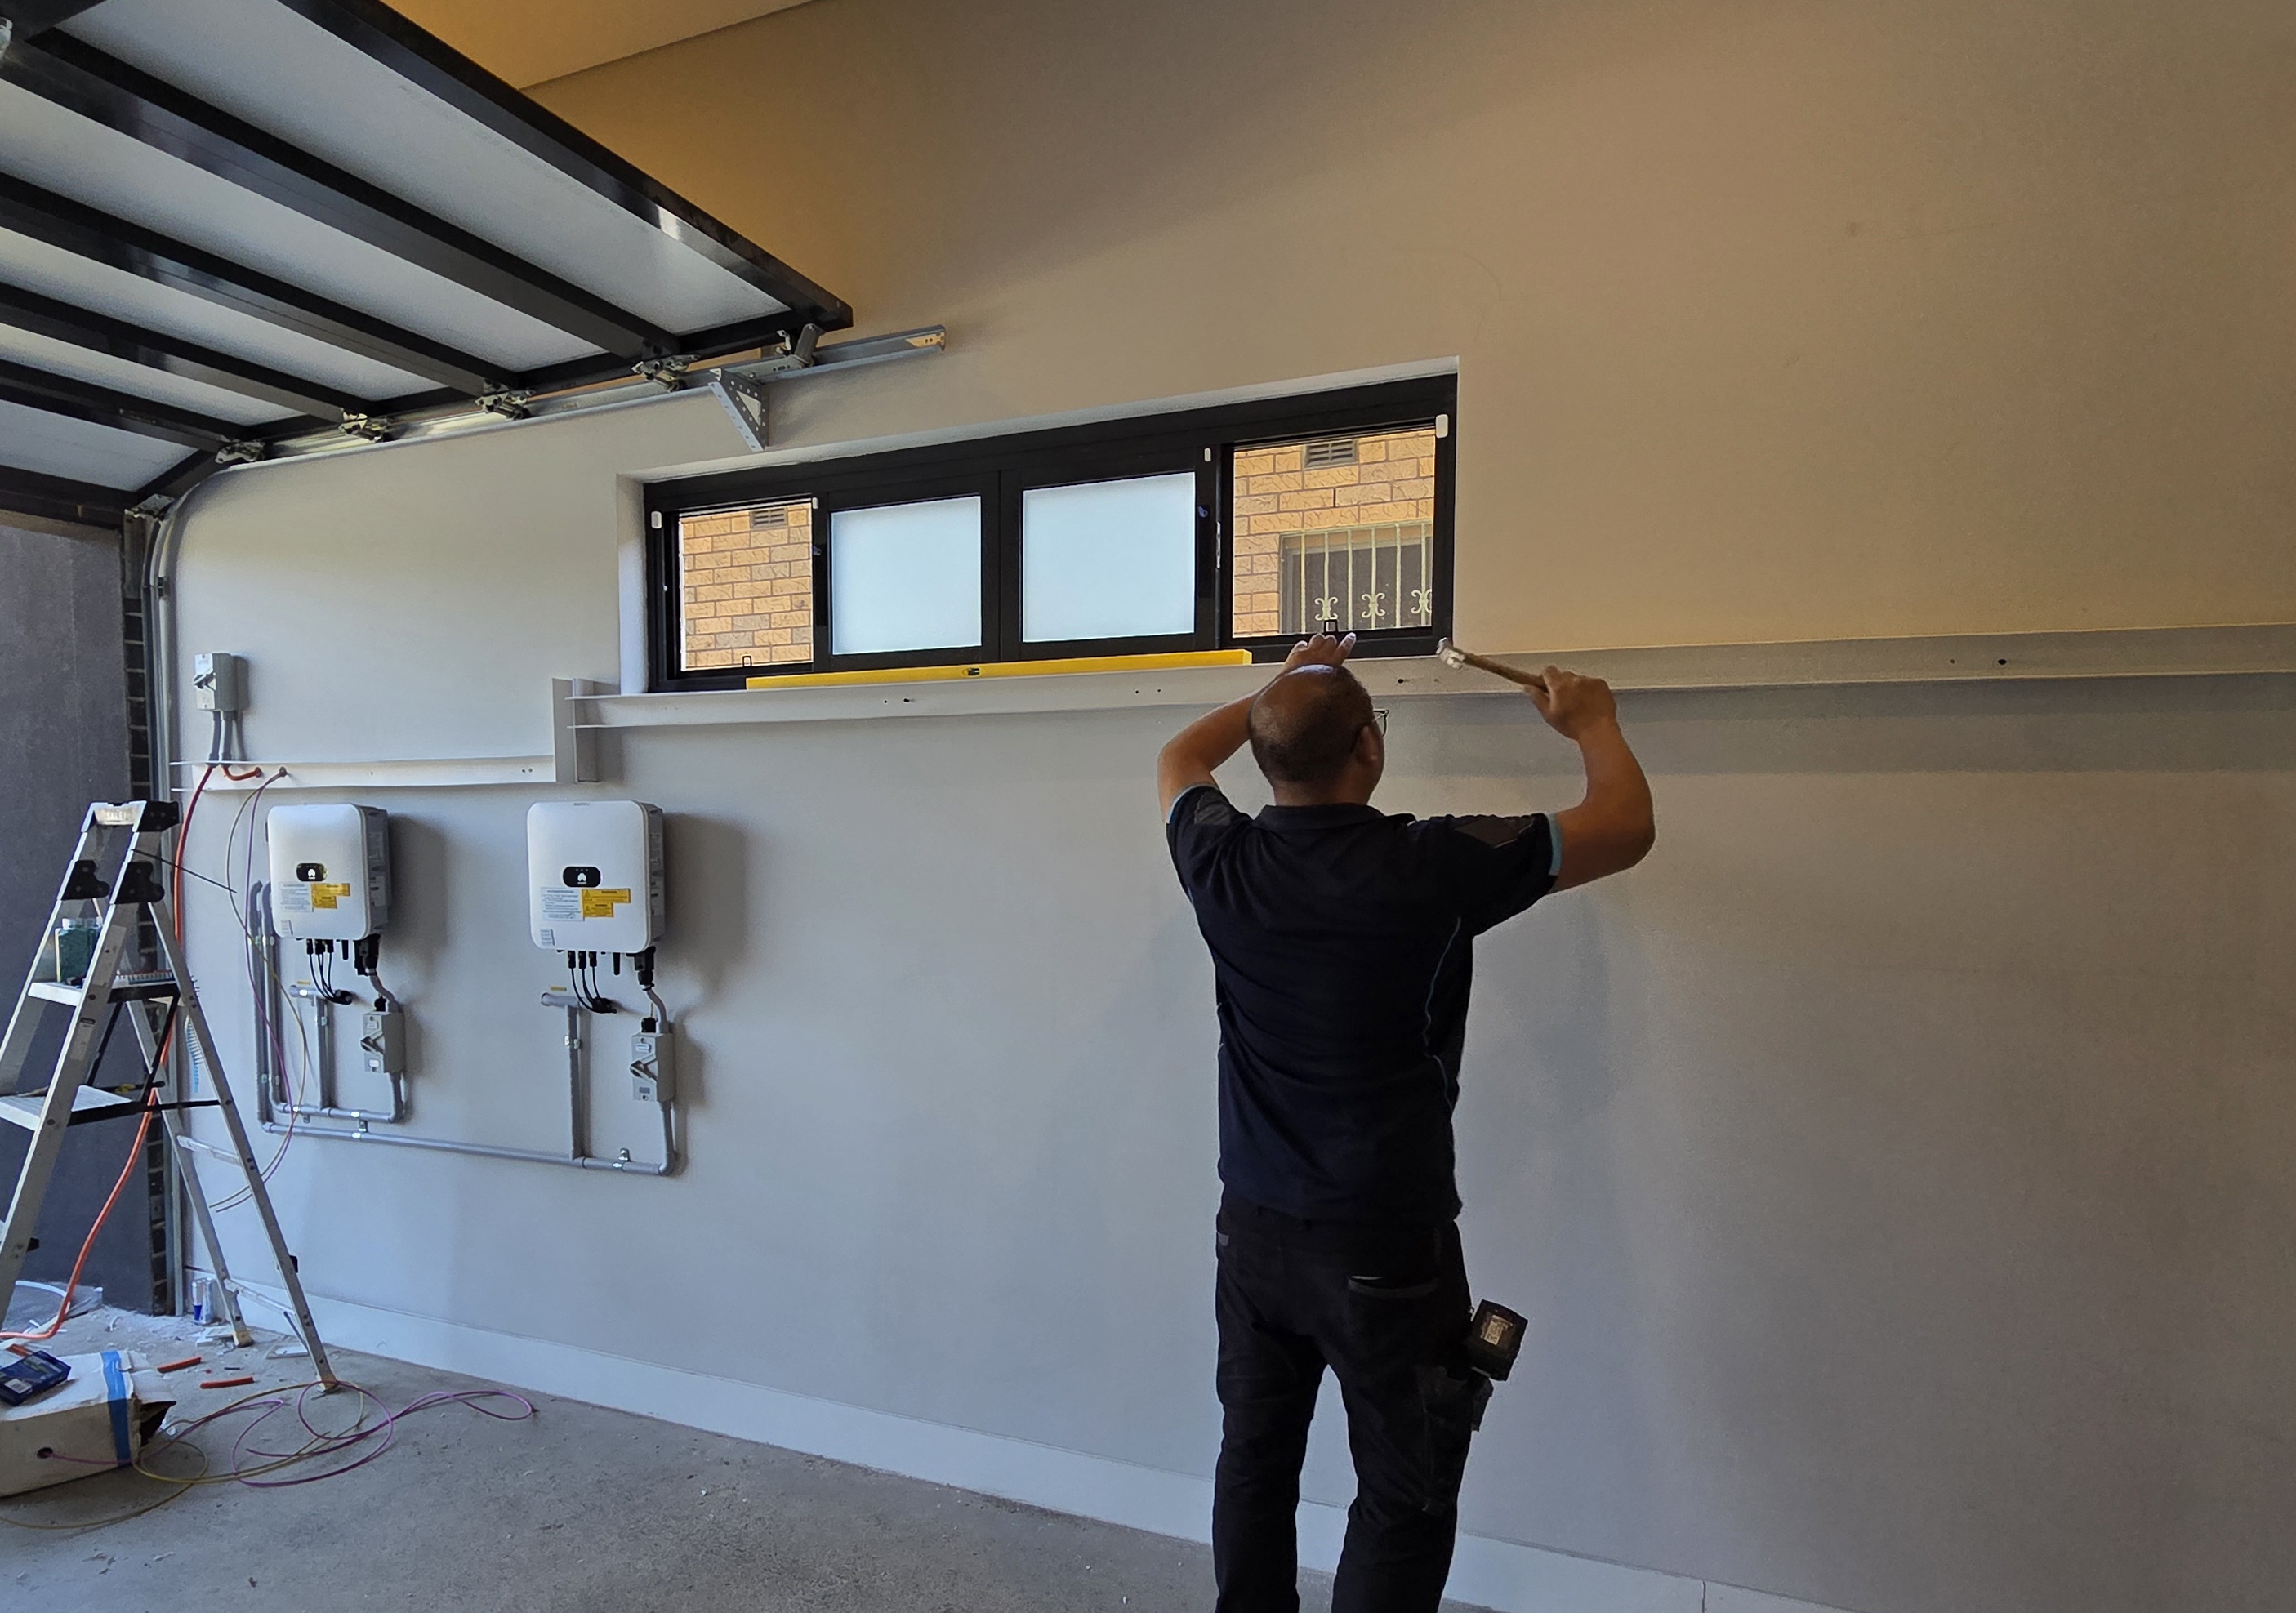
- 9/12/25 - Installation day. A crew of three installers were here from 8:30 AM until 6 PM. OzBargain comments mentioned some installers doing 2 or even 3 jobs in one day, so I was surprised they spent a full day on mine.
- 29/1/26 - Final invoice arrived, about ~50 days later.
- 5/2/26 - Paid the final invoice.
My installation was relatively quick after signing the contract compared to other commentators on OzBargain. Some had signed their contracts before I did. I think my proximity to their Regents Park warehouse helped.
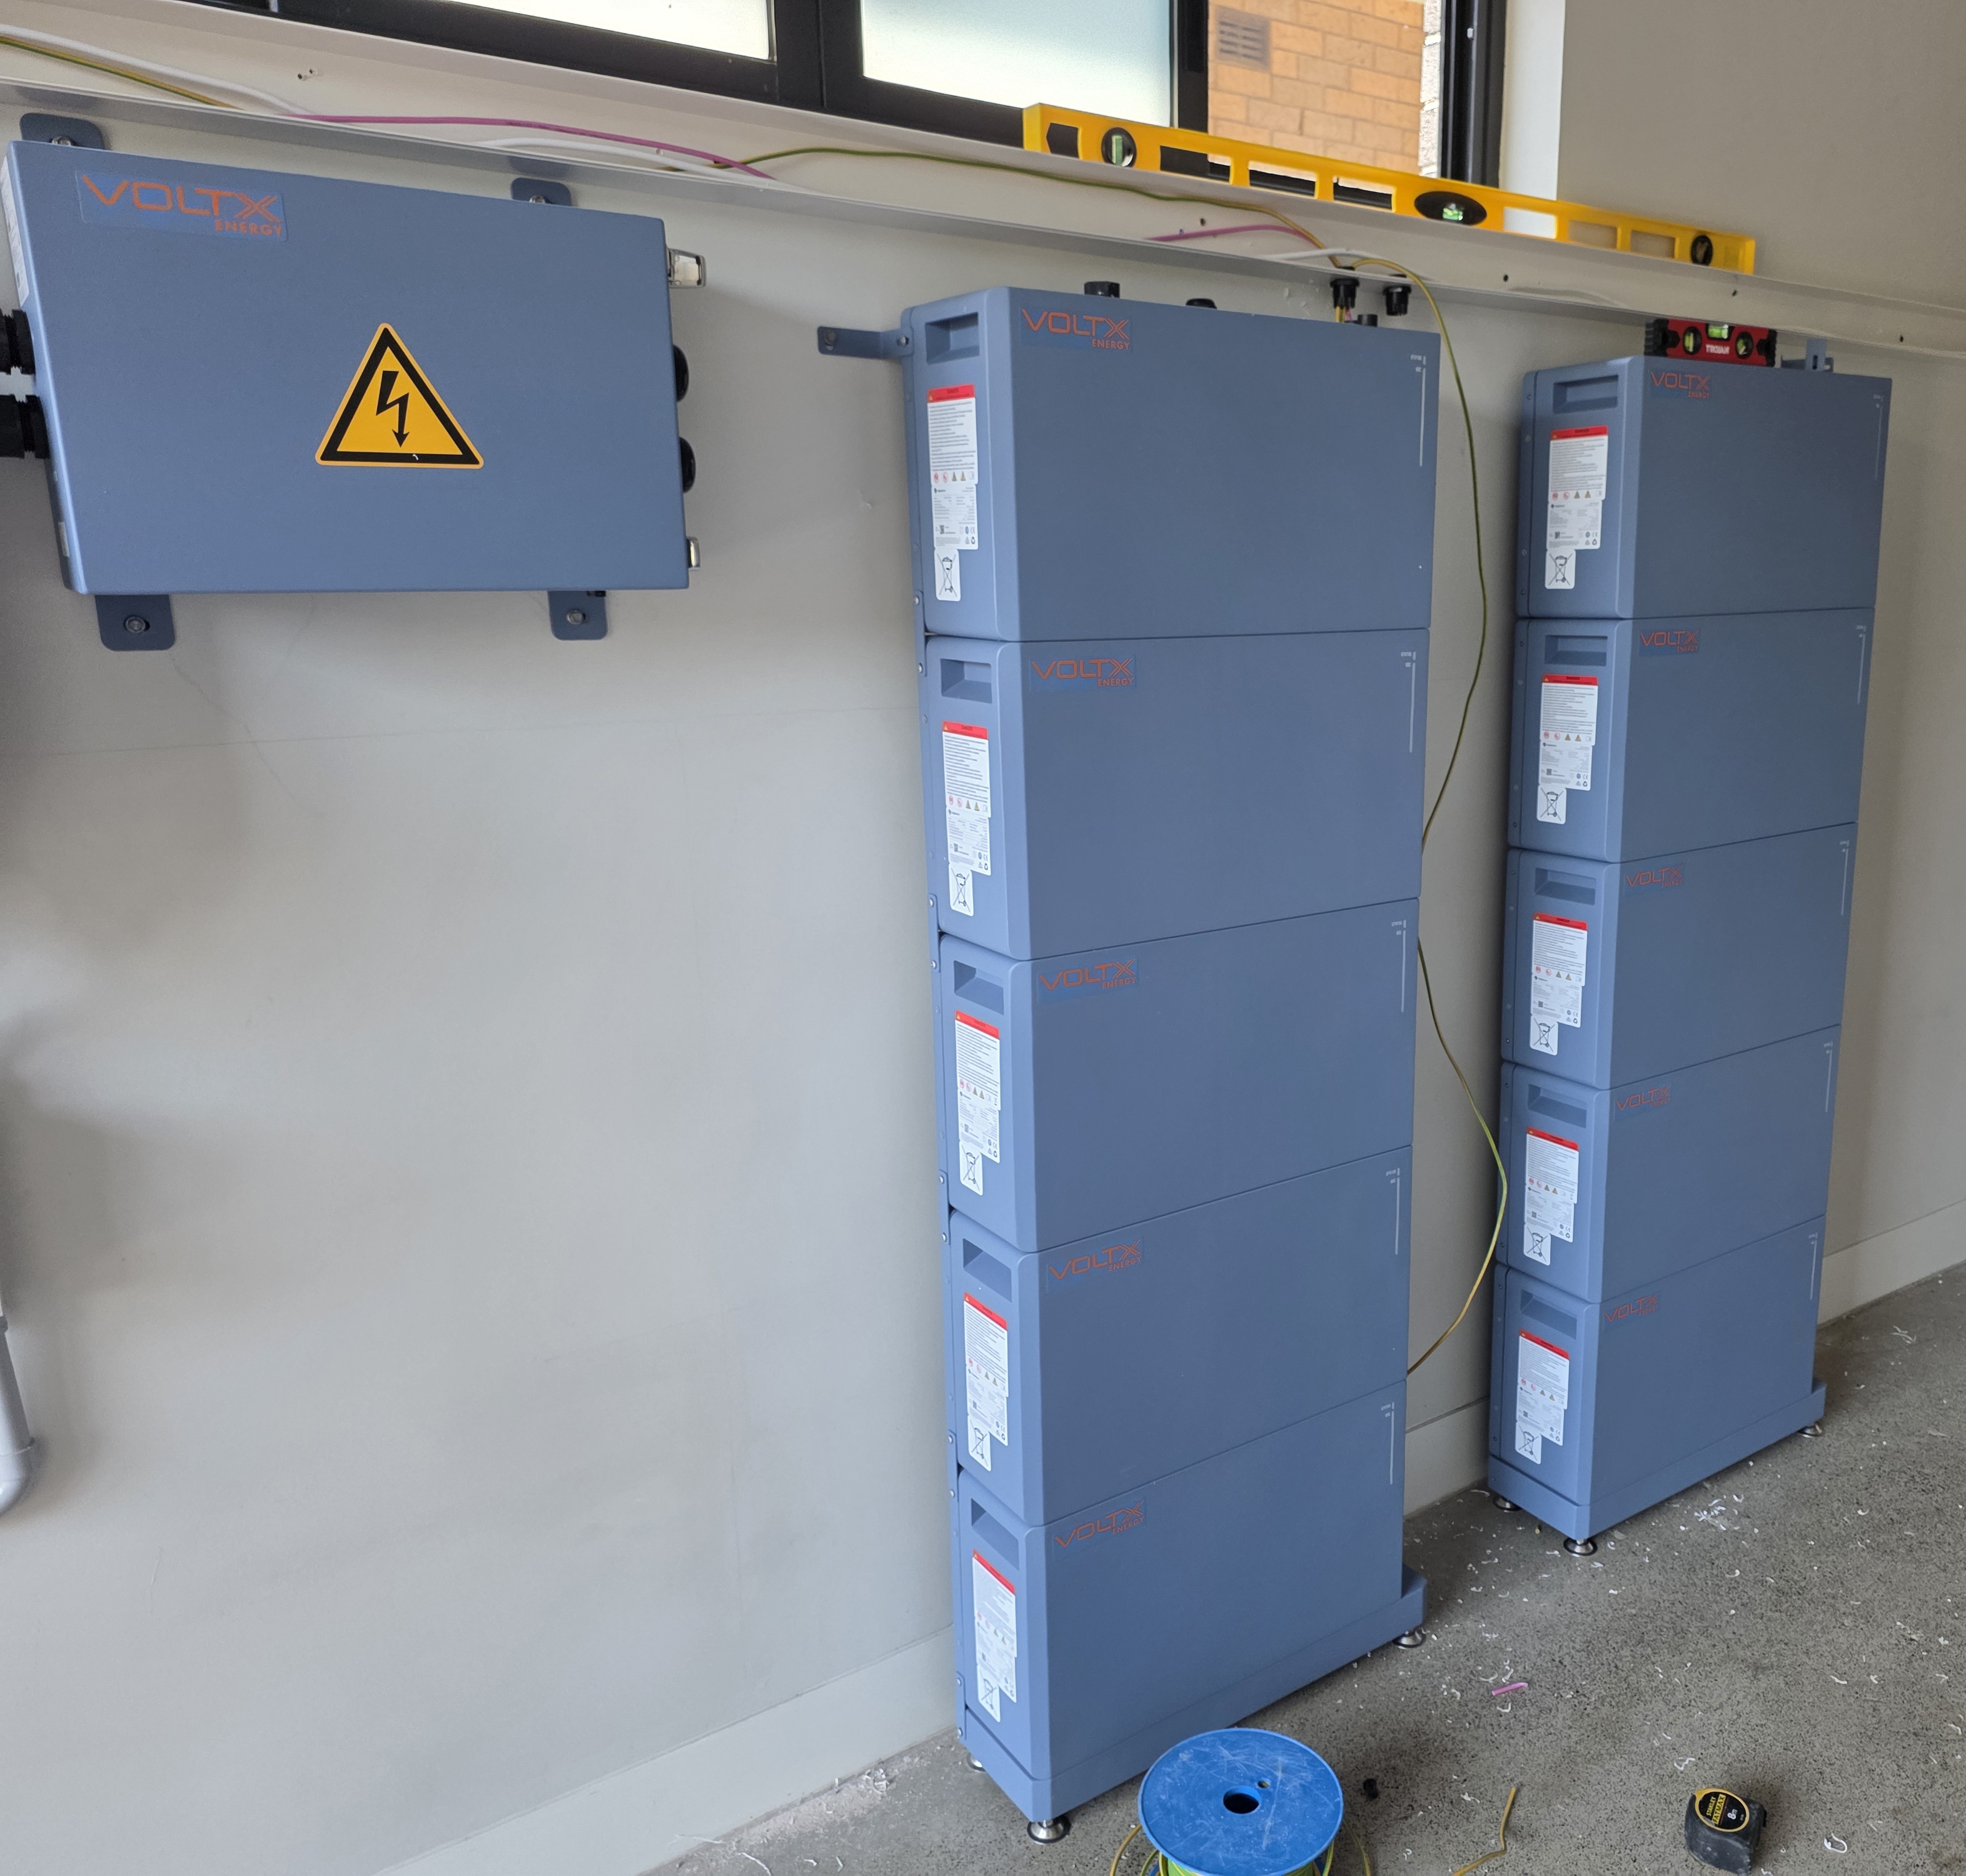
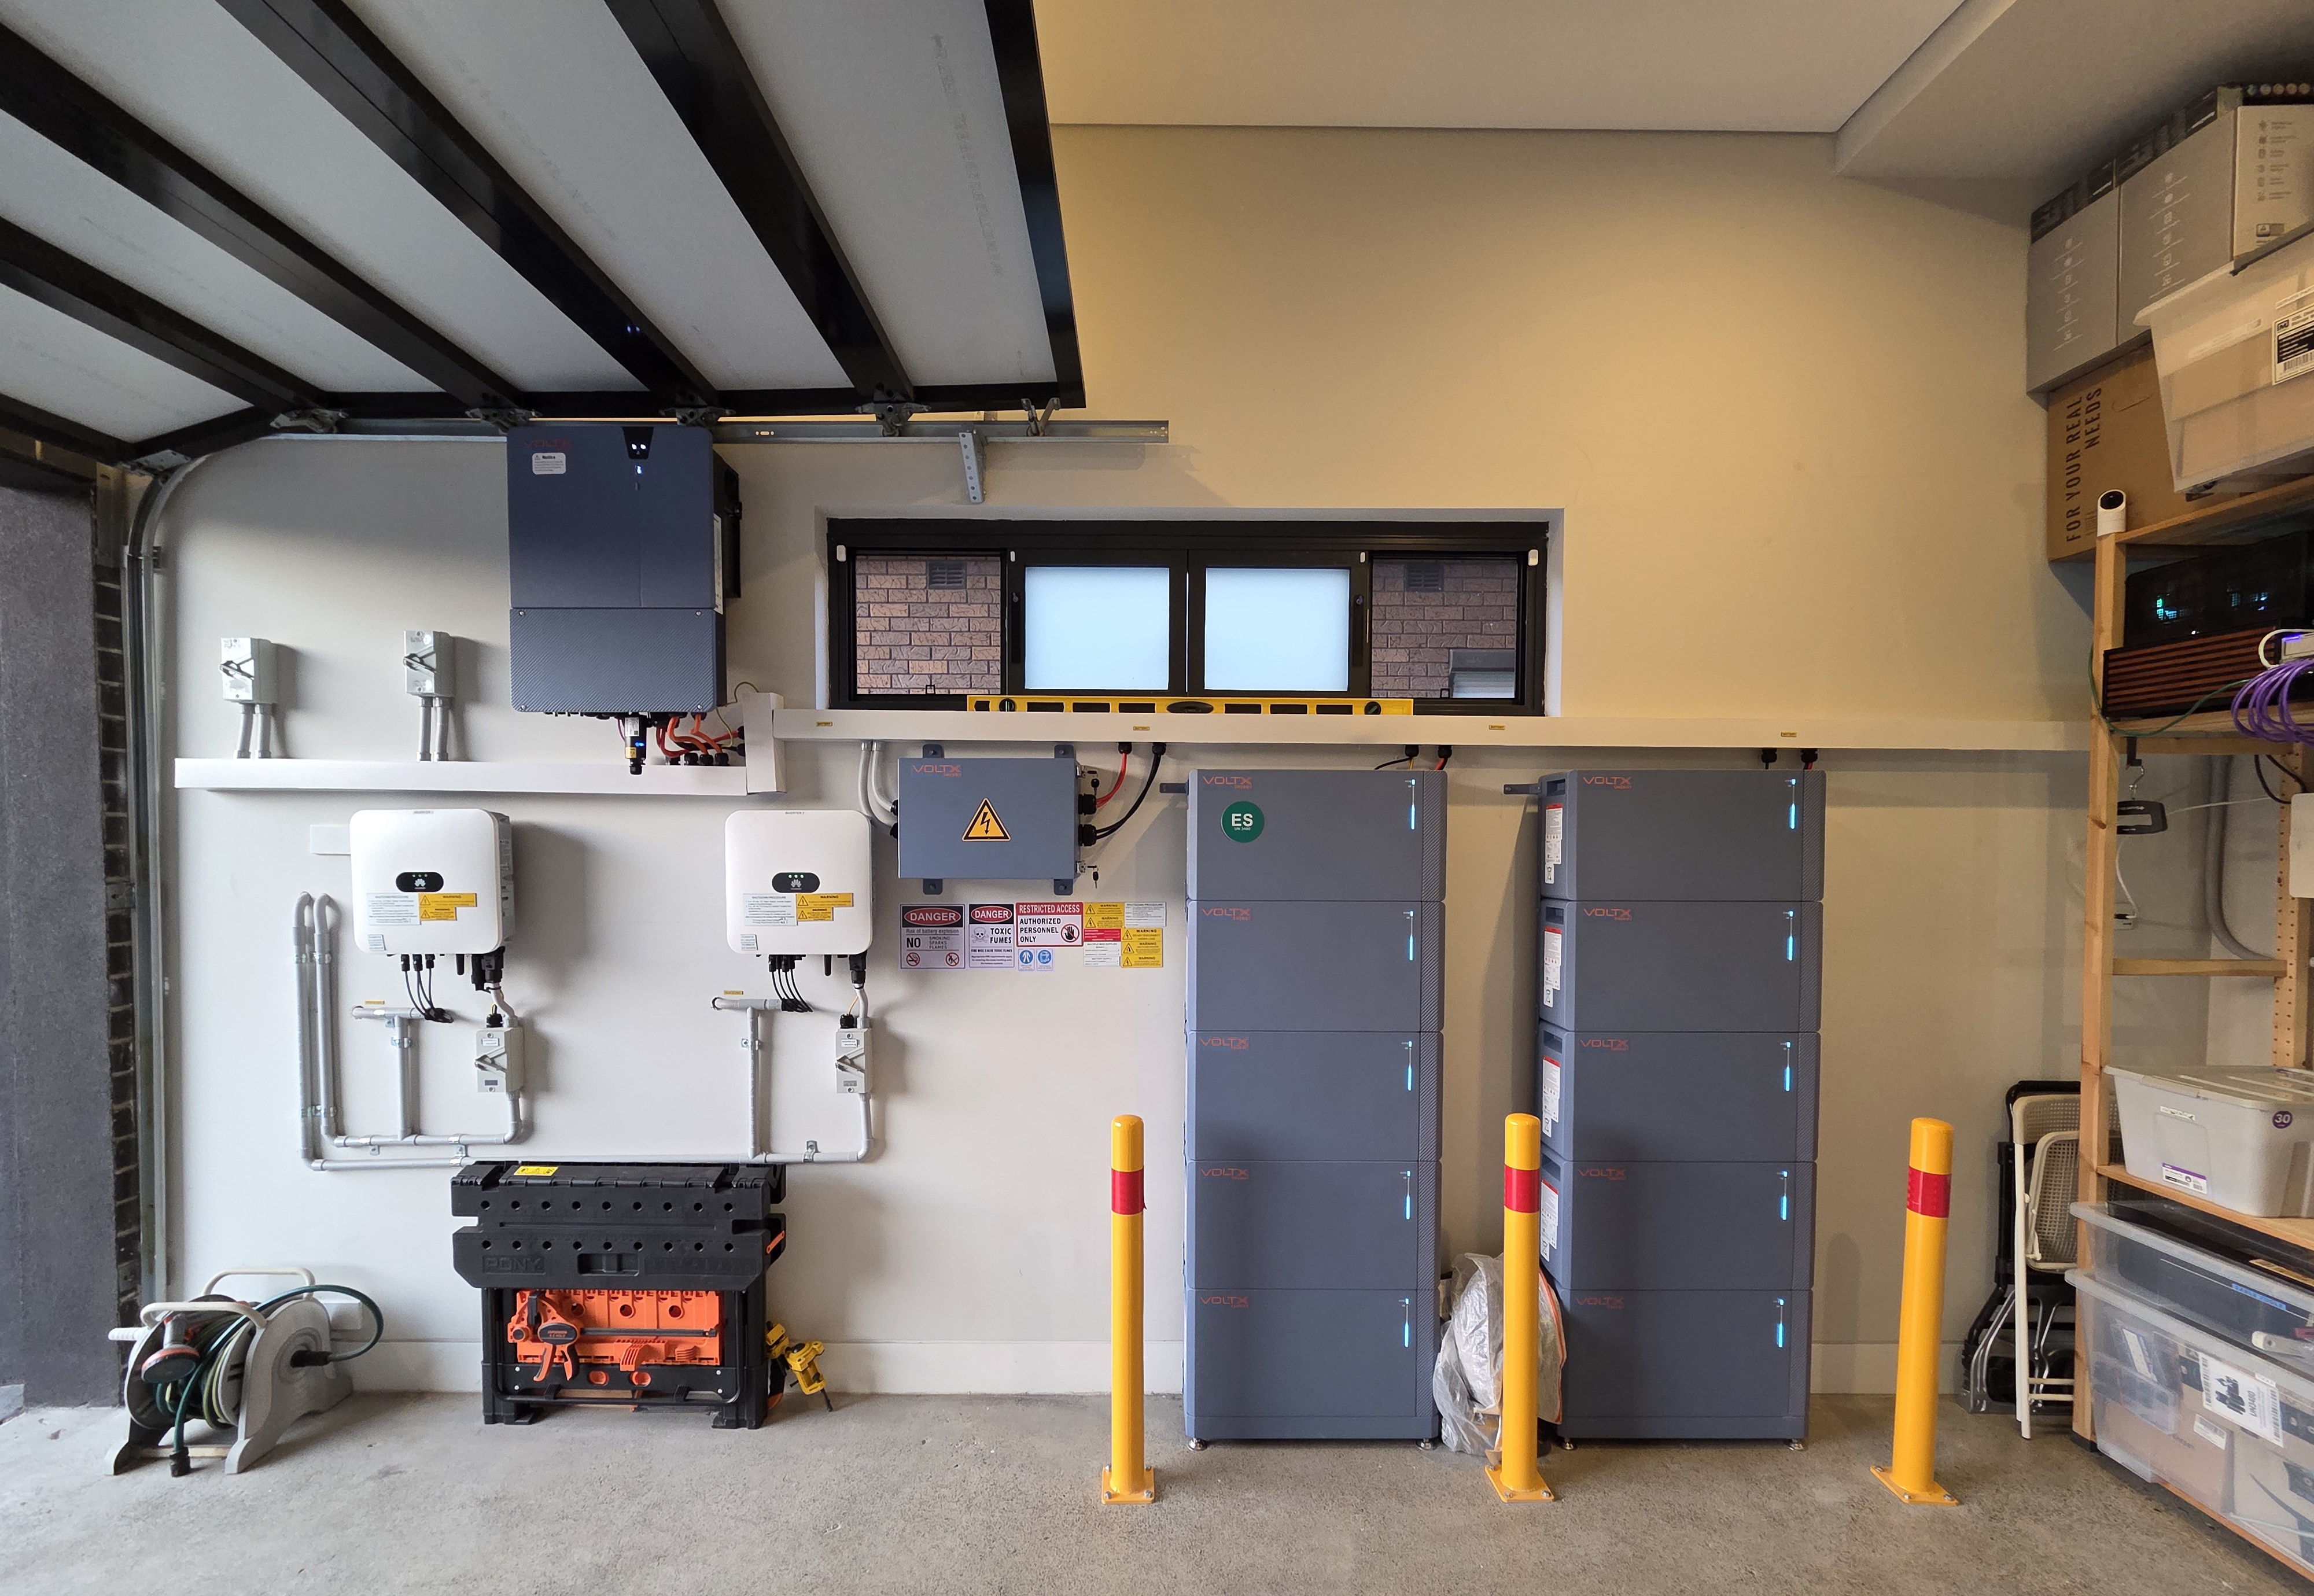
Installation
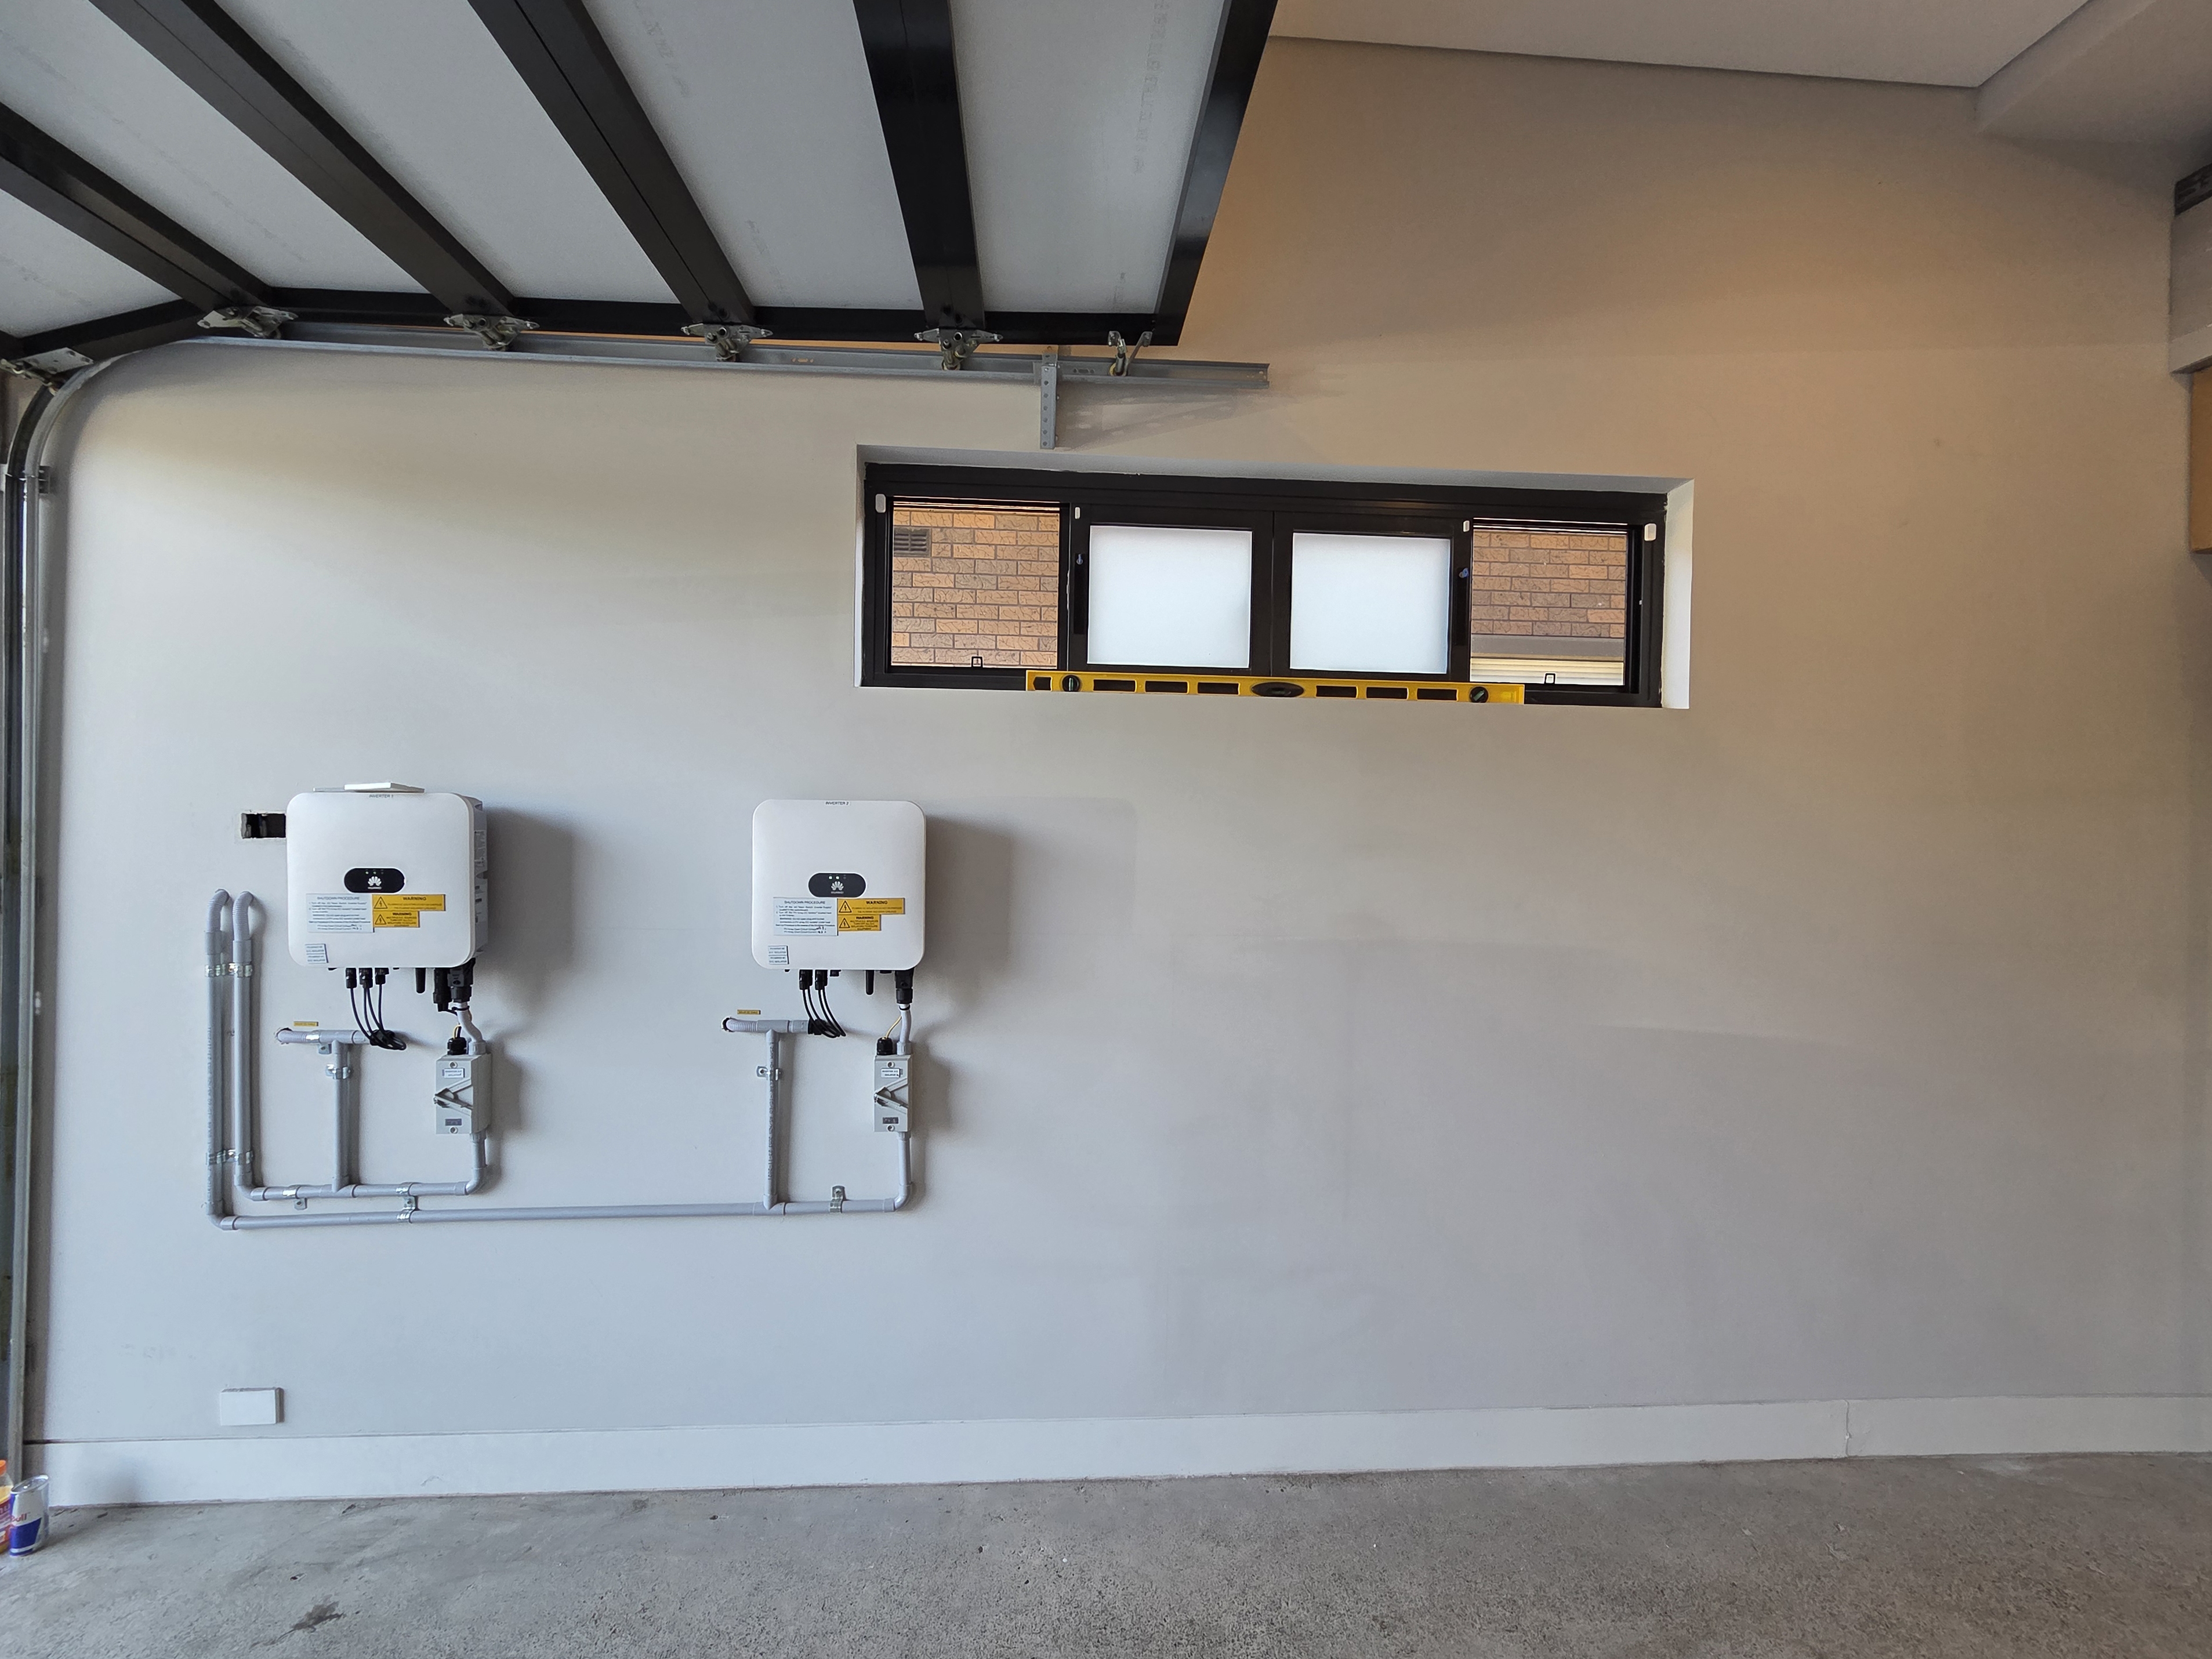
I had the batteries installed in my single garage. My wife wanted it outside, but heat kills batteries. I also prefer it somewhere that is harder for someone to mess with, because lithium-ion fires are not something I want to think about.
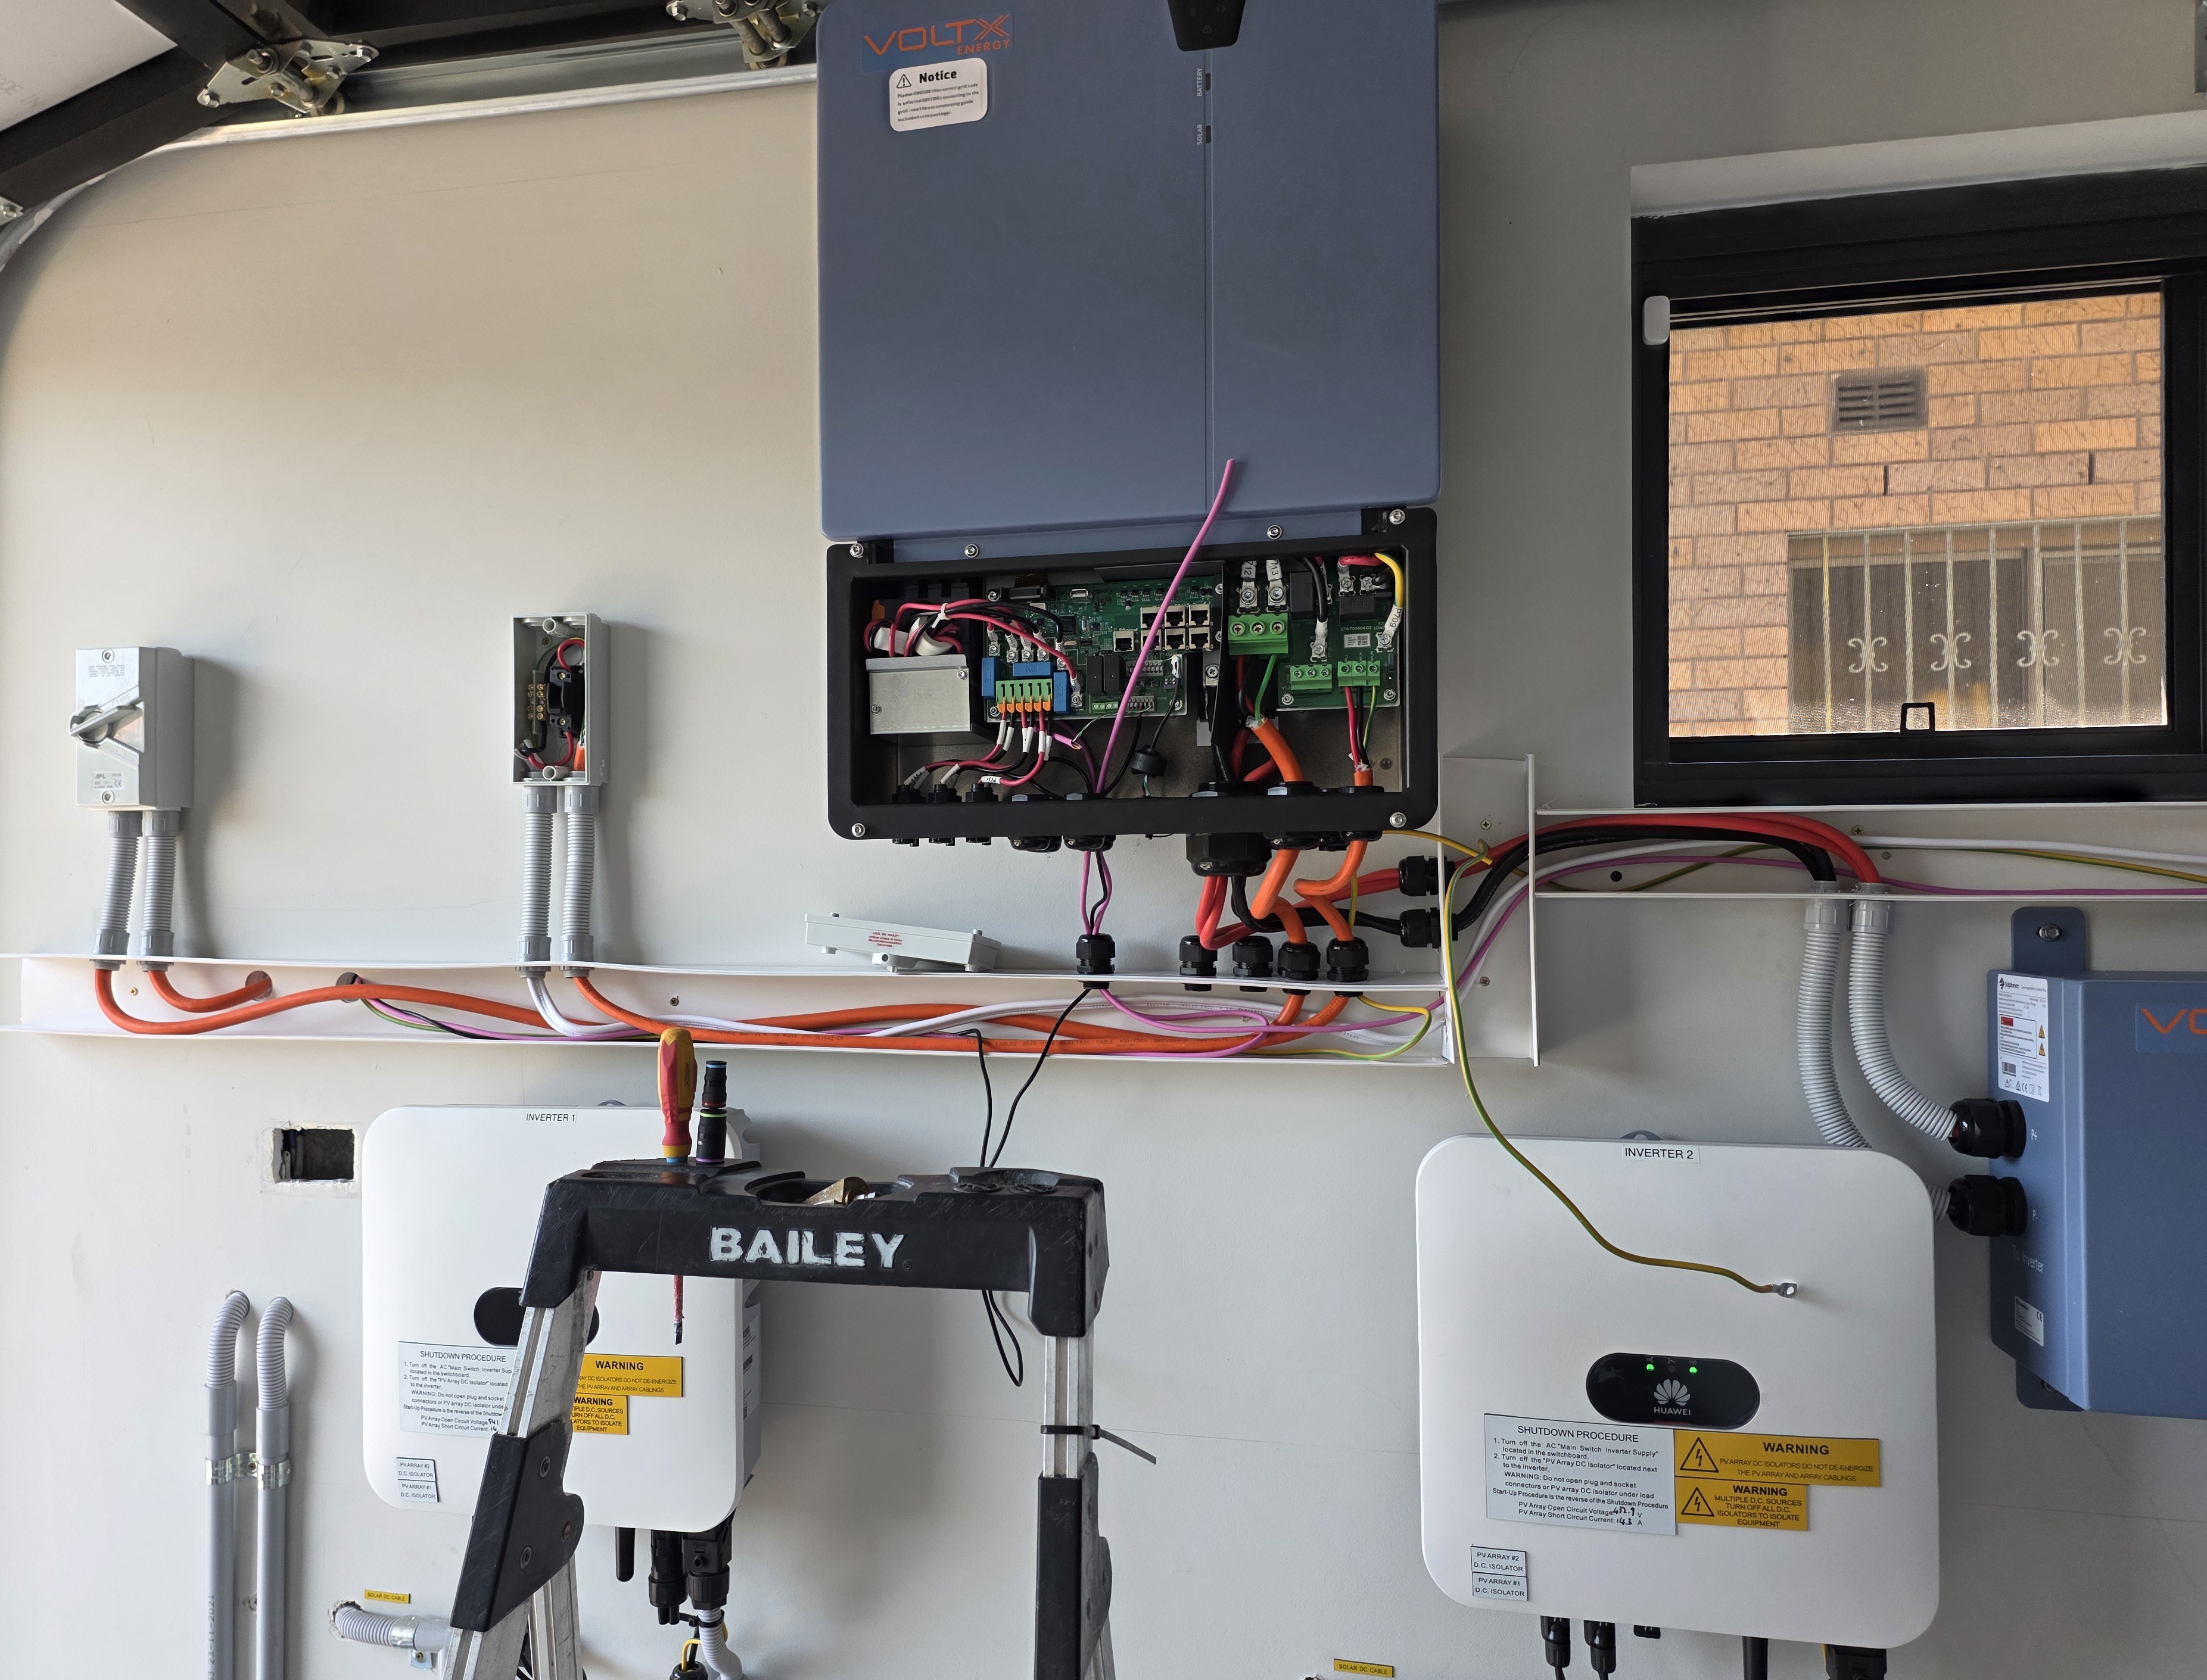
The batteries and inverter were installed on the same wall as my solar inverters.
A large cable channel is used to hide all the cabling for connecting all the components.
The inverter was installed above my existing inverters. The meter is just on the other side of the wall.
The batteries were installed along the wall.
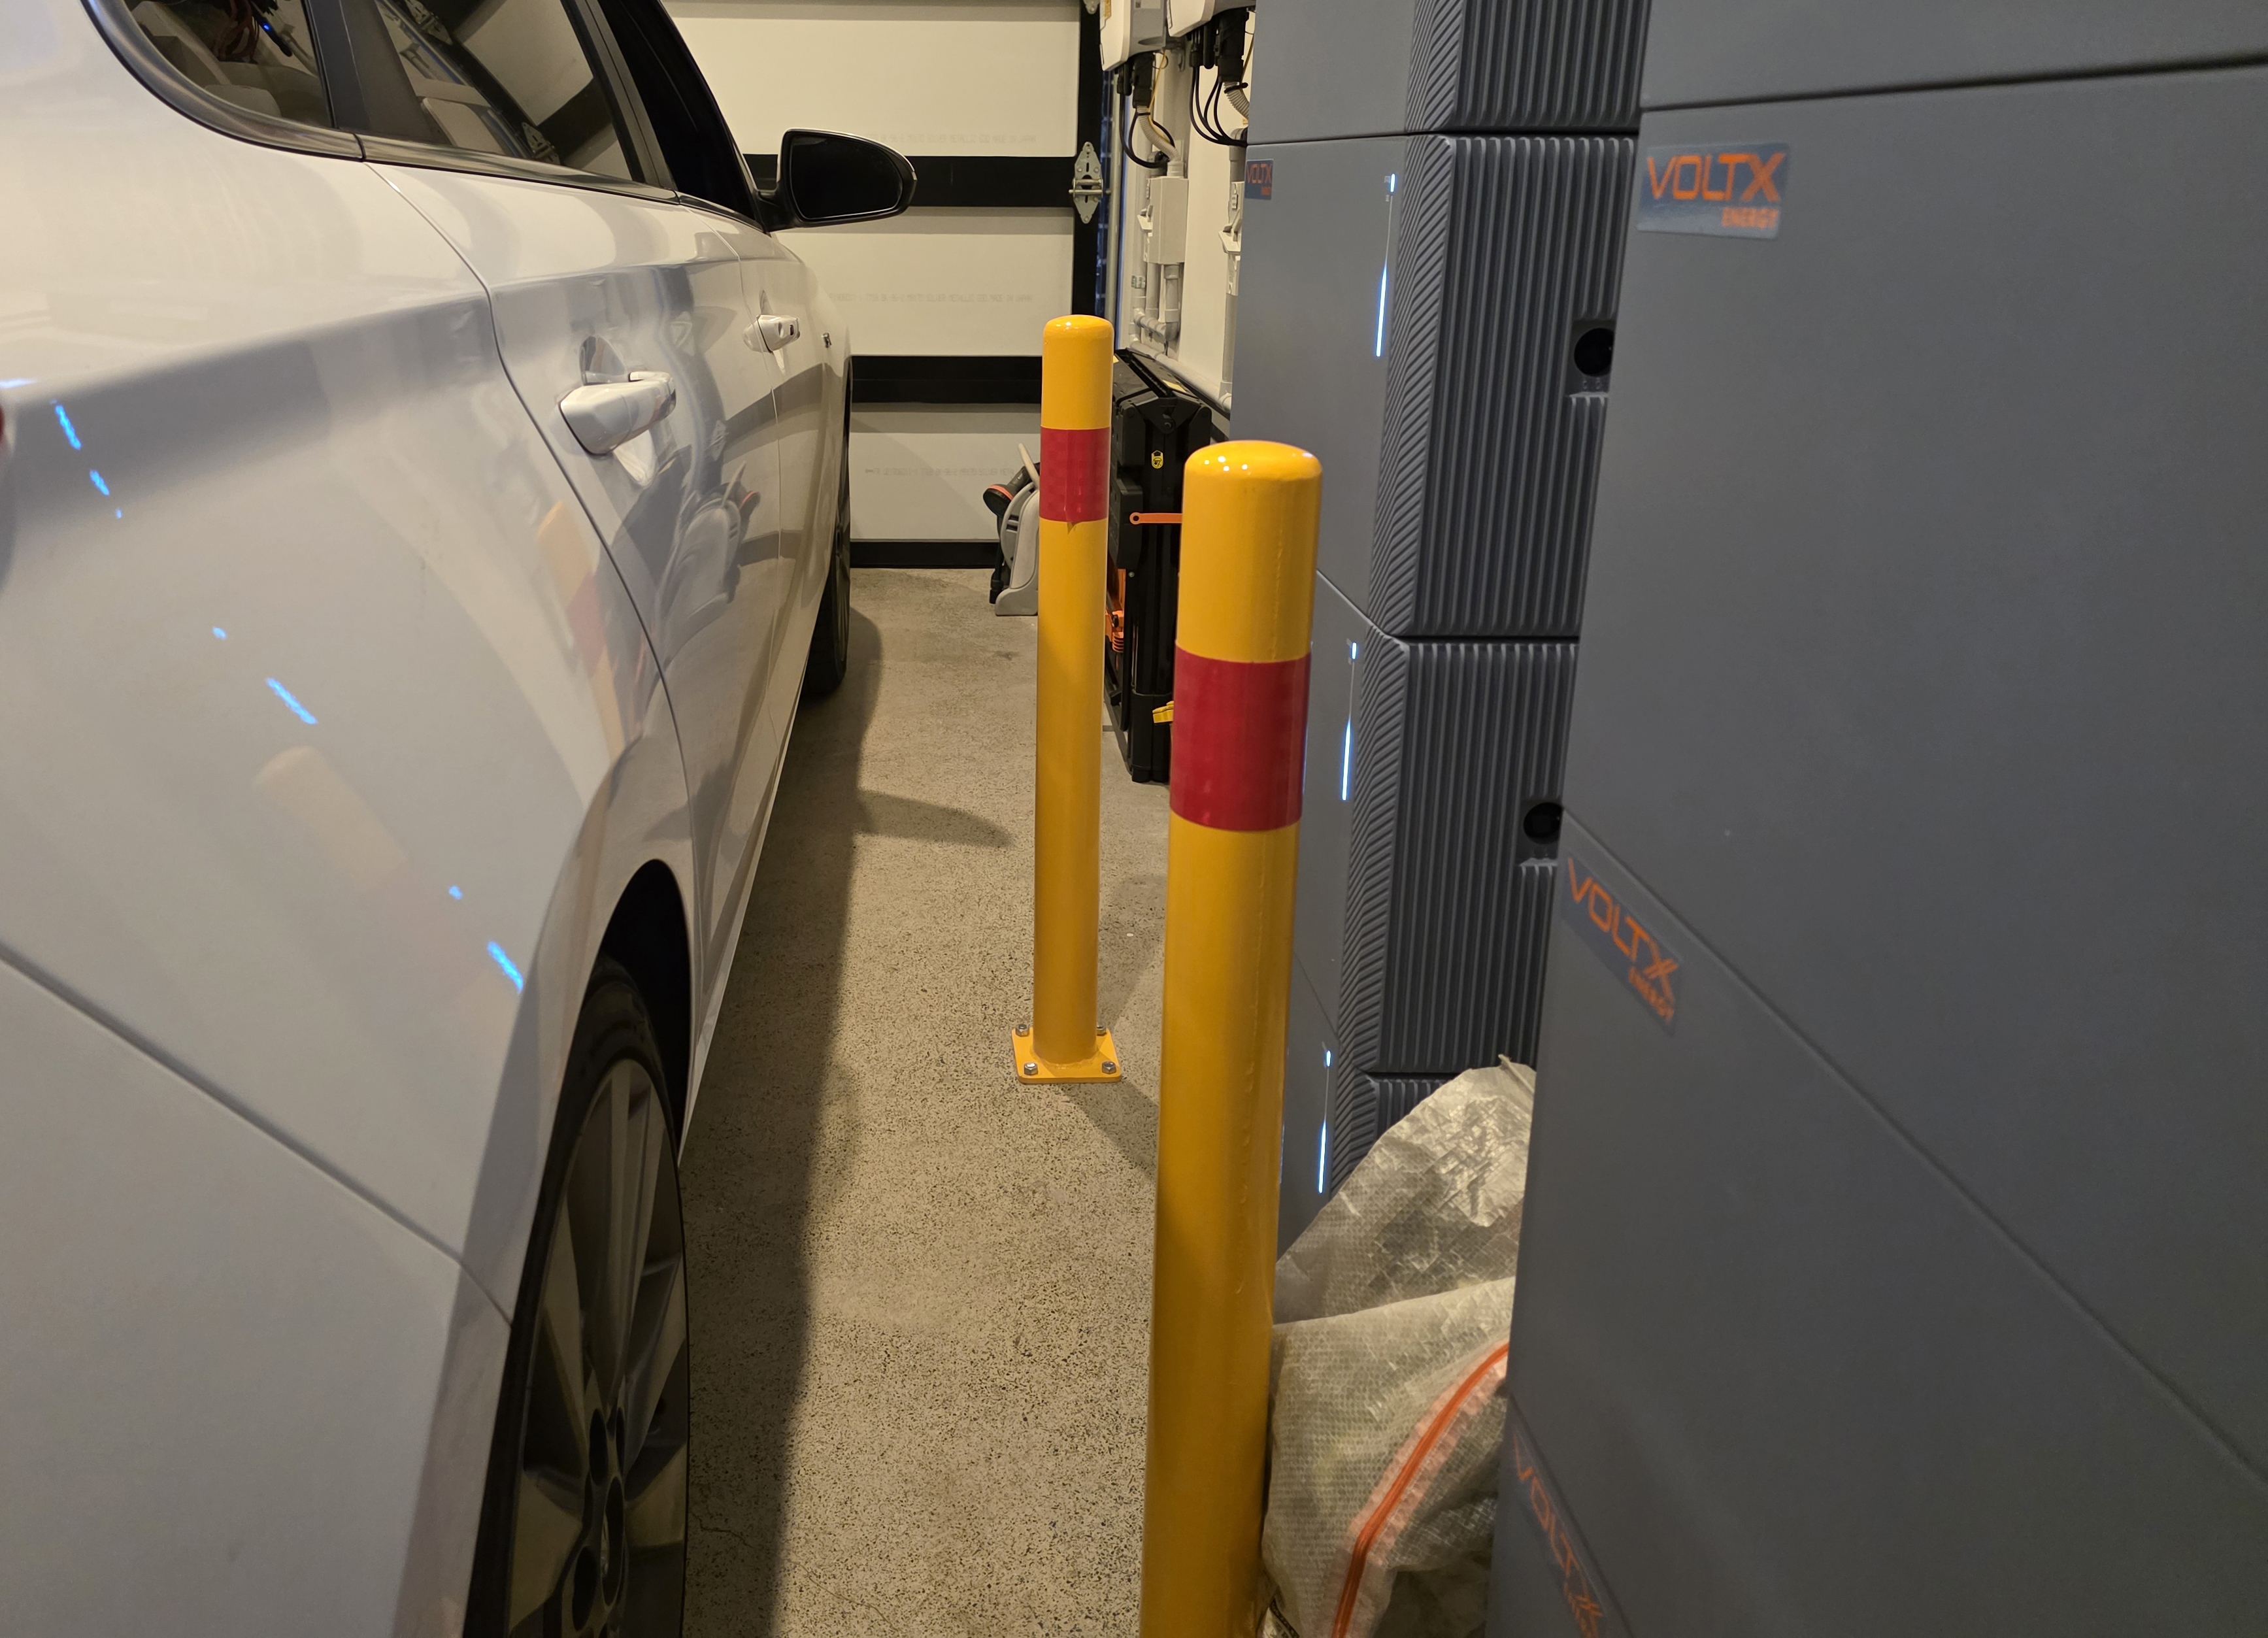
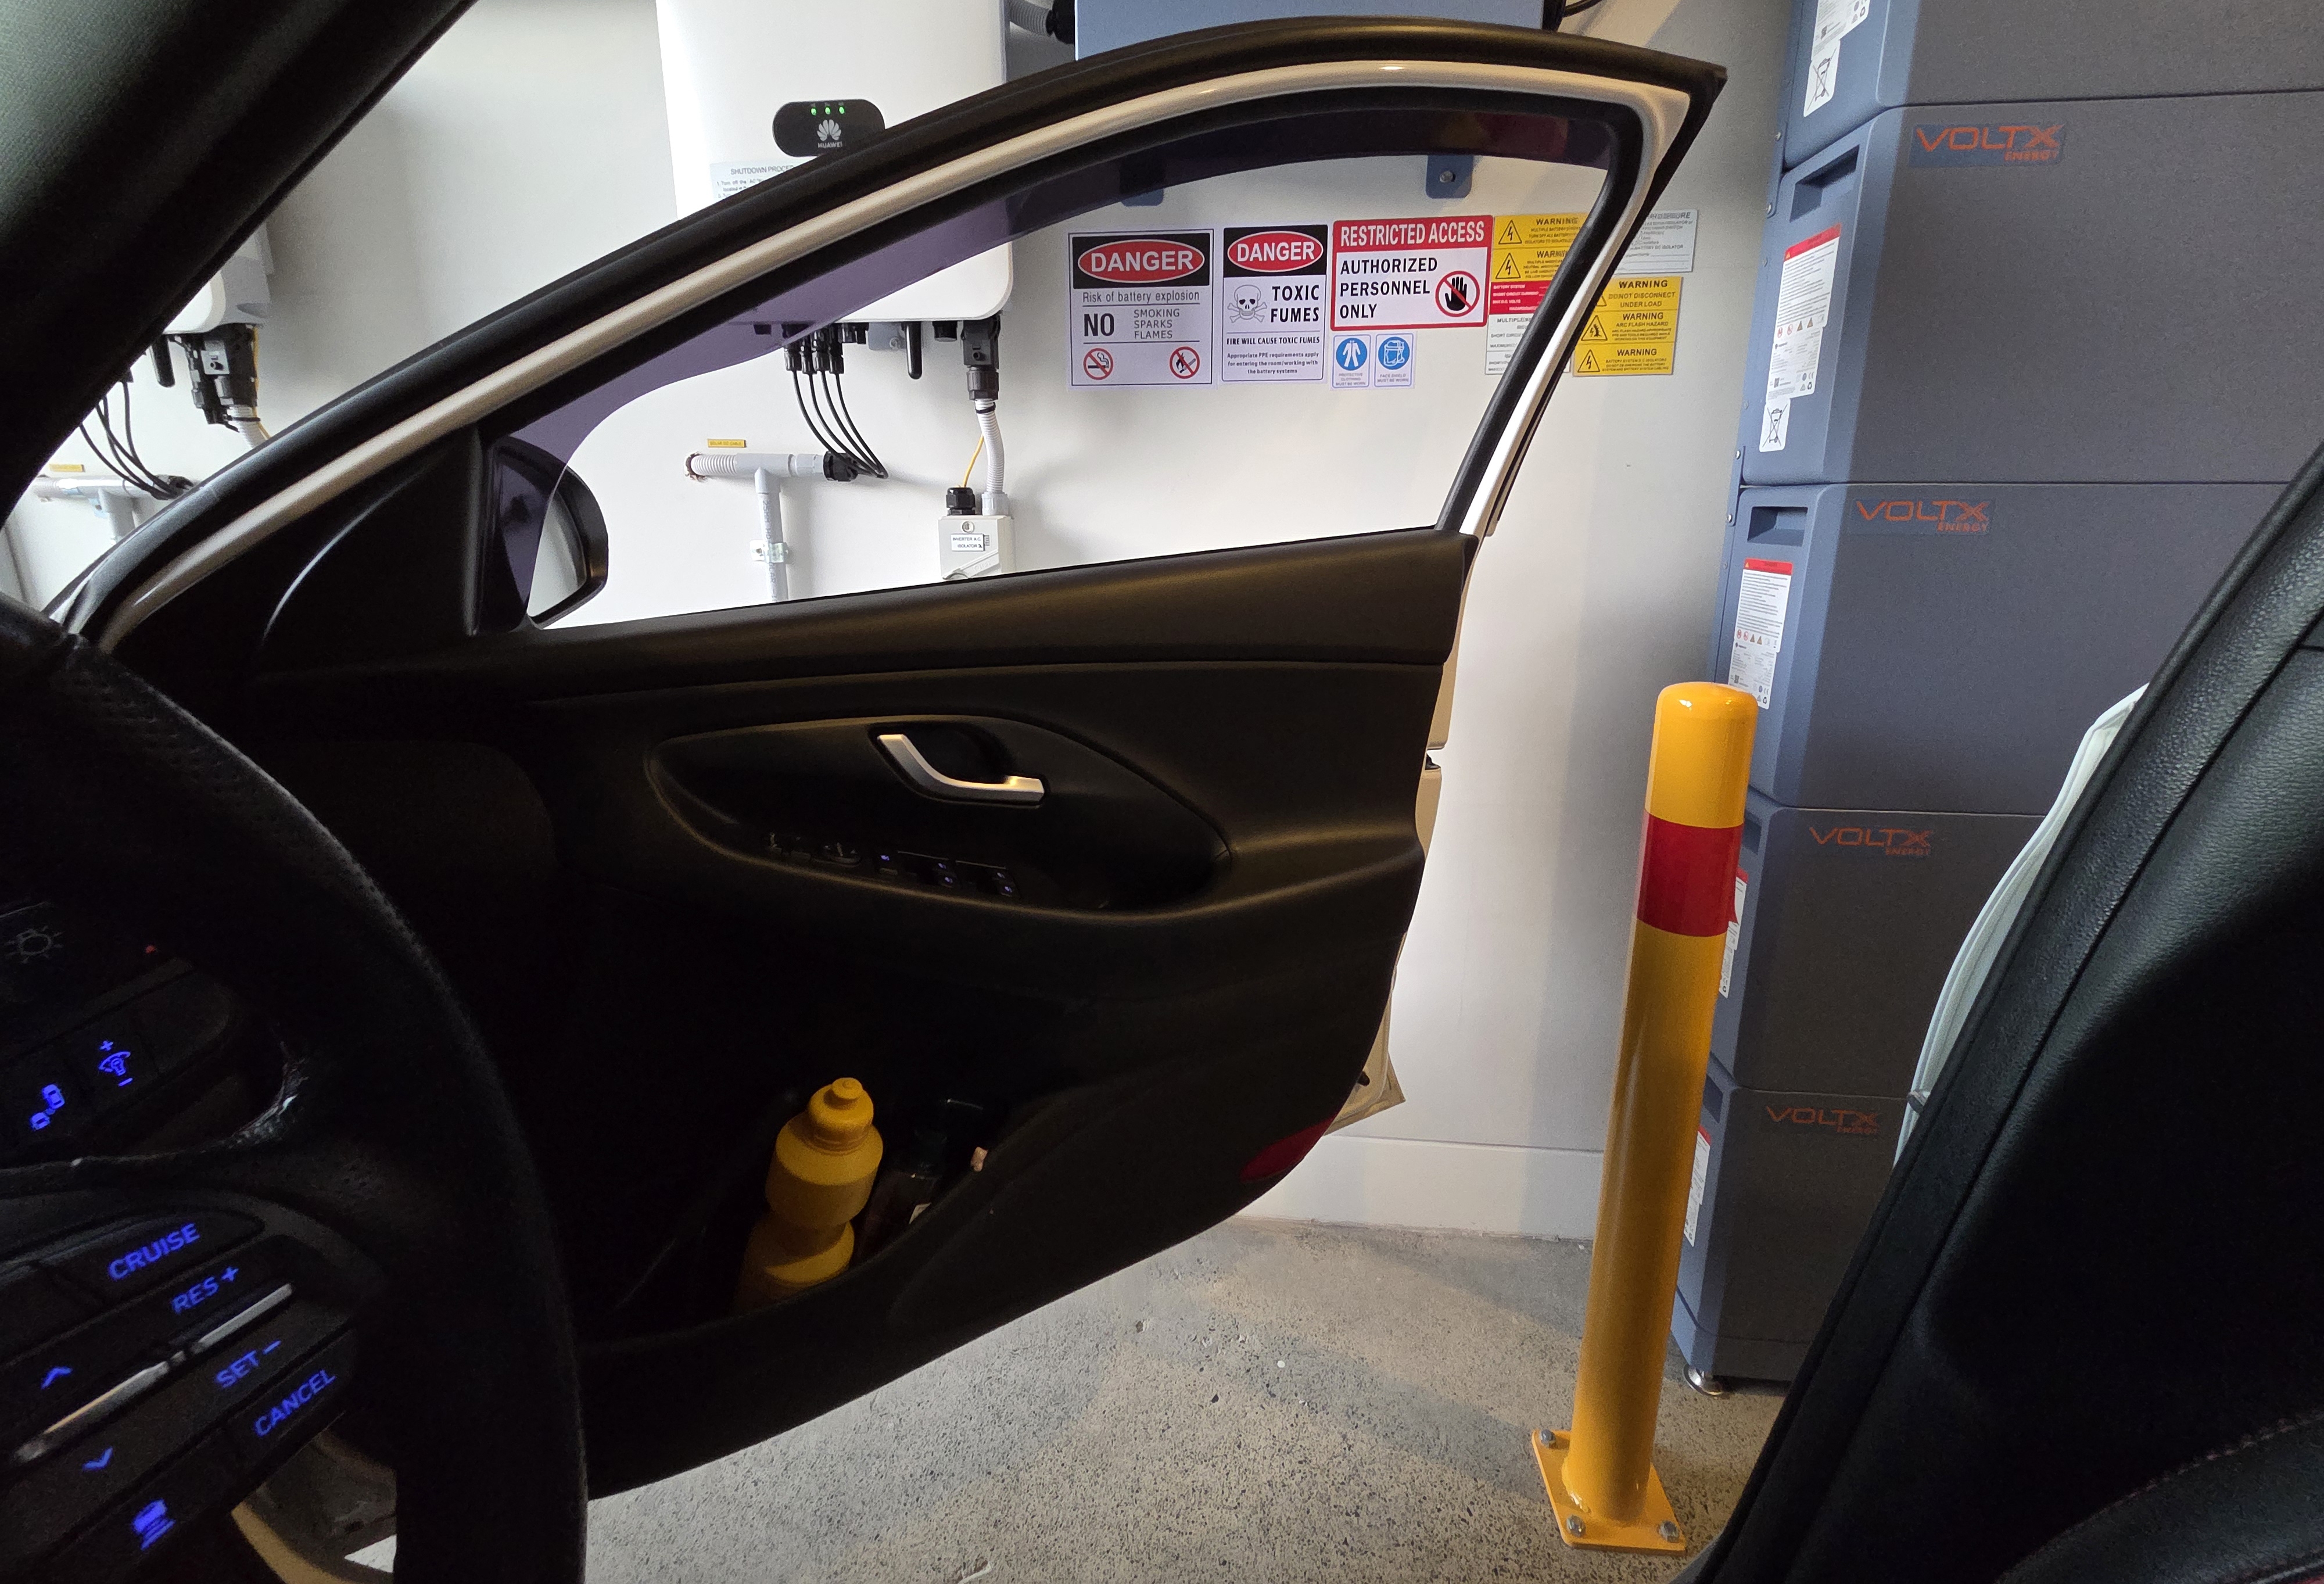
Three parking bollards were installed as required by Australian regulations.

The bollards are just out of the way from the car and driver's door.
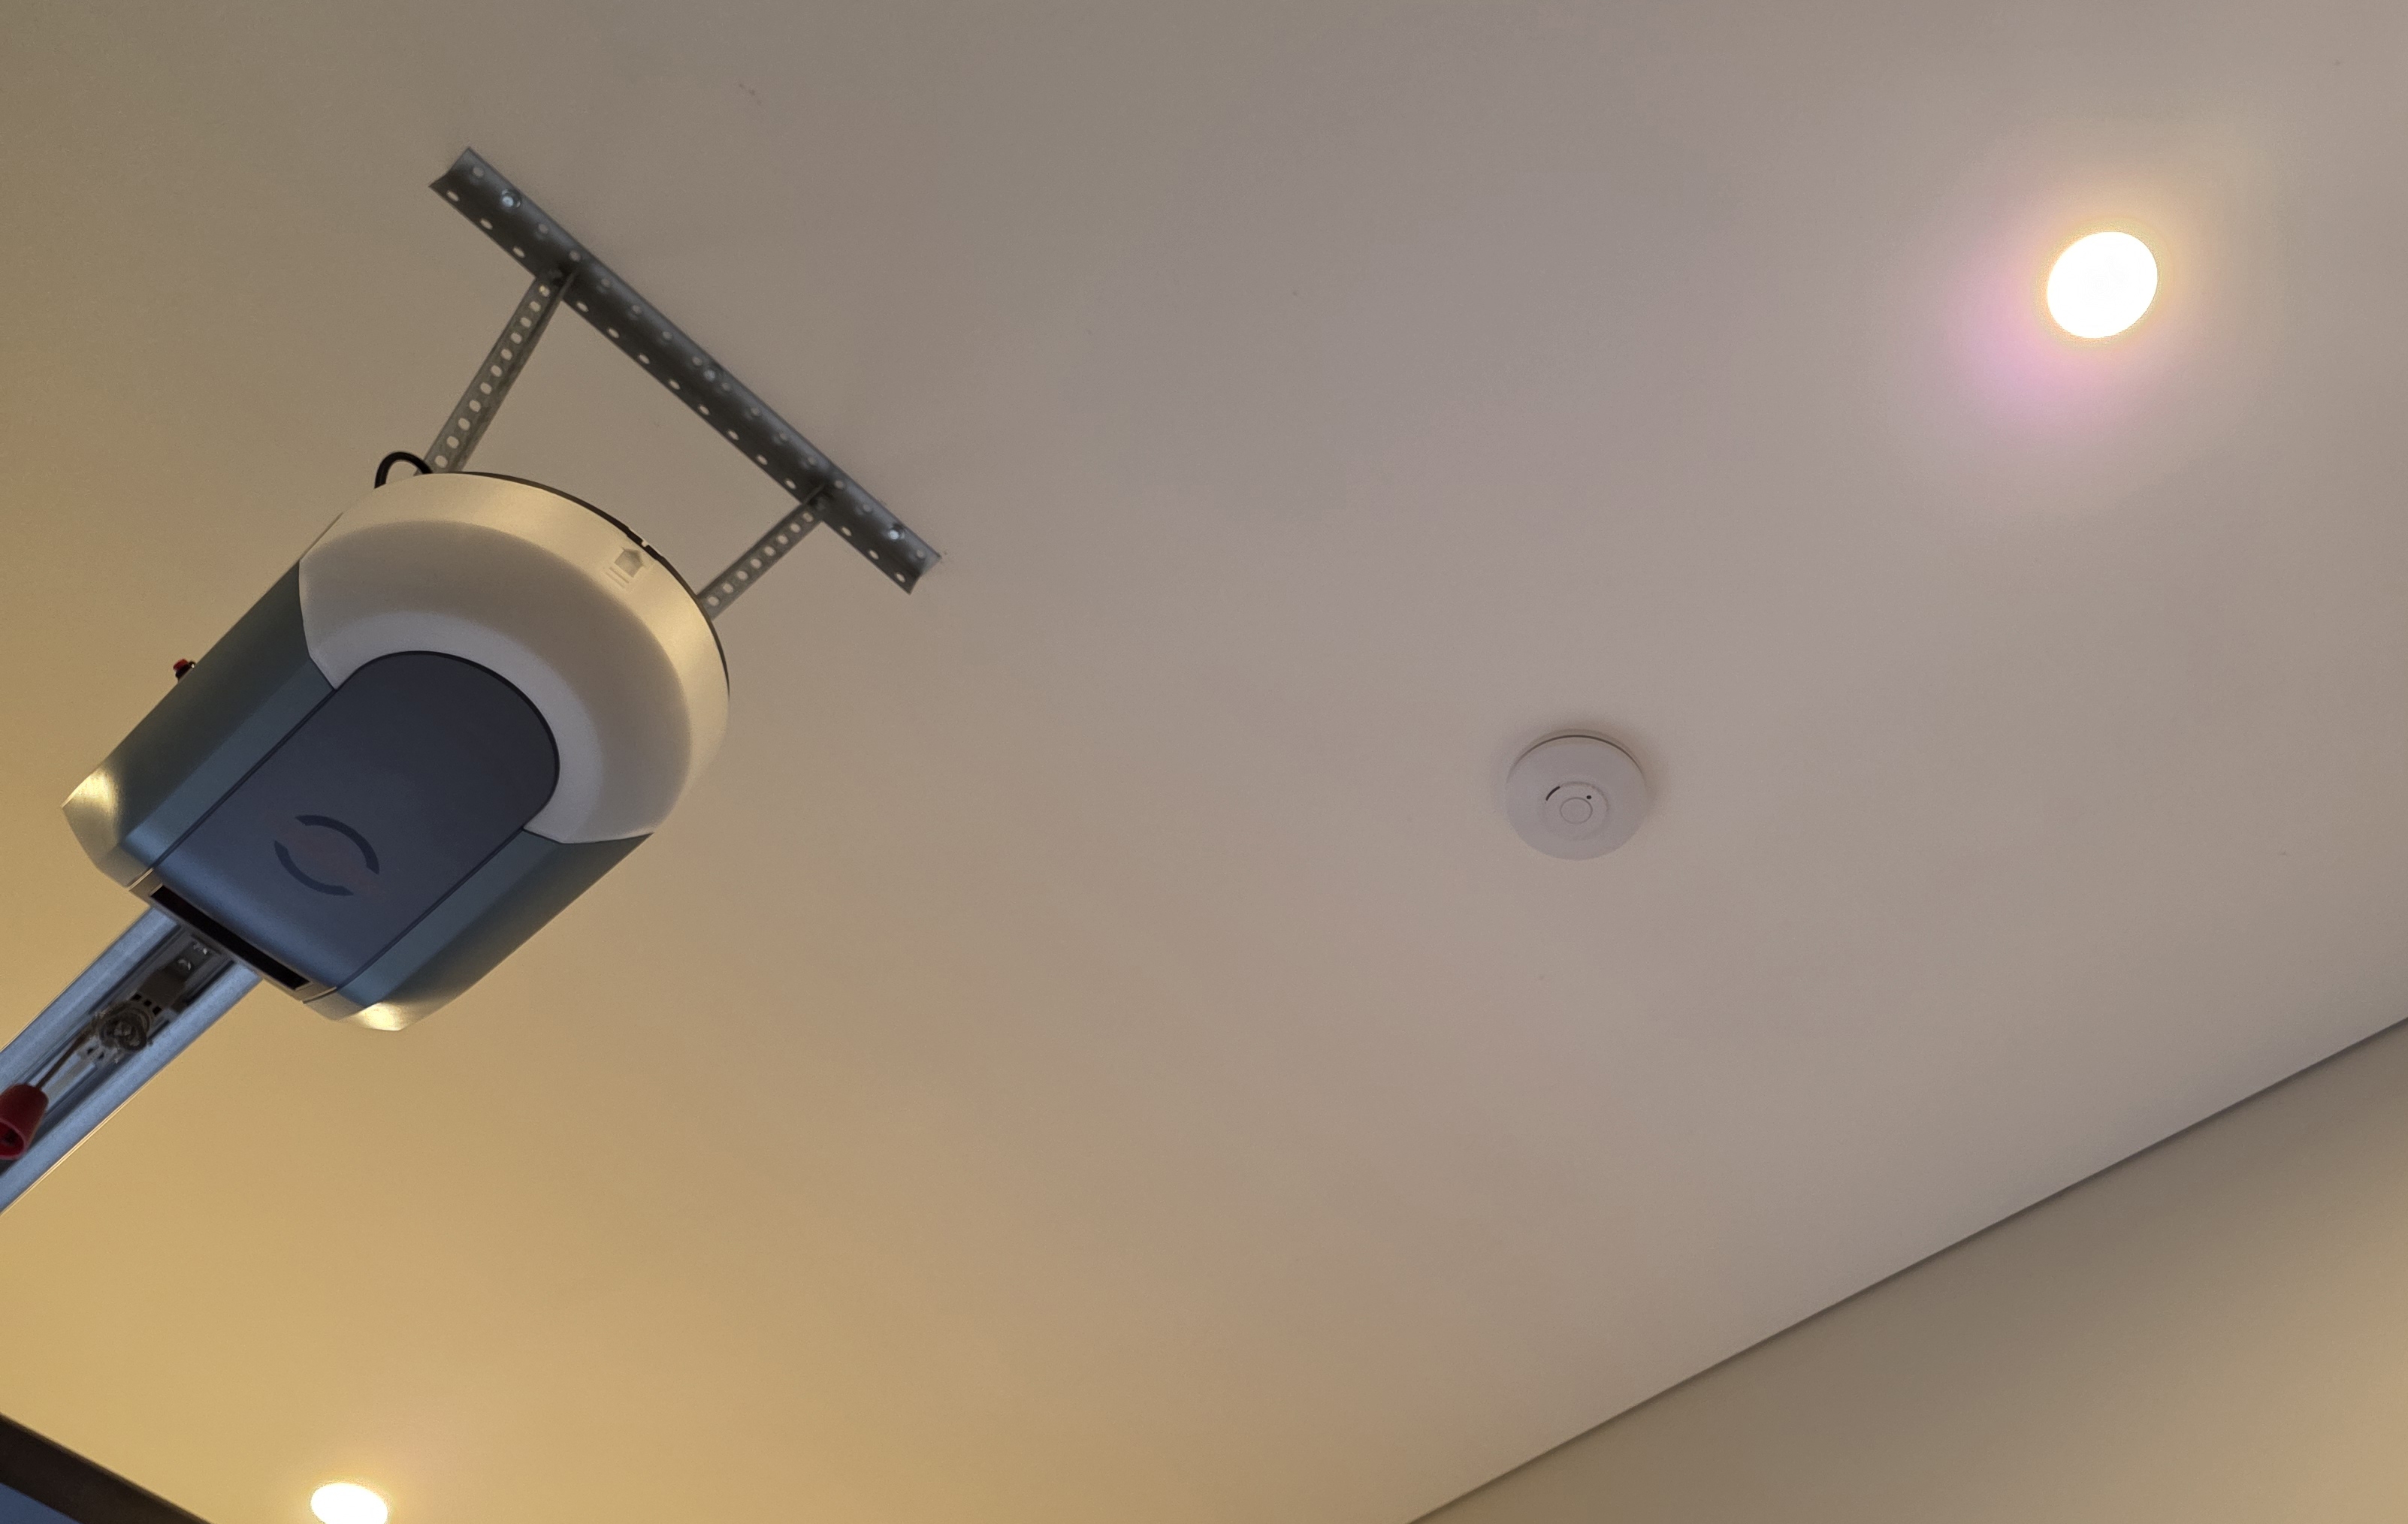
A fire alarm was also installed as required by Australian regulations. This is linked wirelessly to the other alarms in my house.
They installed a small switchboard below my existing one because the main board did not have any free space.
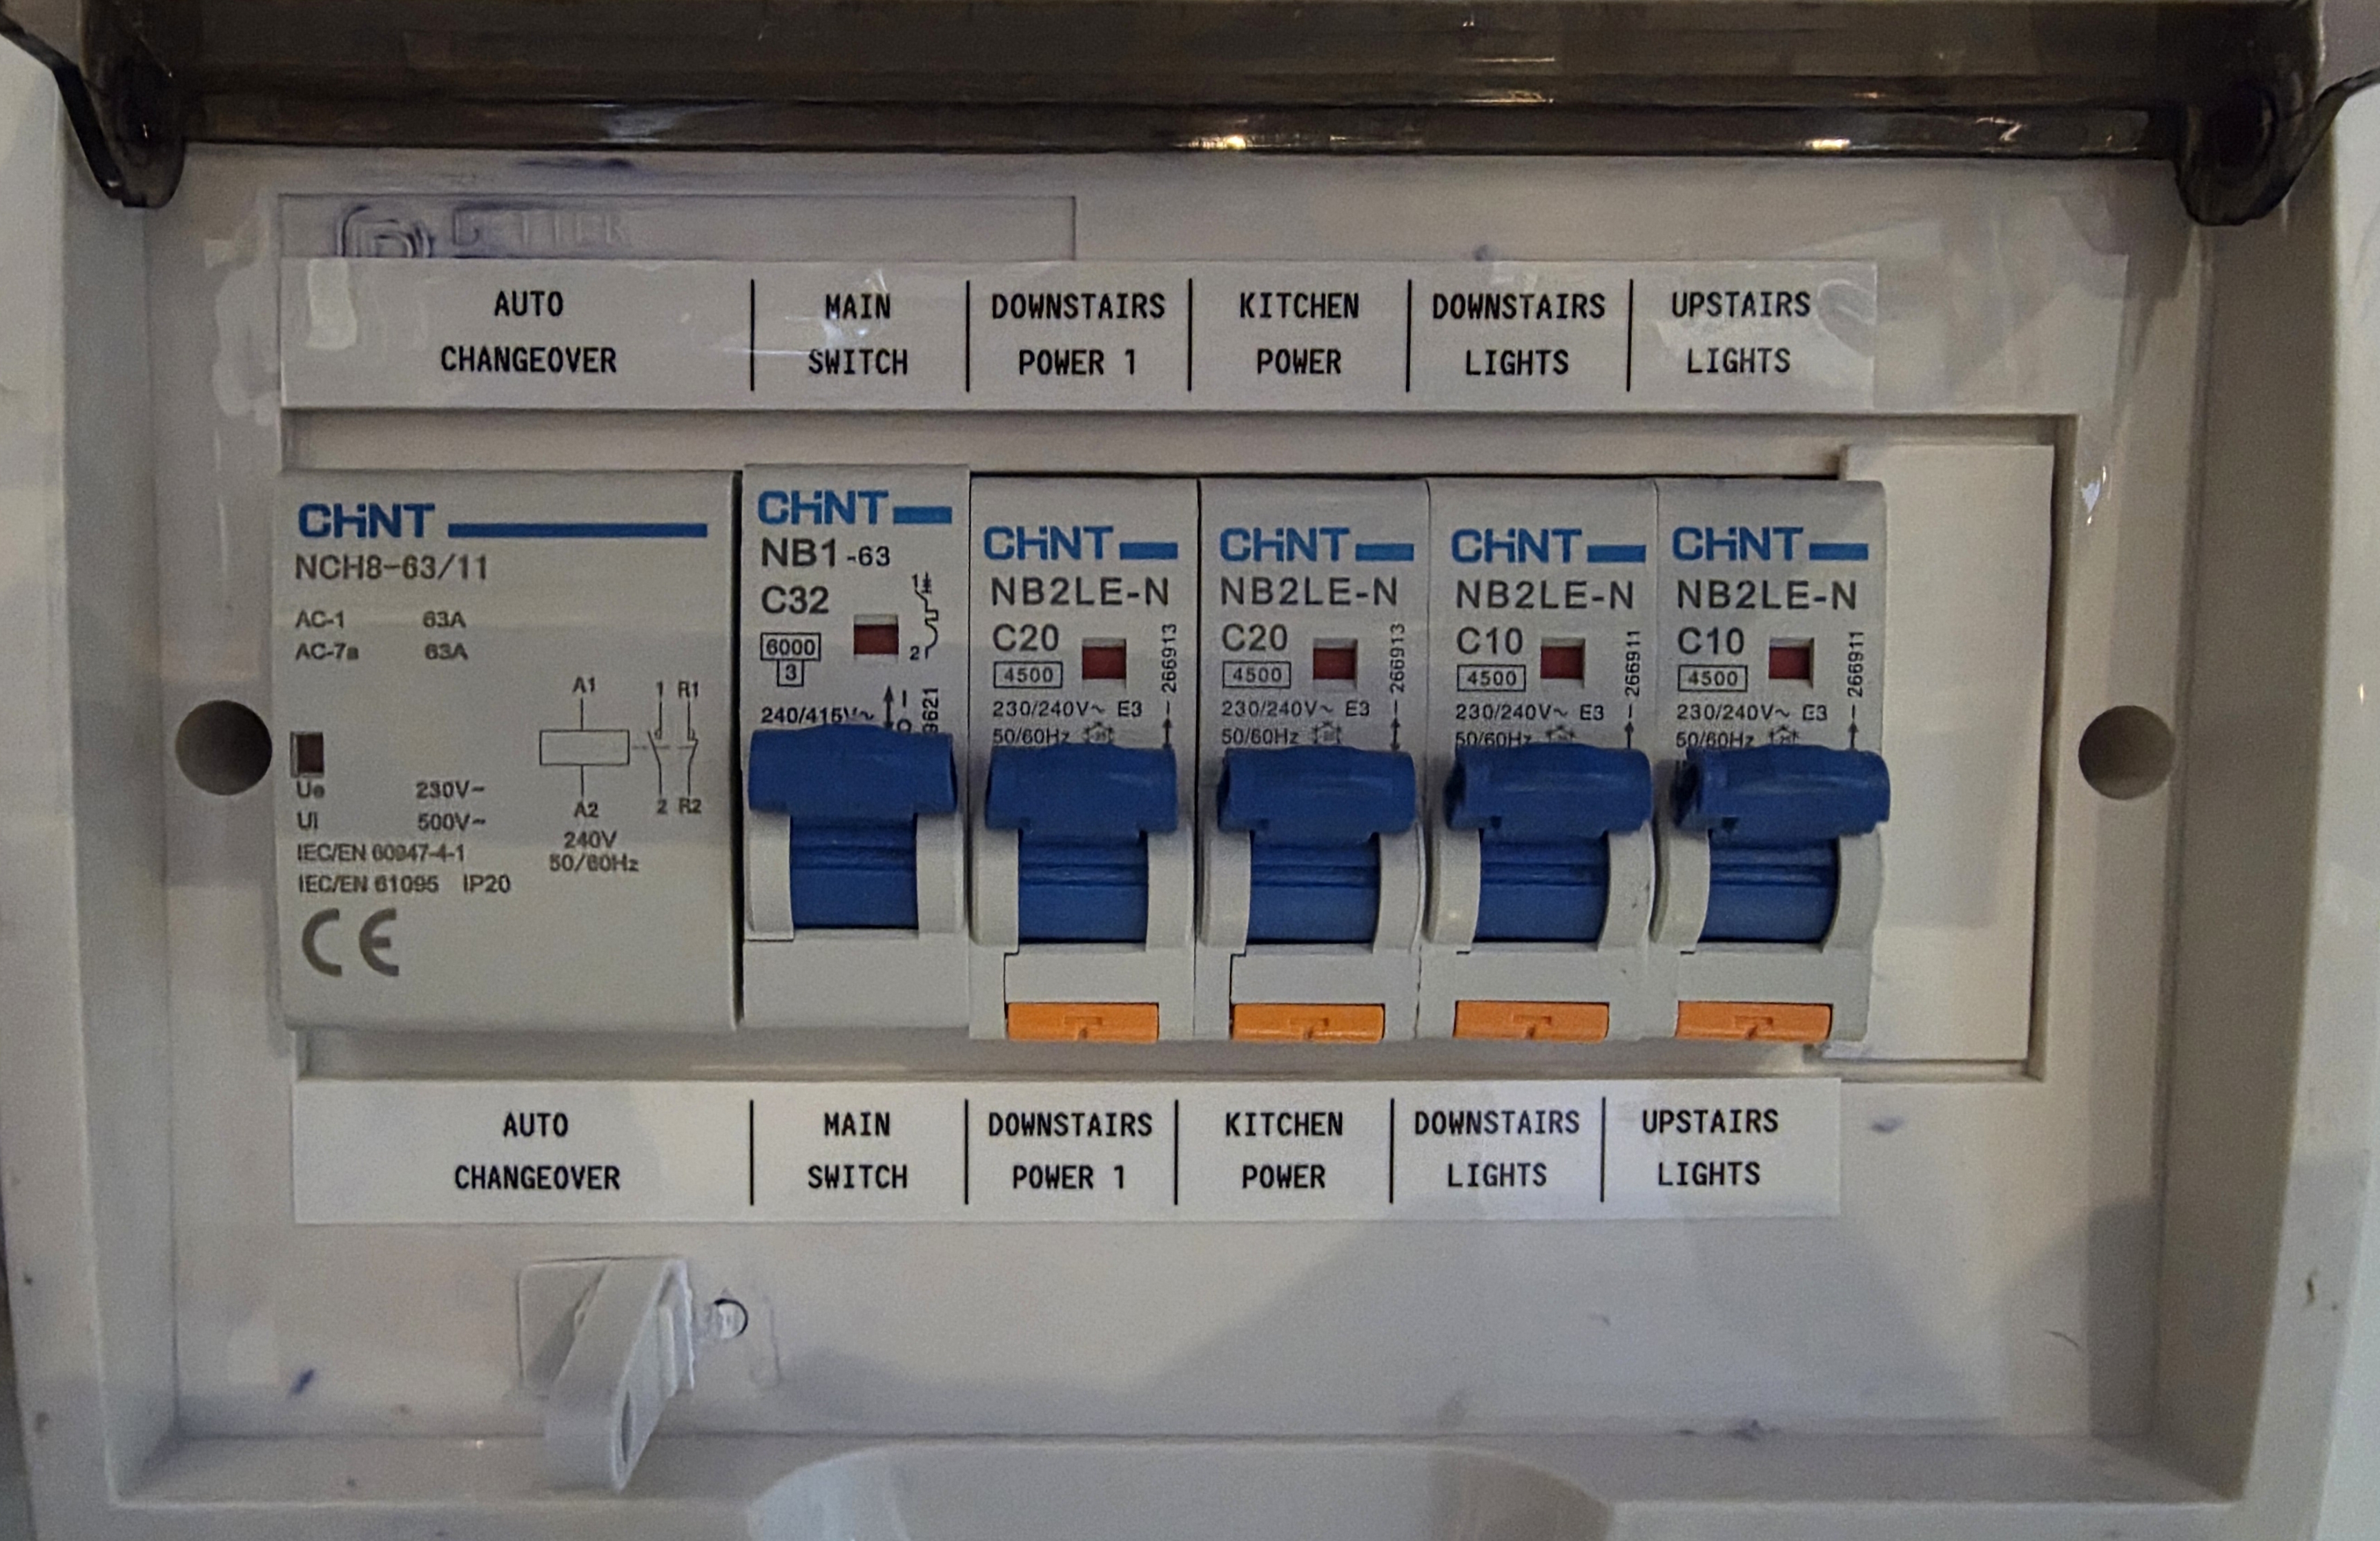
That new board includes the blackout protection gear (a Chint 63A auto changeover switch) and the 4 circuits I chose to be backed up:
- Upstairs Lights
- Downstairs Light
- Kitchen Power
- Downstairs Power
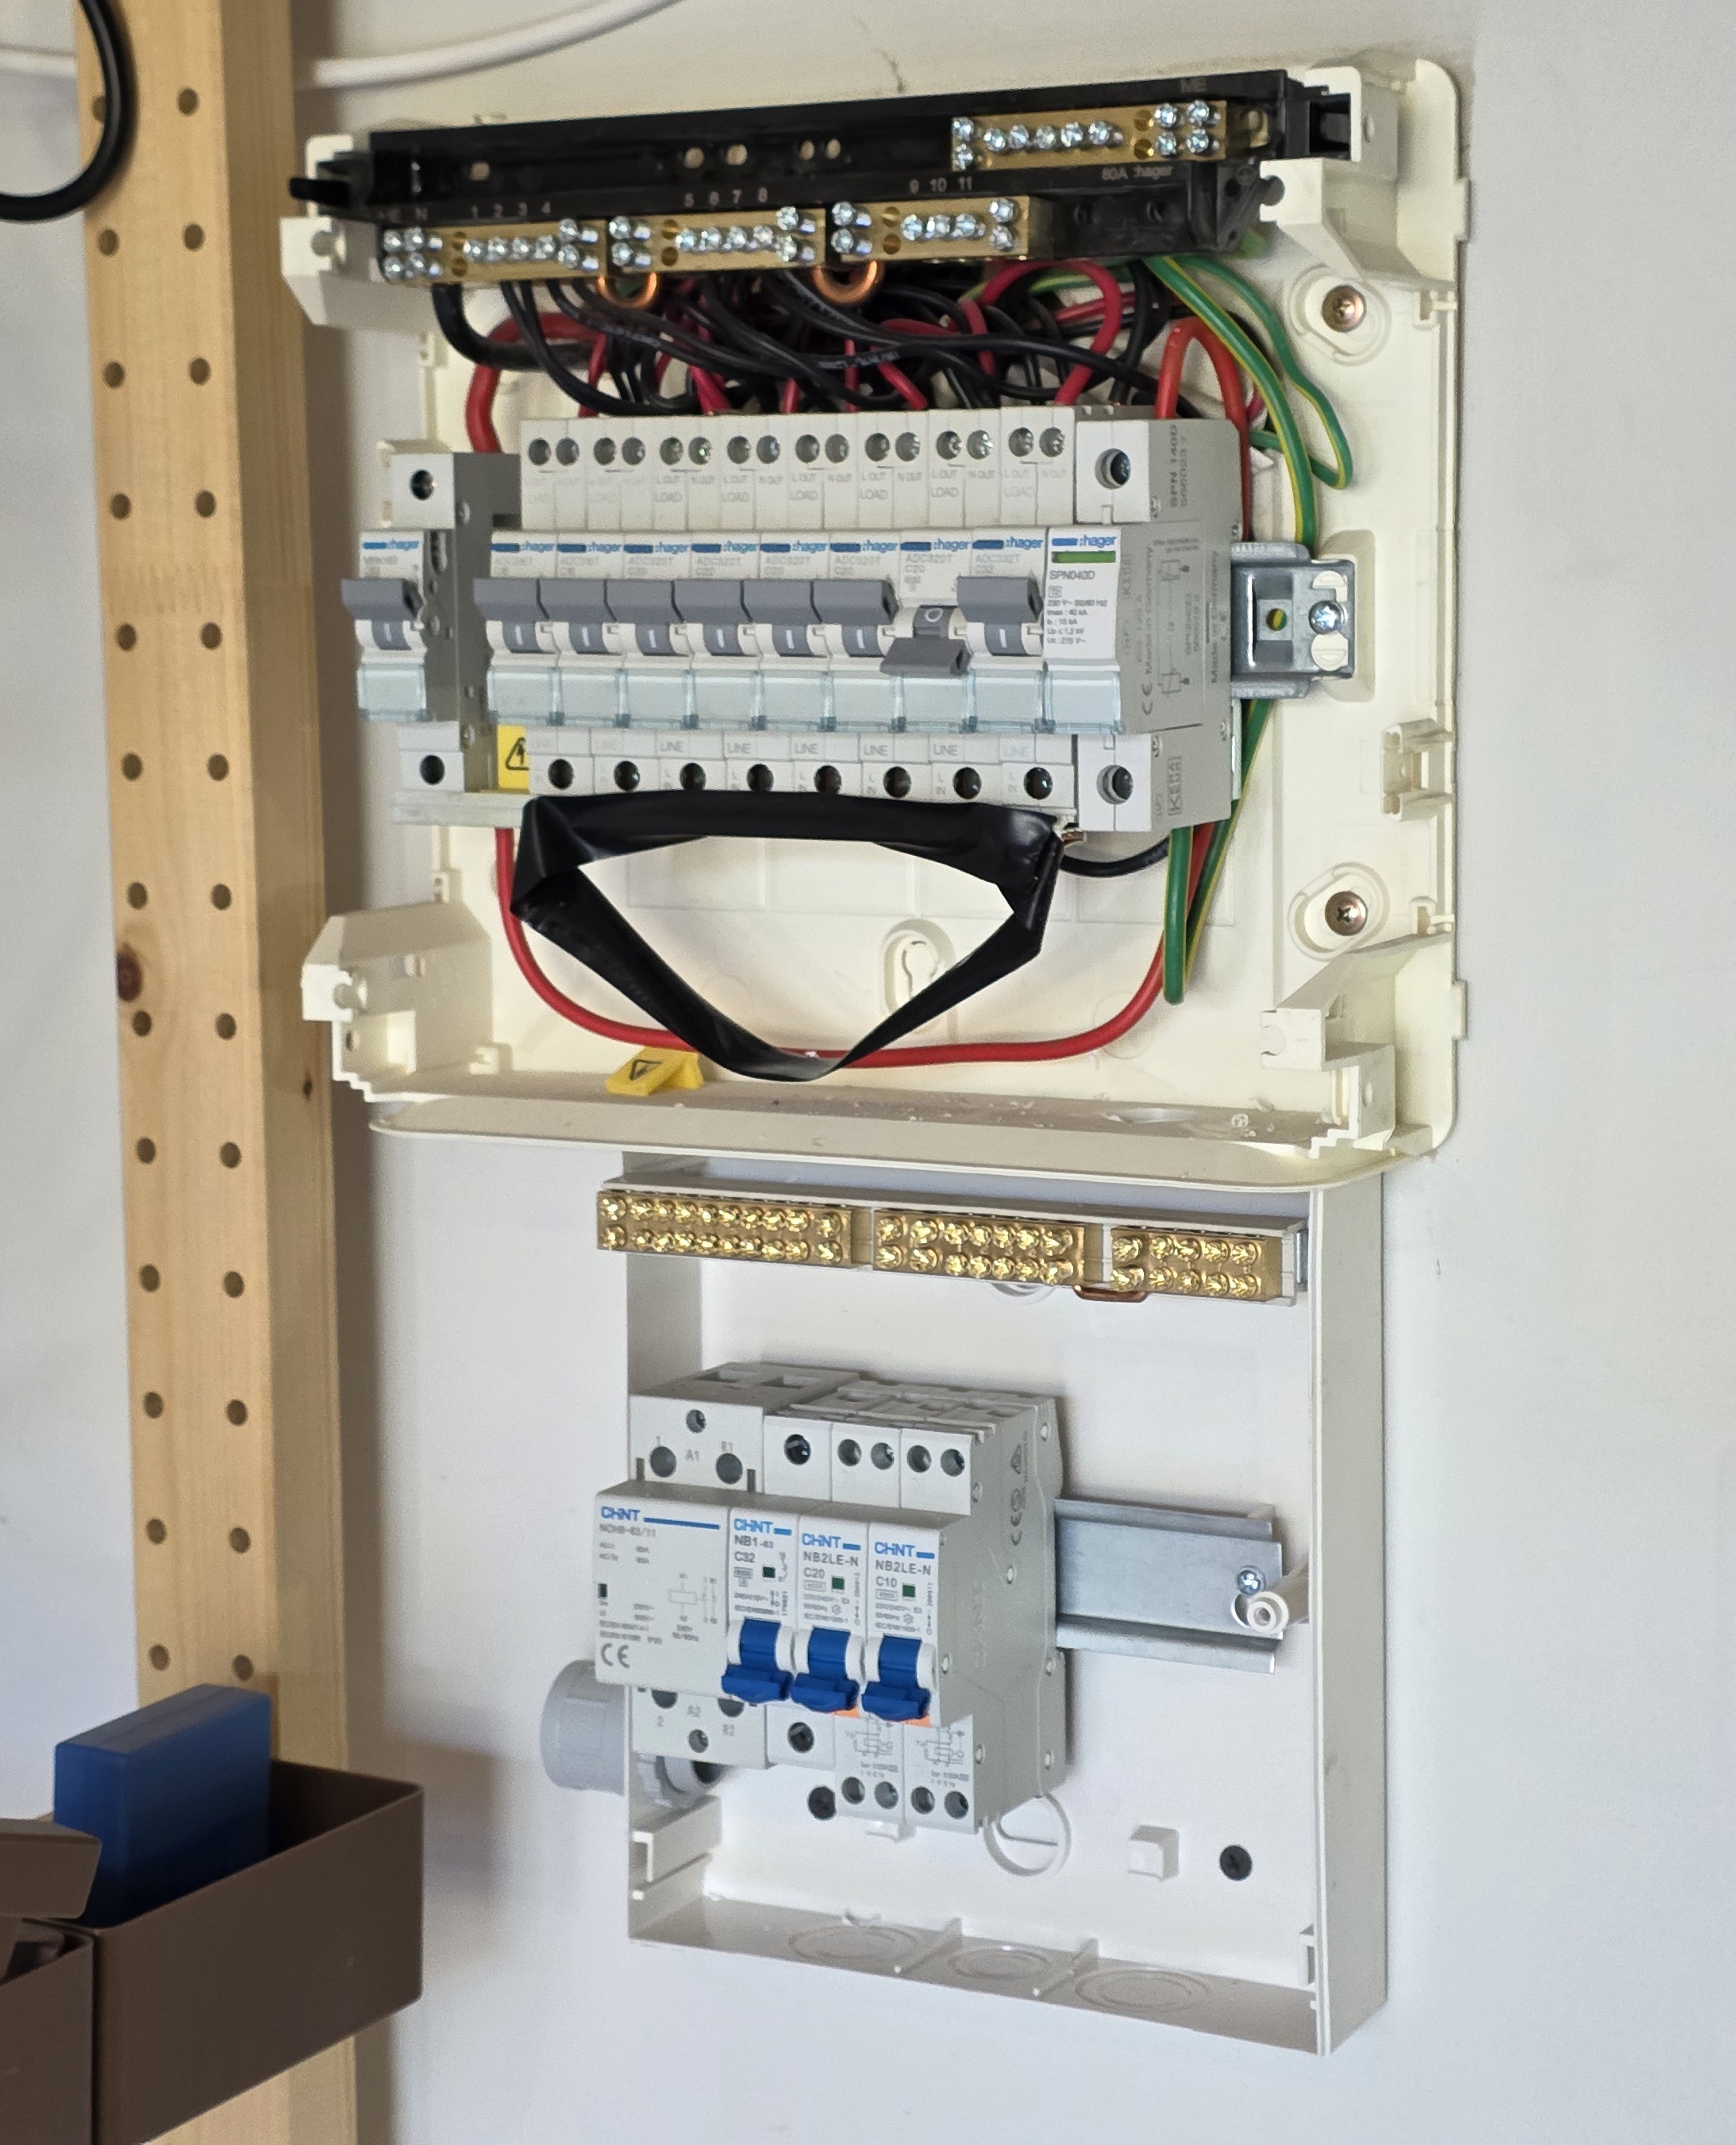
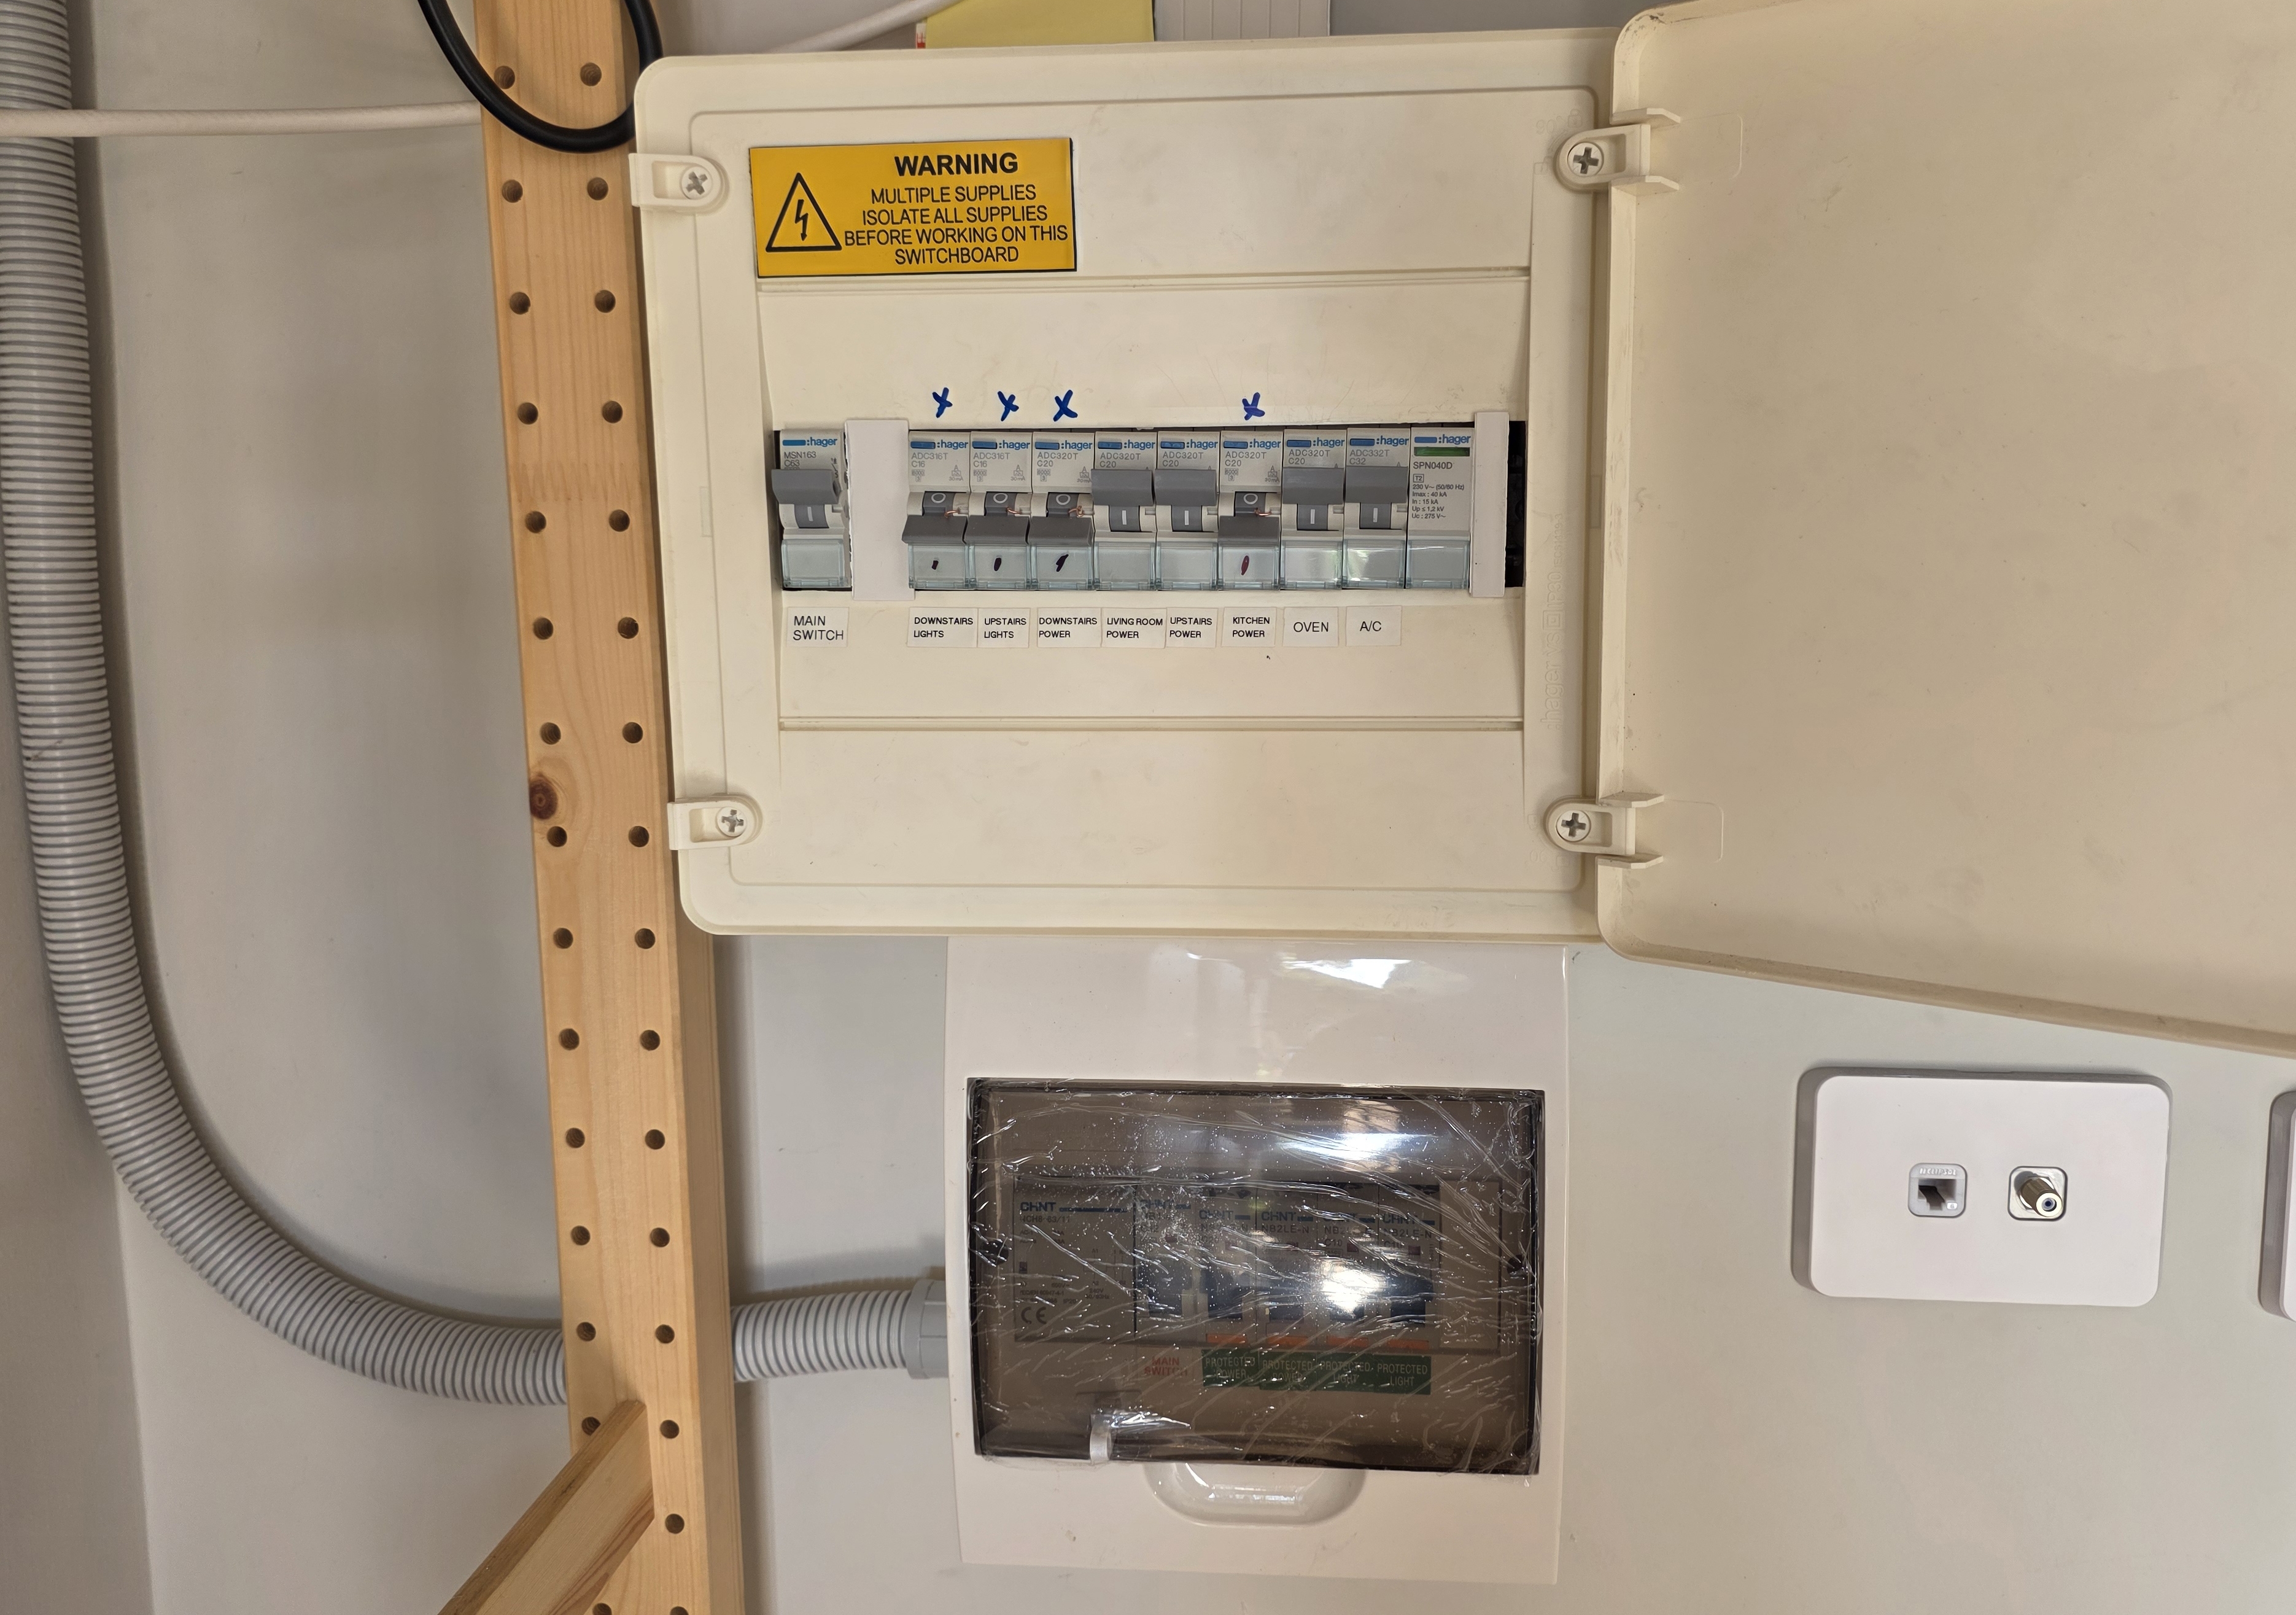
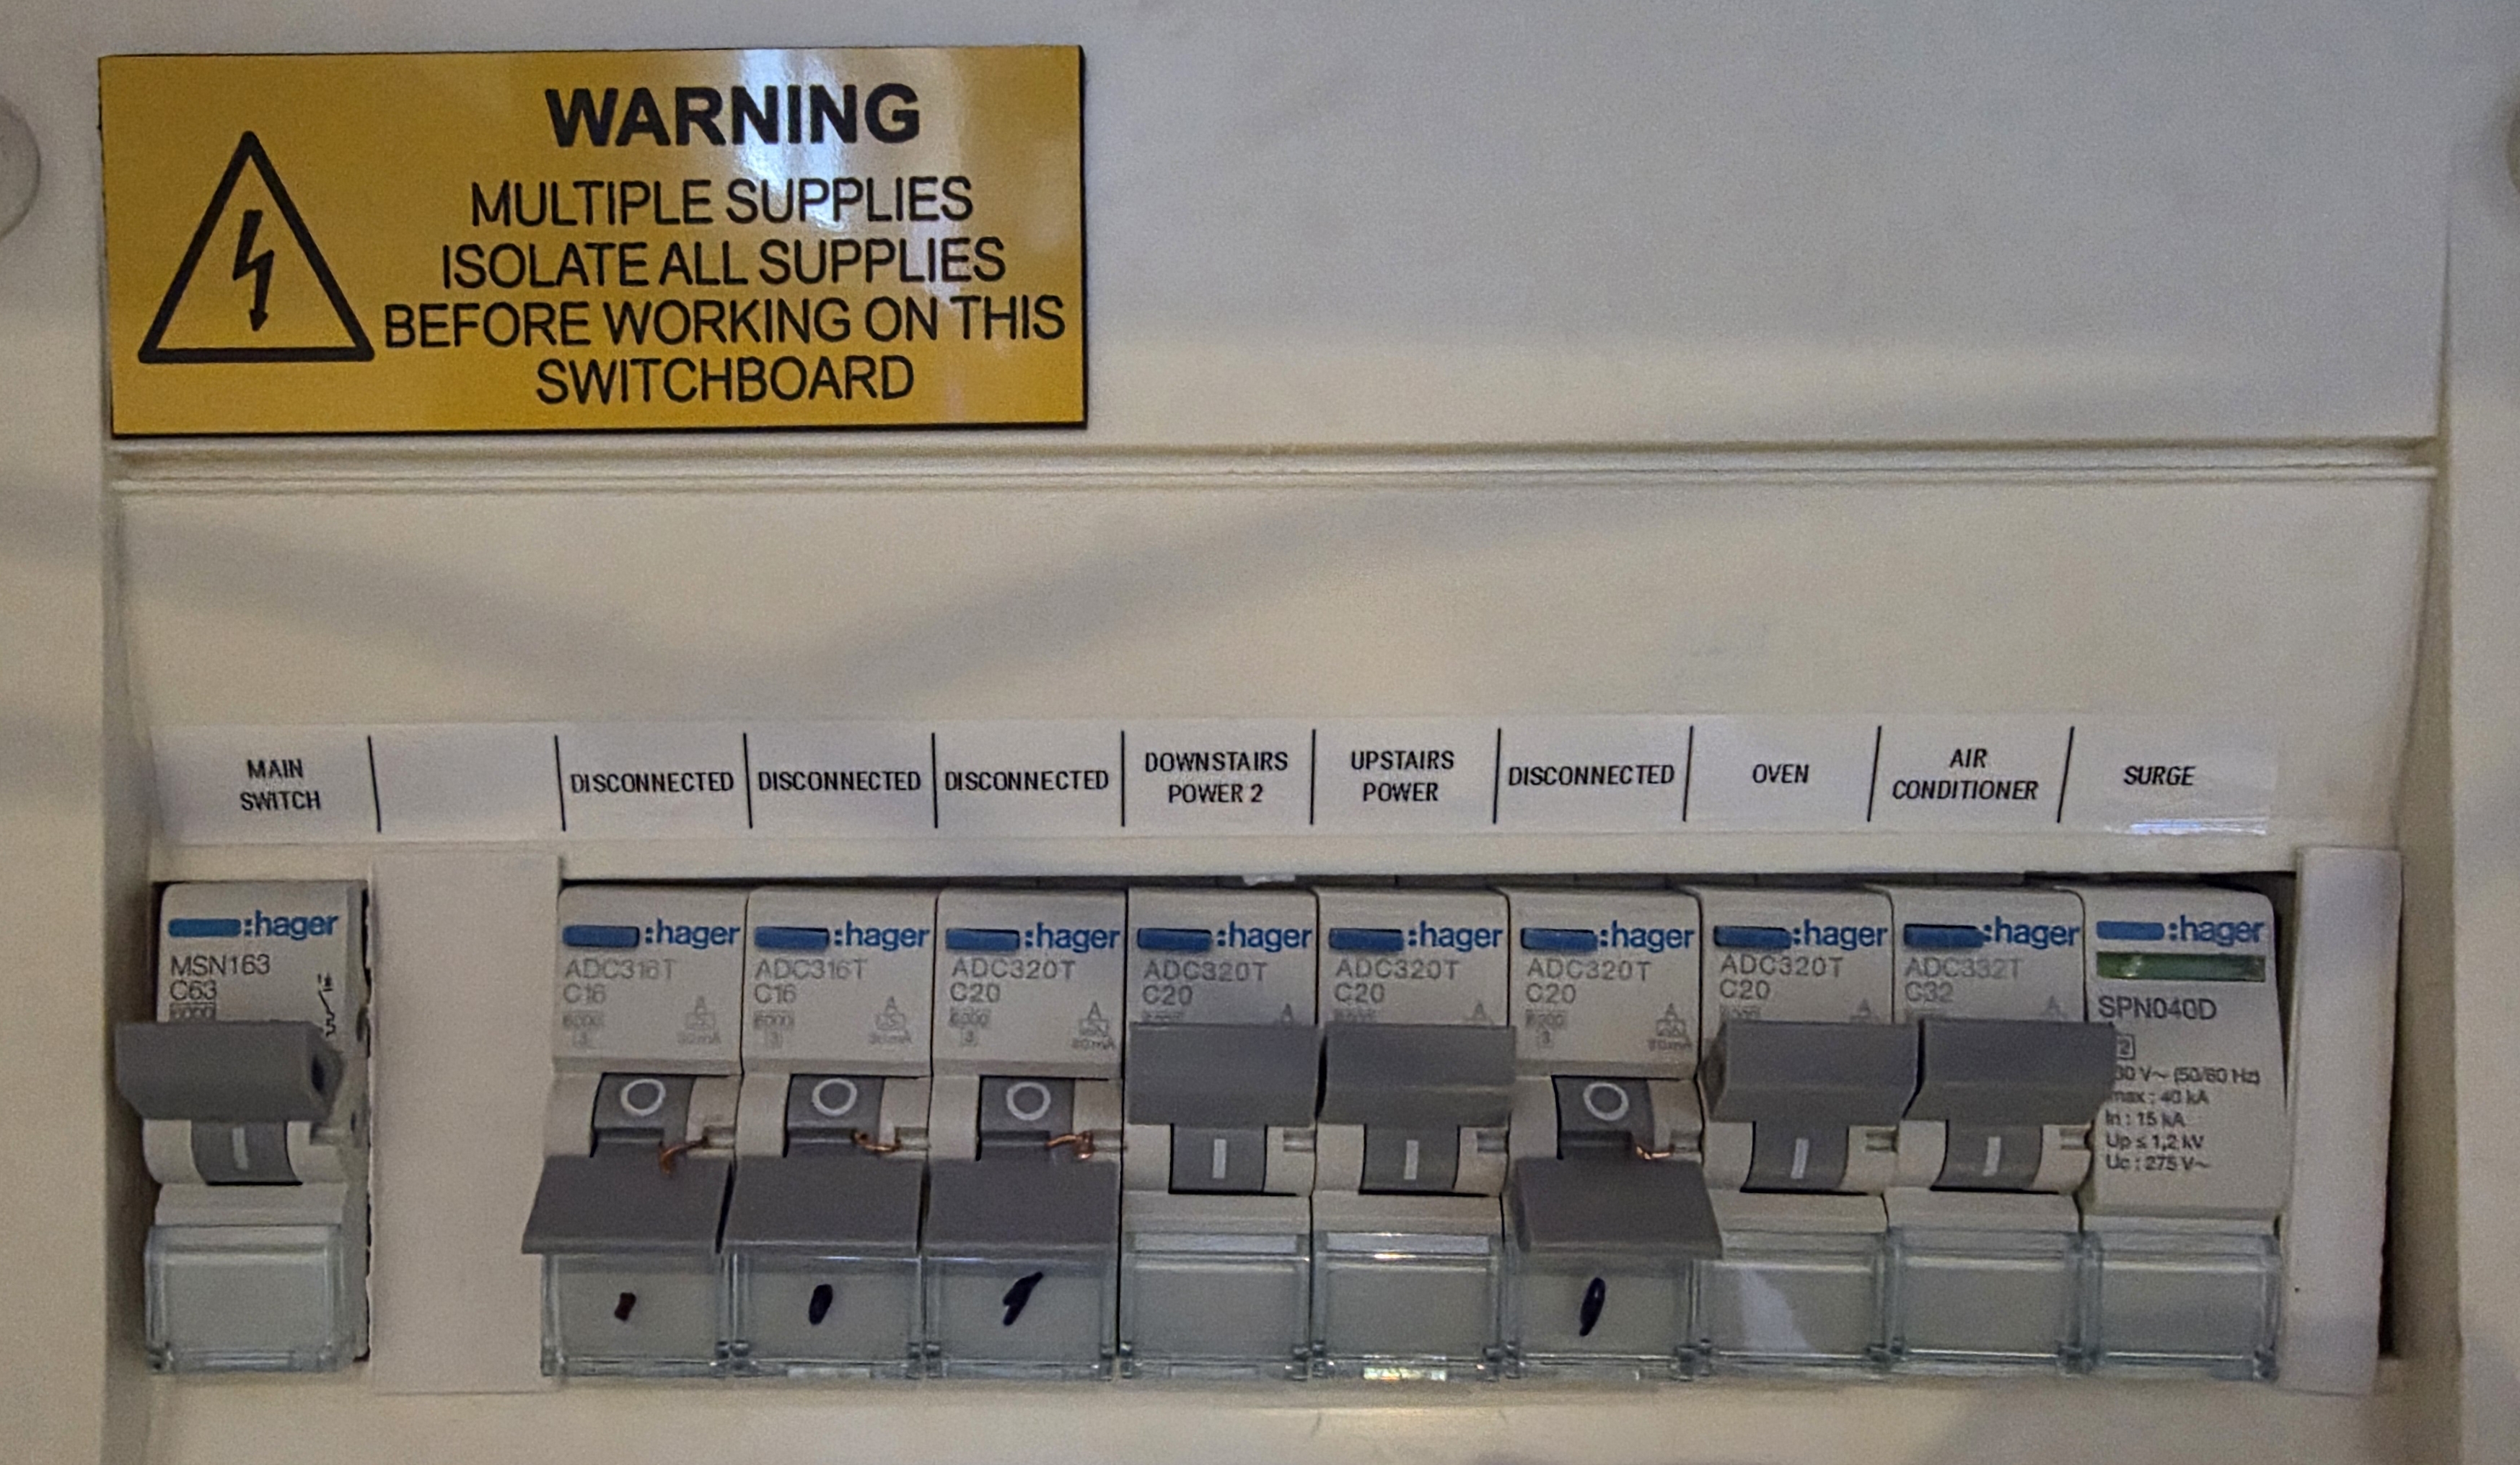
After they left, I cleaned it up and relabelled it. If I add some Shelly Pro devices in the future, I'd probably get a 2-row switchboard instead and replace both.
Finally, the completed install:
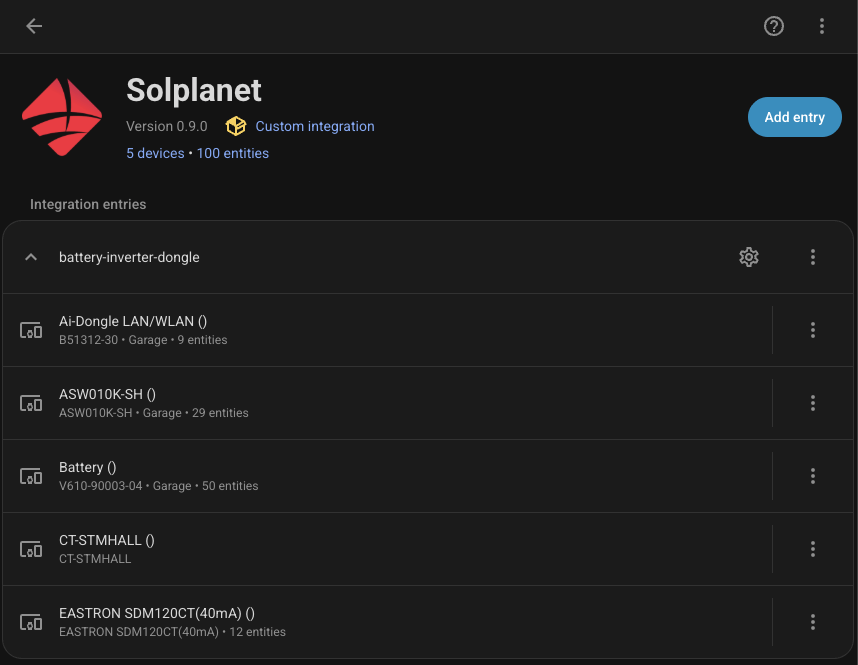
Home Assistant
Integration
I maintain the Solplanet integration for Home Assistant. I originally forked it from an earlier version by zbigniewmotyka, because it did not support the newer VoltX-branded inverters.
I did not set out to maintain an integration. It happened out of sheer need for something that worked, as my solar consumption sensors were all skewed.
It connects via the AI Dongle, which puts the inverter online for monitoring.

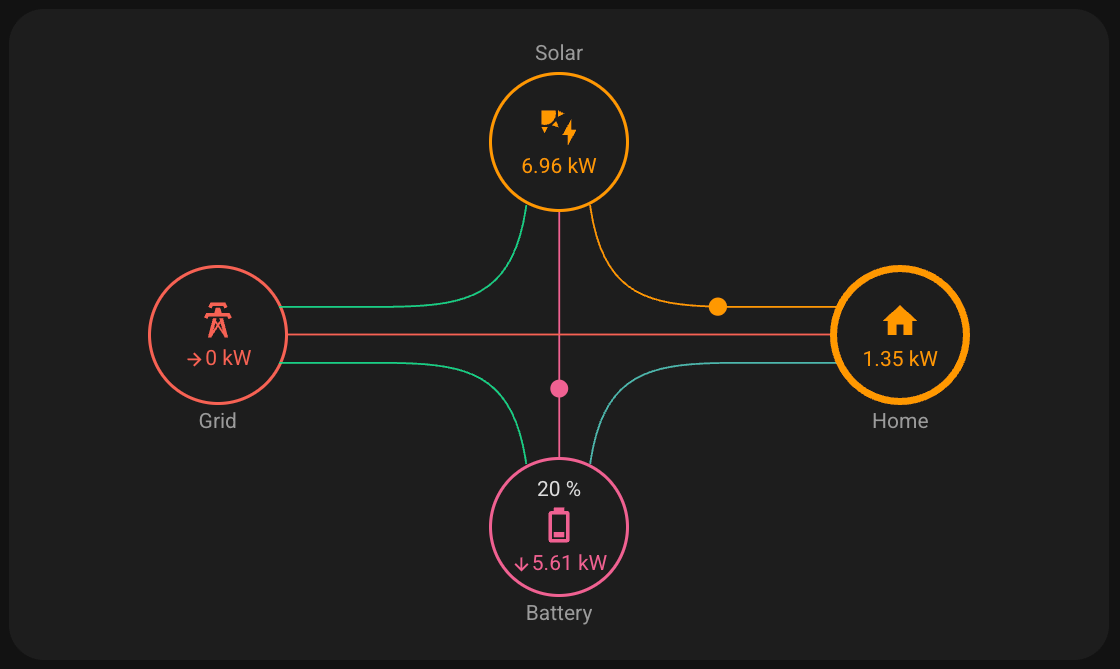
The integration exposes inverter, battery, and smart meter information in Home Assistant. The most important feature is battery schedule management, which is useful for plans with cheap or free charging windows, or variable pricing like Amber.
Personally, I am only using it for tracking. My feed-in tariff is a very generous 12c, and I can usually drain the entire battery over 2 or 3 days of cloudy/rainy days.
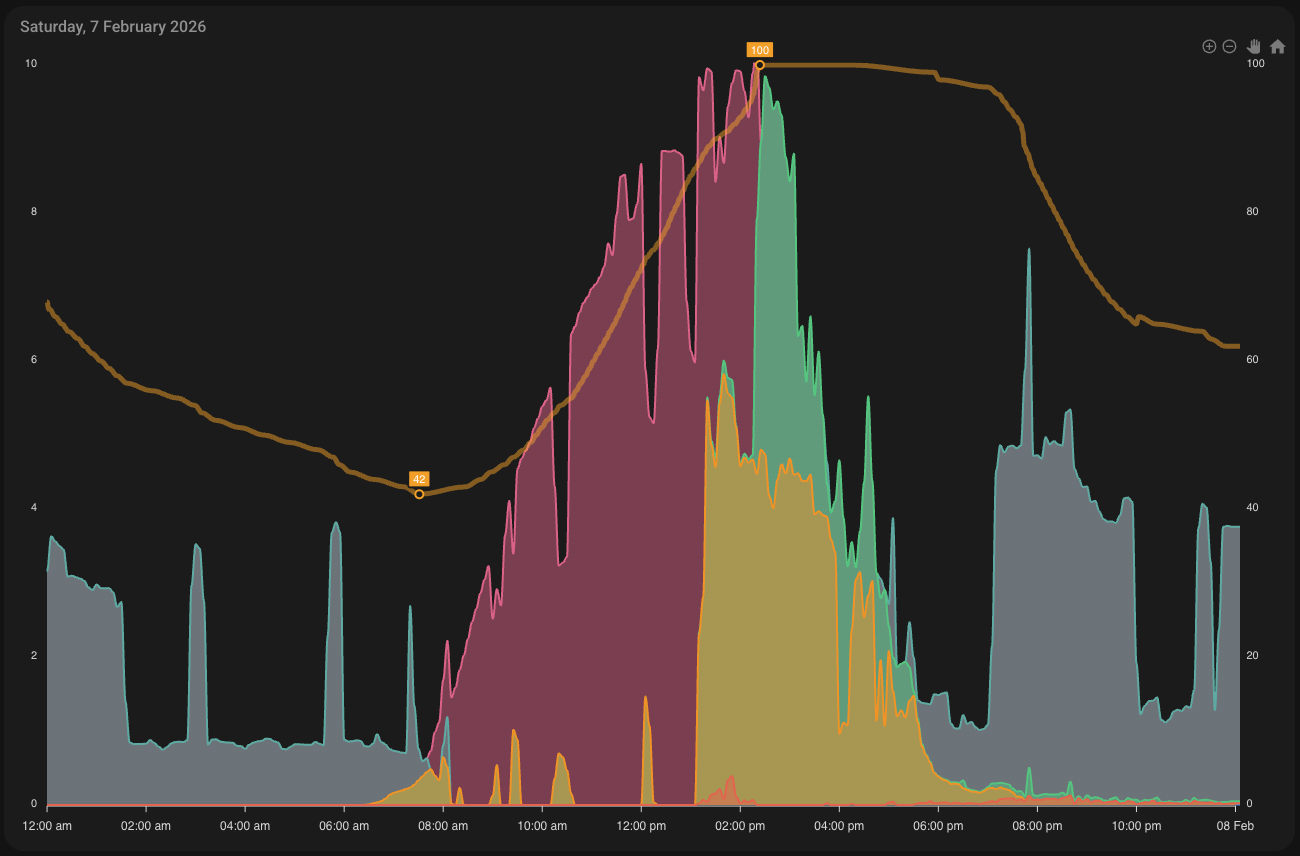
Dashboard
I updated my dashboard graph to include battery charge, discharge, and state of charge. Seeing the charge go down to 66% overnight, then back to 100% the next day, is satisfying.
Dongle Ethernet
The AI dongle has an RJ45 Ethernet port. I skimmed past it in the manual because I assumed it was just Wi-Fi, and the installers were attaching an antenna.
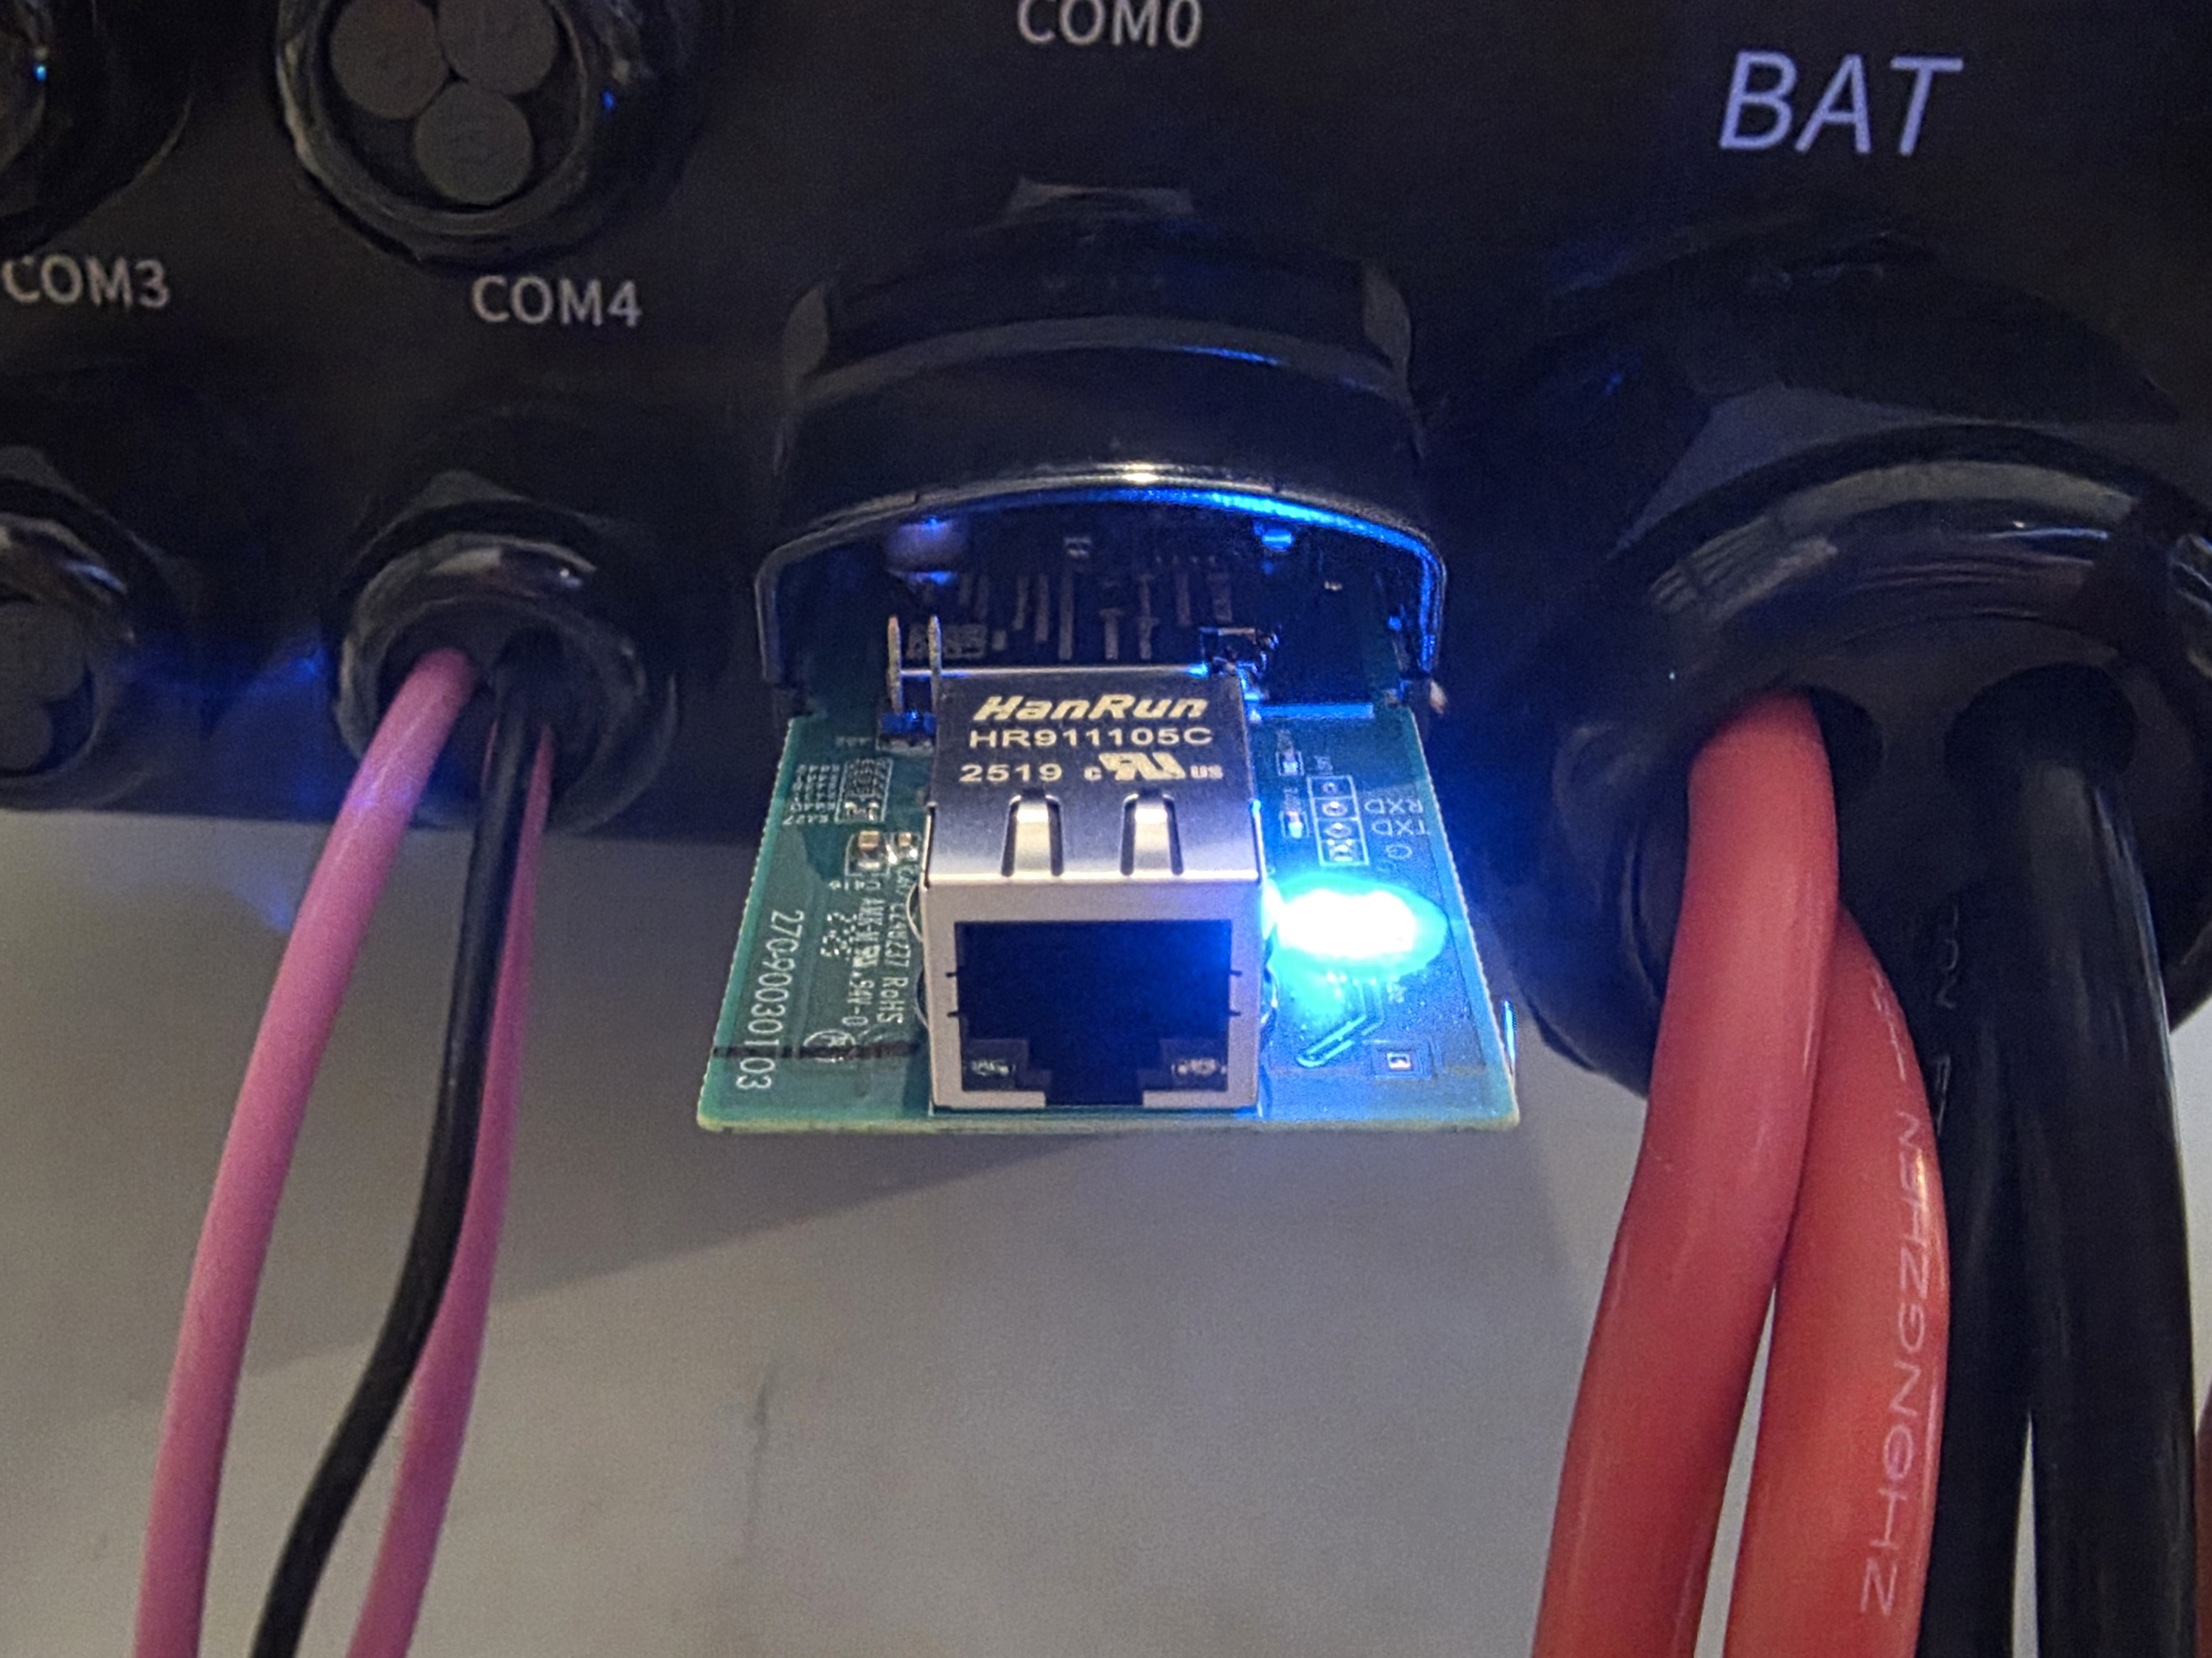
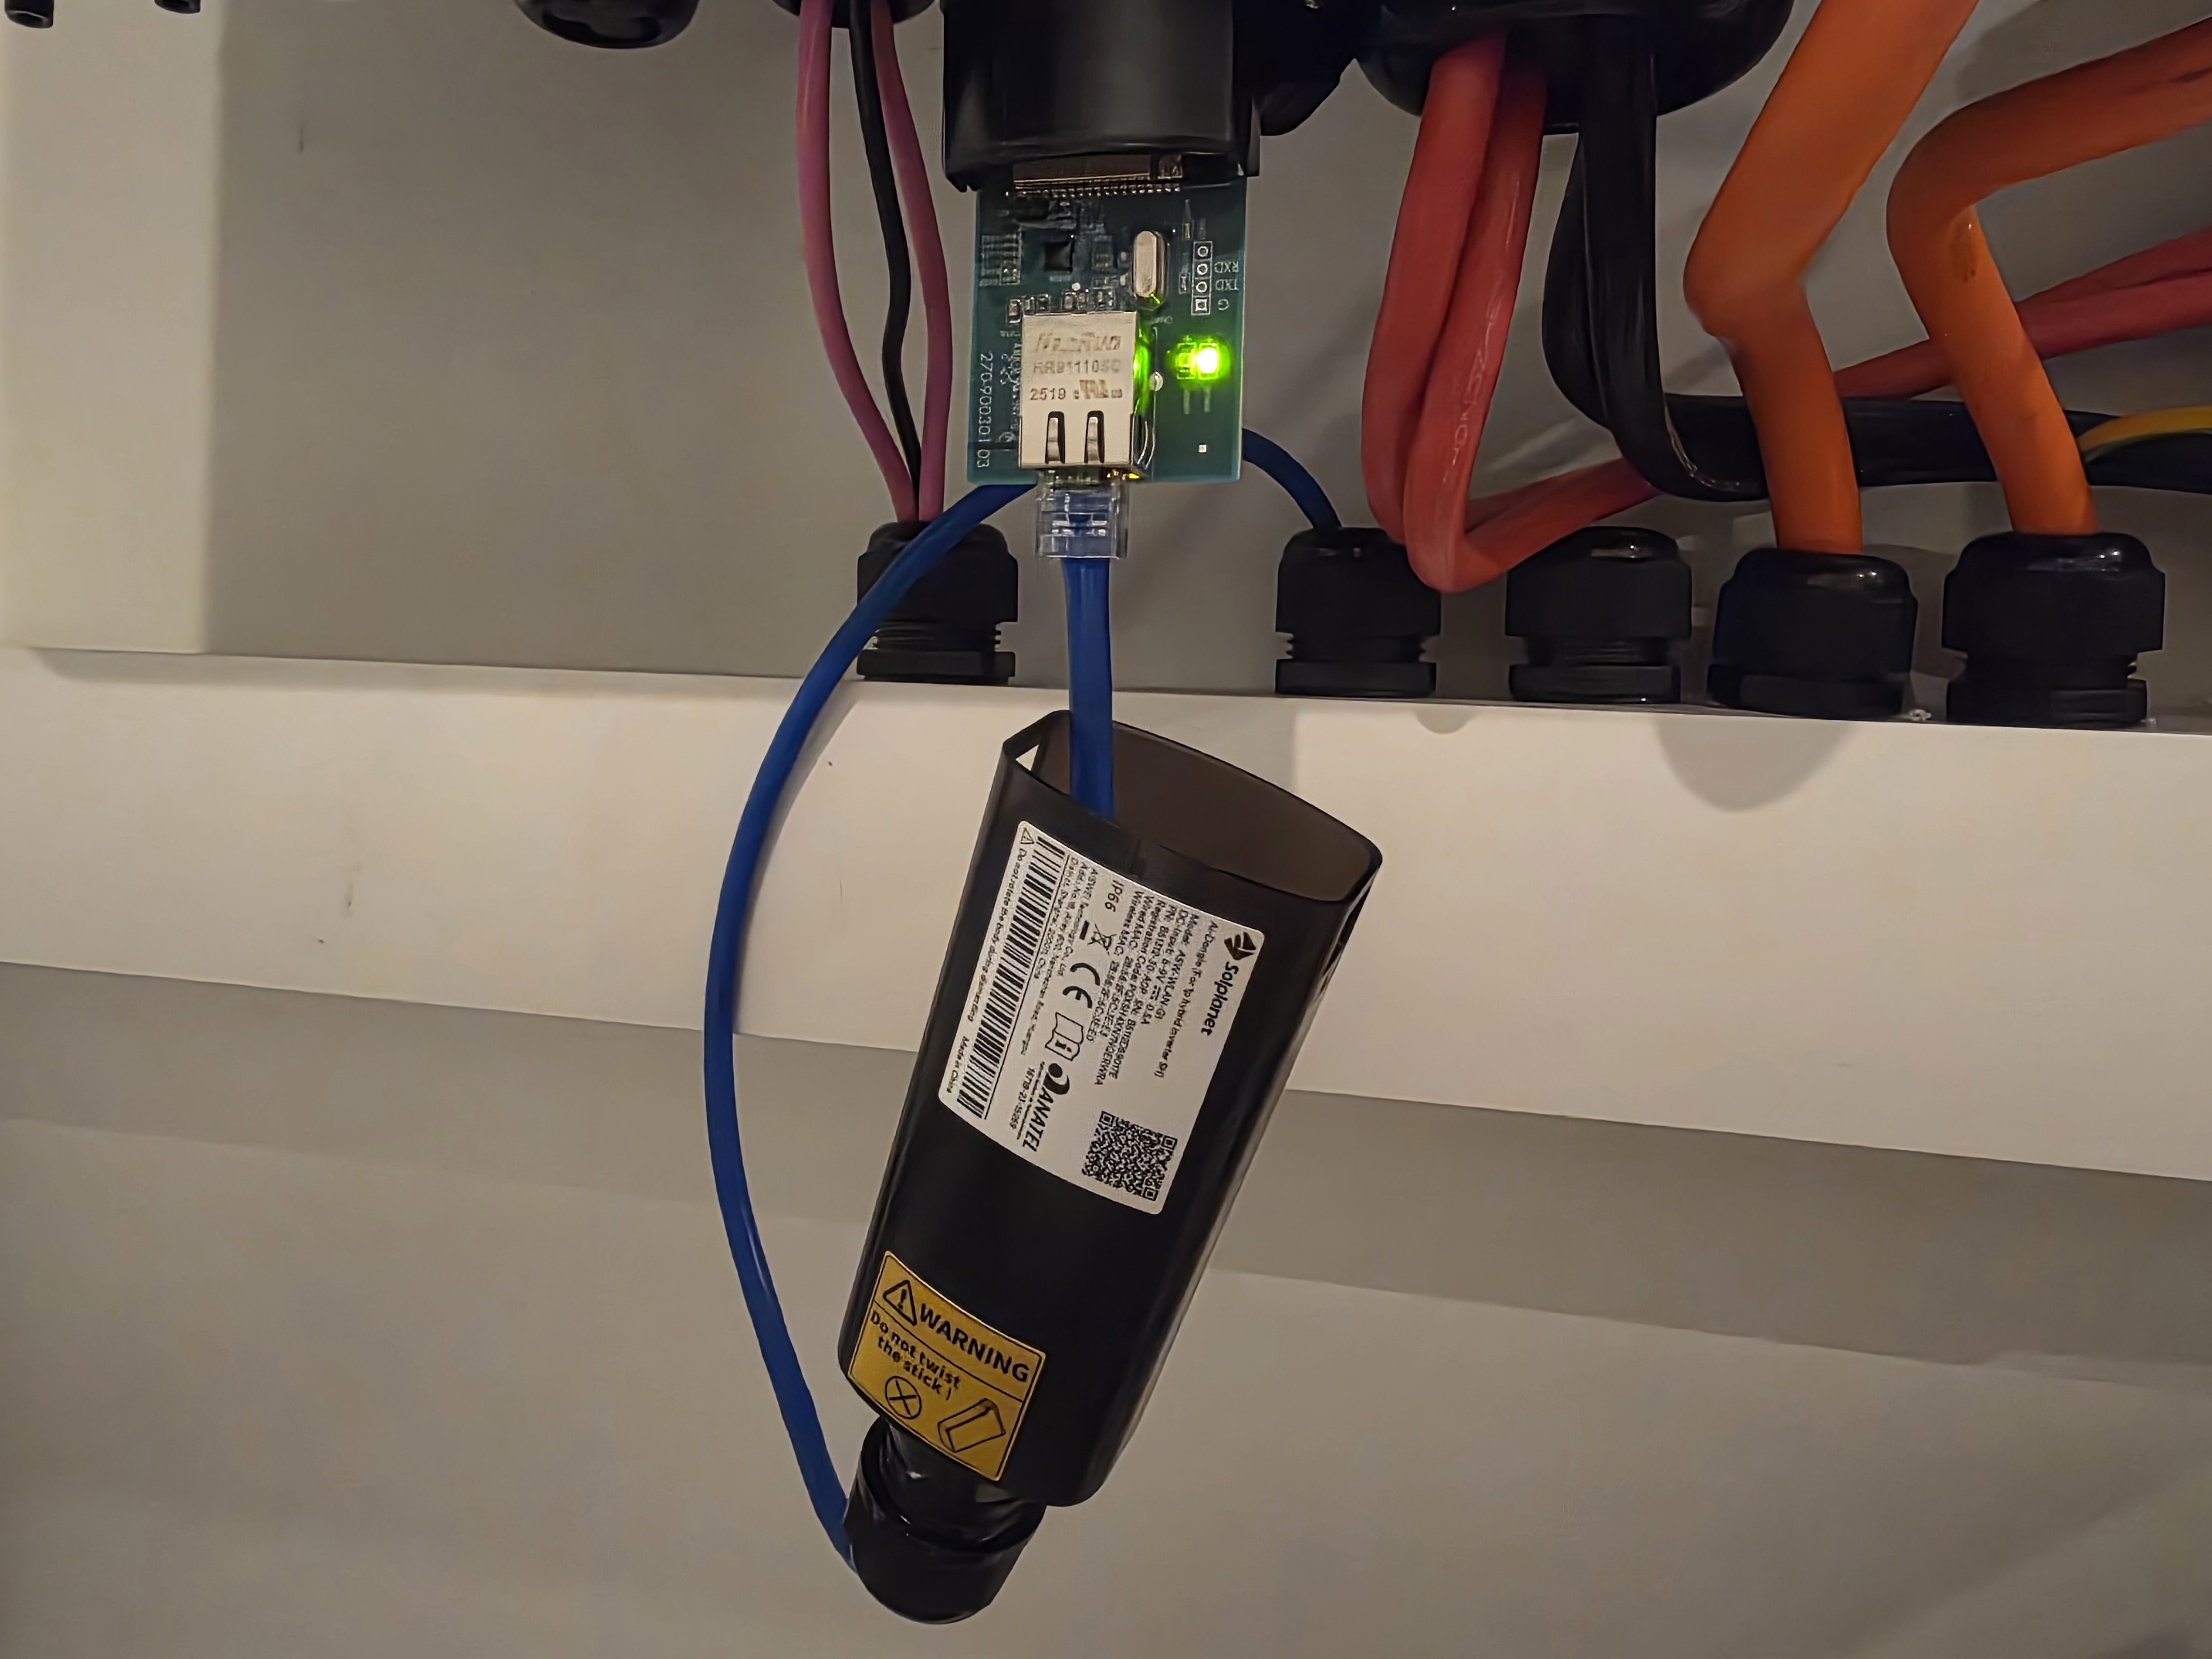
Once I plugged it into the Ethernet, the difference was obvious. Here is a ping comparison.
Wired:
64 bytes from 10.127.30.36: icmp_seq=79 ttl=254 time=1.190 ms
64 bytes from 10.127.30.36: icmp_seq=80 ttl=254 time=0.832 ms
64 bytes from 10.127.30.36: icmp_seq=81 ttl=254 time=0.845 ms
Wi-Fi:
64 bytes from 10.127.30.37: icmp_seq=76 ttl=254 time=33.908 ms
64 bytes from 10.127.30.37: icmp_seq=77 ttl=254 time=71.048 ms
64 bytes from 10.127.30.37: icmp_seq=78 ttl=254 time=89.506 ms
Meanwhile, the Ethernet port on the inverter itself appears to be locked down and does not respond to any HTTP or Modbus requests.
Another gotcha is when scanning for the dongle in the Solplanet app, it only looks at the /24 subnet the phone is in. My network is a /23, and outside of the /24 subnet the dongle is in, so I had to set a static IP on my phone.
Payback Period
As of today, the breakeven date for the battery is 22 December 2029, or about 4 years. That is a huge improvement compared to the 10+ years it used to be before the scheme, and also better than the 8-year estimate I got for a Powerwall.
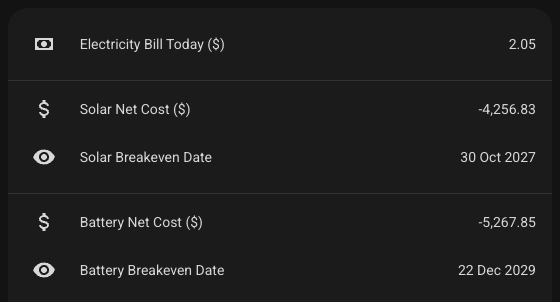
The funny dilemma is the more I use the battery each night, the quicker it pays off. Being energy-efficient and not using it does the opposite. Our behaviour has not really changed, though. We still try to run appliances like the dishwasher, washing machine, and chargers during the day when the sun is out.