Rooting a Chromecast looks easy. The method itself looks easy. But when things look easy, they're never really easy. This is what I went through to get Hubcap running on my Chromecast.
The First Chromecast
I say first Chromecast, because there were more after this. For Christmas I got a Chromecast. I had an idea to use stream from it late at night to save energy by turning off my computer.
I plugged it in and went through the setup process. I somewhat keep up to date with Chromecasts happenings so I knew I could root it and add some extra functionality but I'll thought I'd just go through the setup process first.
After the setup process it was great. I even went ahead and got a Plex server ready just for it. Plex works great too. Little disappointed the Chromecast doesn't support WPA2-Enterprise but whatever, usually nothing that's not a computer or smart device doesn't anyway.
An hour goes by screwing around with it. I thought, is this all it does? I guess it was time to look into rooting it and installing a custom rom. I went over to XDA Developers as anyone would to only find out by updating it, I've just patched the exploits. Damn (I didn't say that word). Surprising how difficult root is considering it's a Google device.
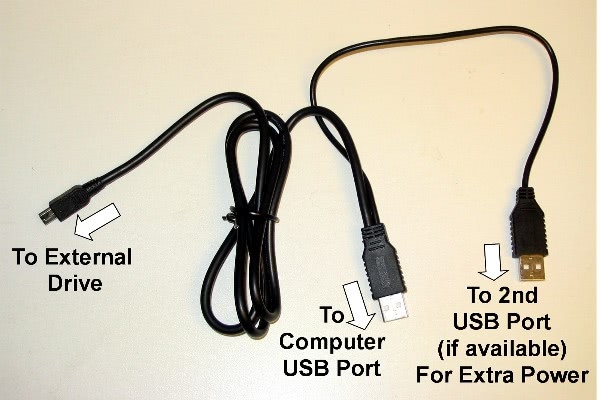
I was going to try it anyway. I got my external DVD-drive's Y cable and used that along with a Minimus I had when I used it for jailbreaking my PS3. Everything was plugged in and I was ready to press the button when suddenly...I realised it had no button. My button was actually missing.
An example of a Y cable I used:
The Second Chromecast
Lucky me I thought, because my Chromecast is defective I now get a brand new-in-box non-updated one.
The second Chromecast is identical to the first. I realised how vigilant I have to be to make sure this works correctly. I read around as much as I could and watched some videos too. A good trick was to connect to the Chromecast and visit http://192.168.255.249:8008/setup/eureka_info?options=detail where it'll give some details of it including the firmware level.
{"build_version":"15098"}But I ran into another problem. I didn't have a 'powered OTG cable', only a normal OTG cable. I put an order through eBay for one and kept trying to see what I could do.
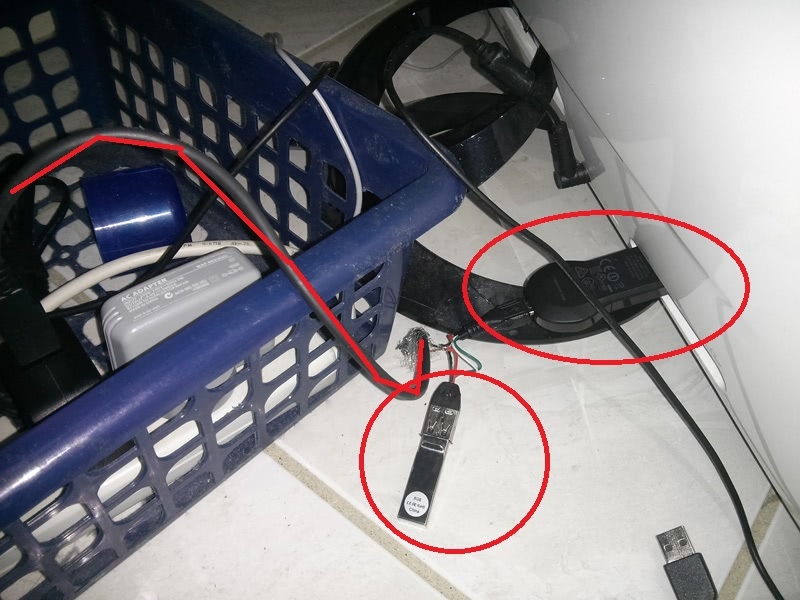
The best solution I found was to use an USB hub connected to the Chromecast:

I didn't have any unpowered hubs though, I only ever bought powered ones. I took out my Roccat Apuri USB Hub (with mouse bungee) and tried to duplicate the method.
I started by powering the hub using the Y cable because I couldn't find the hub's power adapter. My Minimus lit up. That was good. I plugged in Chromecast and suddenly everything started flashing on and off. I thought it wasn't getting enough power so I had to find that power adapter. After minutes of searching, I found my Samsung Chromebook's laptop adapter fitted perfectly.
I plugged in the laptop charger and the it was still happening, on and off like before. At that point, I realised I made a massive mistake by powering the USB hub with a laptop charger that outputs probably 4 times more power than what a USB hub could probably take... and my Minimus and Chromecast are both plugged in it!!!!!!
Needless to say, the USB hub, Minimus32 and Chomecast are all dead or not responding (but some lights up at least). This is what happens when you don't do things the proper way. It always works the proper way.
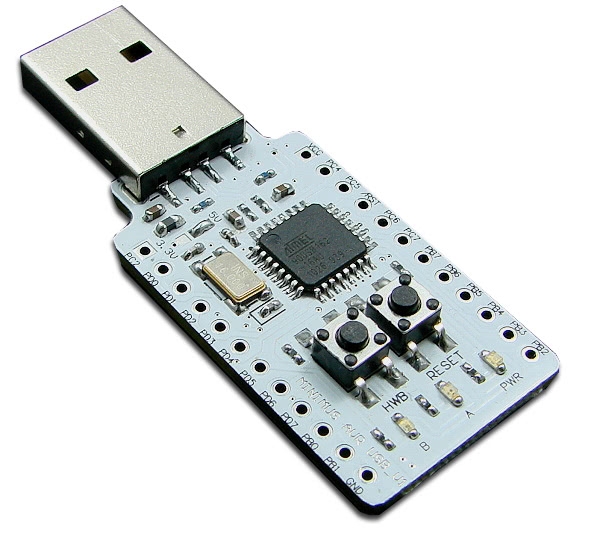
RIP Minimus:
The Third Chromecast
This time I knew I had to just wait for the powered OTG cable in the mail...but I was itching to get this done.
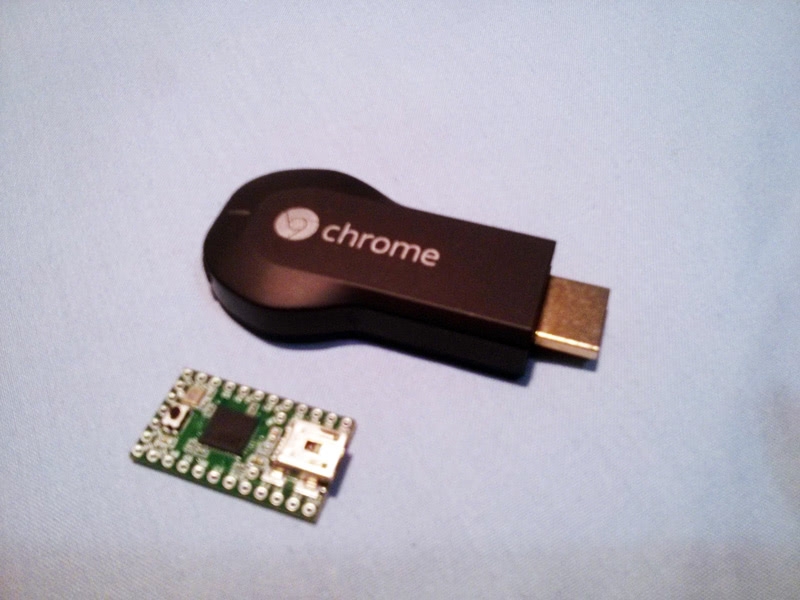
I had a normal USB hub this time and I bought a Teensy2 since the incident. I tried to repeat what I did last time in a safer way but this Chromecast was annoying!
Hacked by something smaller than itself. David vs Goliath.:
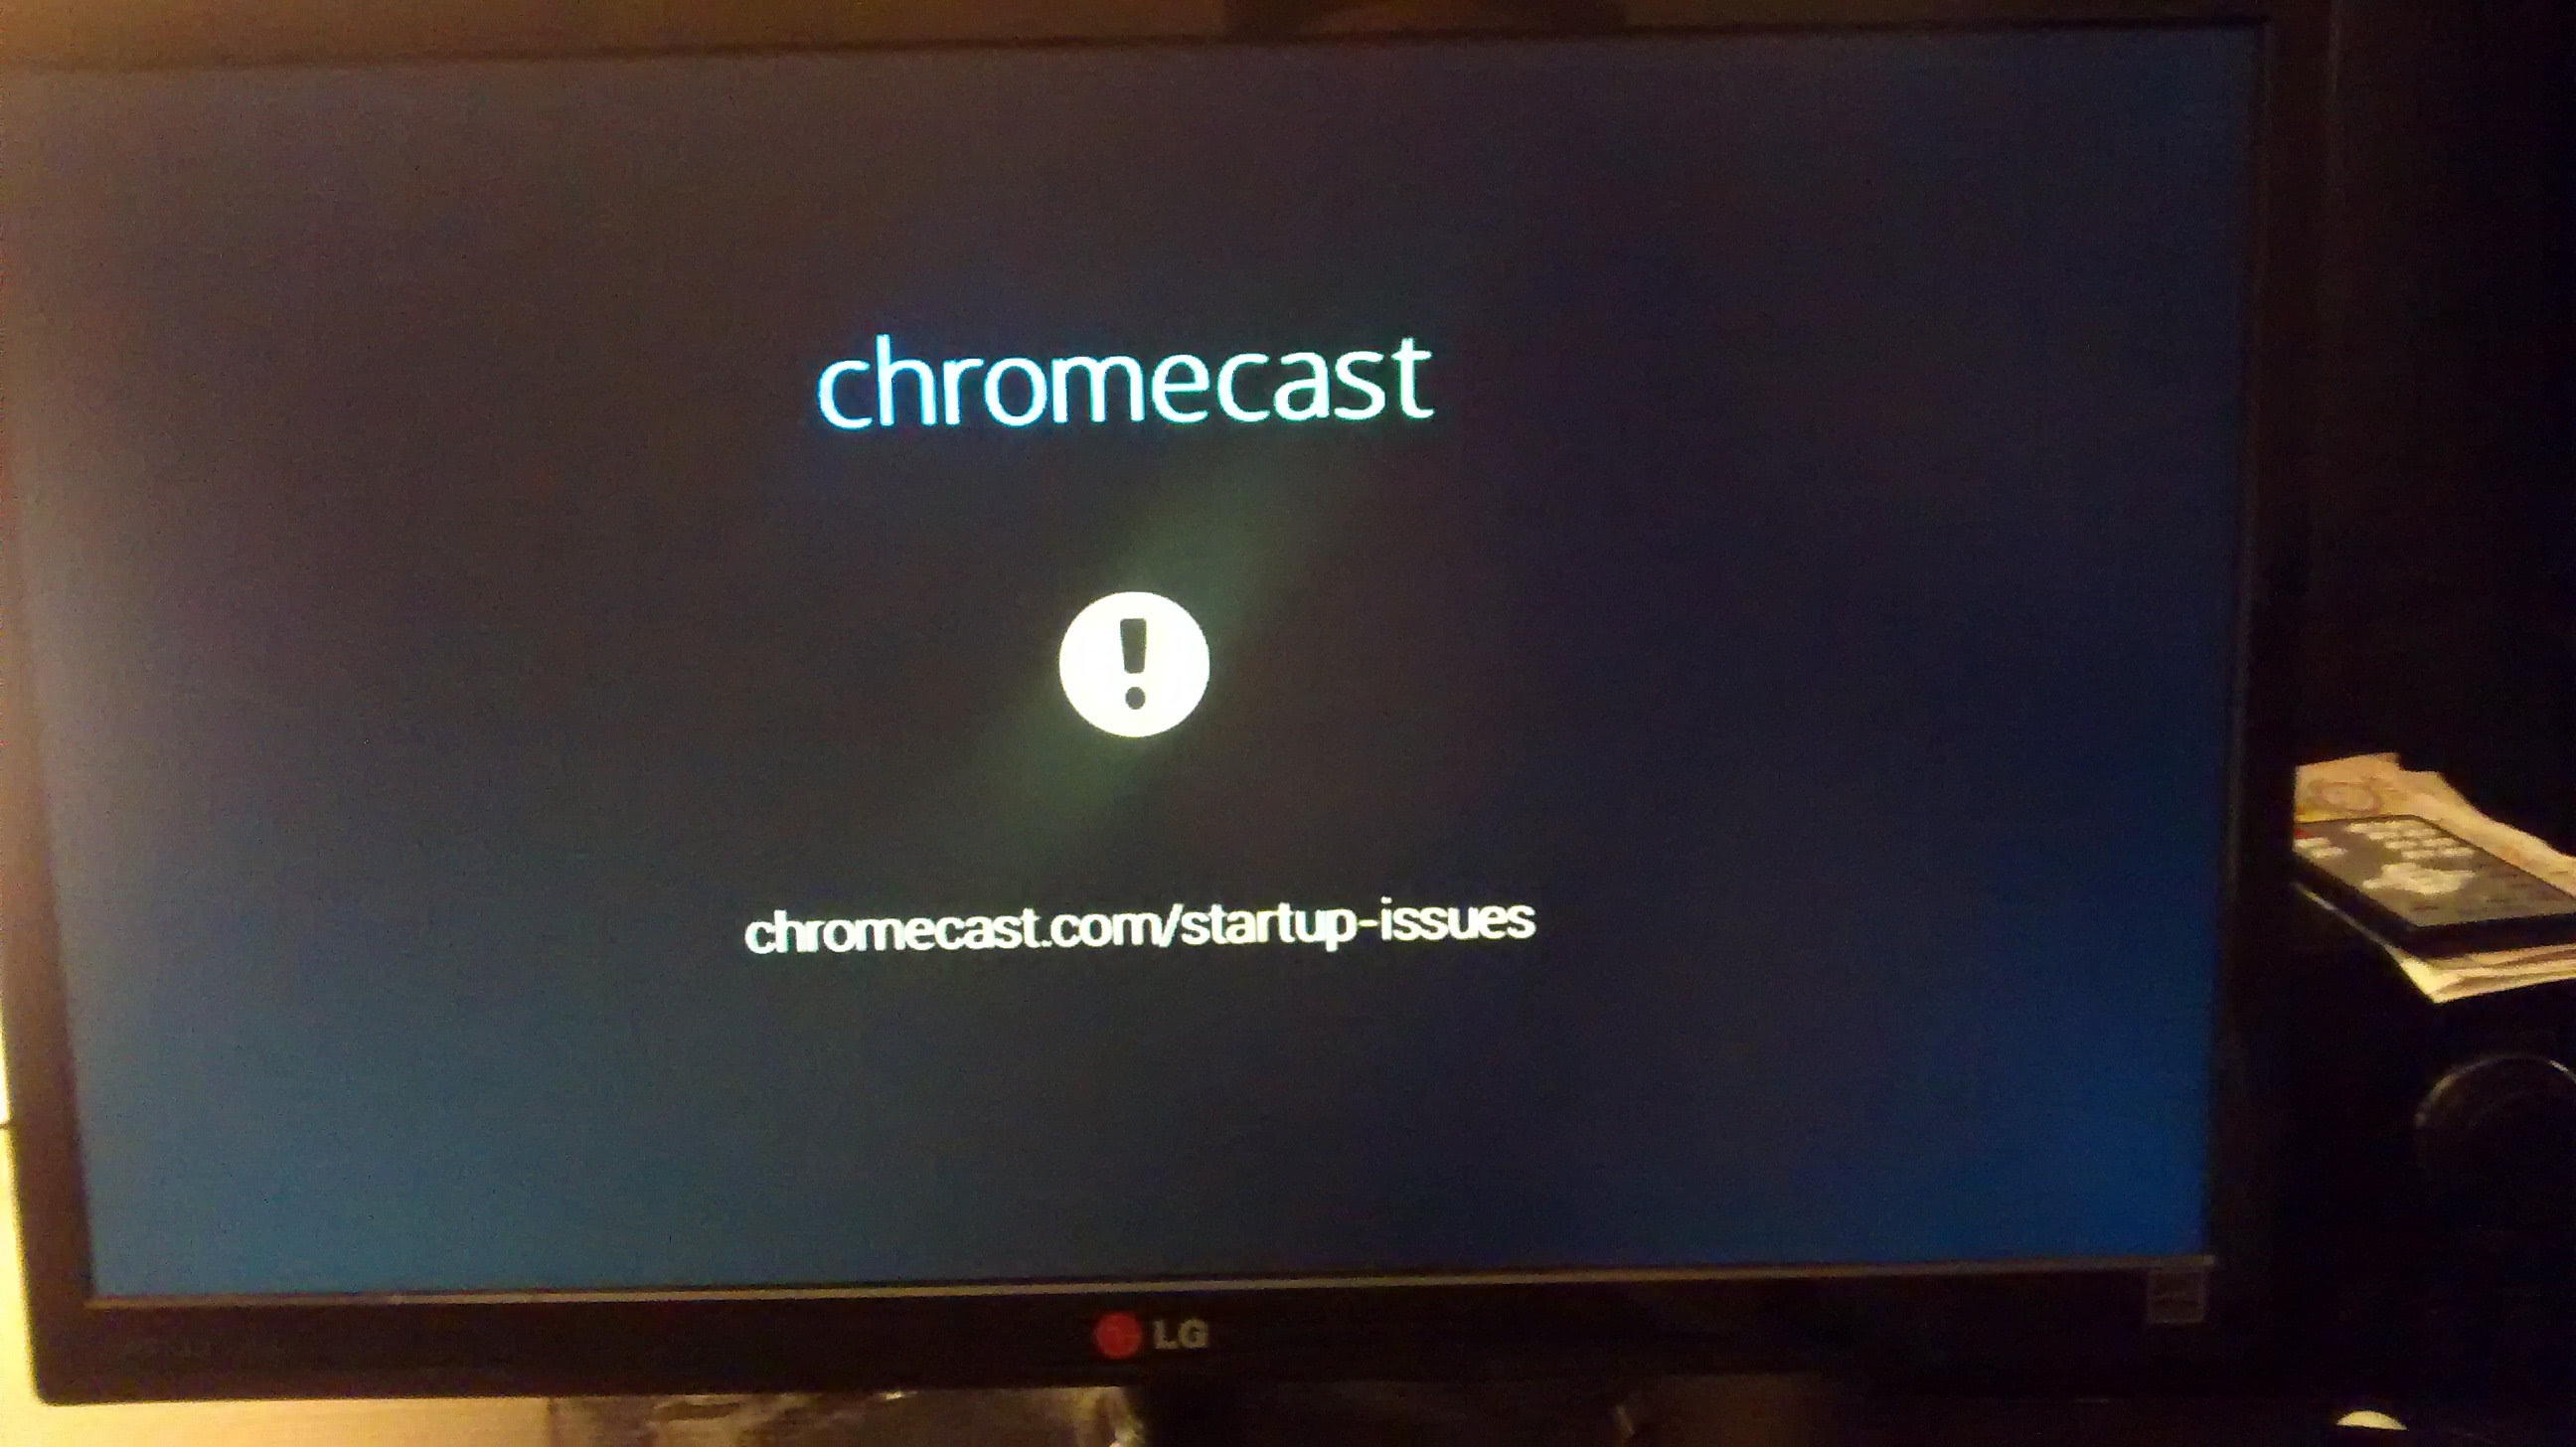
Sometimes it would flash, sometimes I wouldn't. It would work at certain power points but not others. Sometimes it only flashed if the Chromecast was plugged into a monitor as well. When it did begin working (to my relief) I realised I had used the wrong flash file because the instructions weren't updated to cater for the 15098 firmware. It was frustrating and annoying all around.
After a while I gave up, it would turn on and keep throwing me the 'Startup Issues' screen. I decided there and then I was going to make my own powered USB OTG cable.
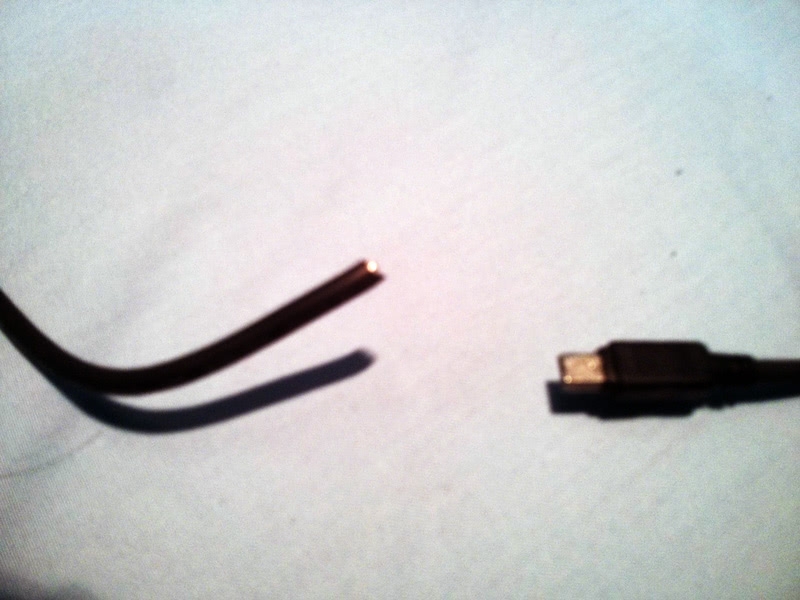
I followed a very simple guide on how to make an OTG cable. Just by soldering the black and red cables together, I could power my unpowered OTG cable. First I needed a USB Male head to power the cable. I got out a USB Mini cable and snipped it off there.
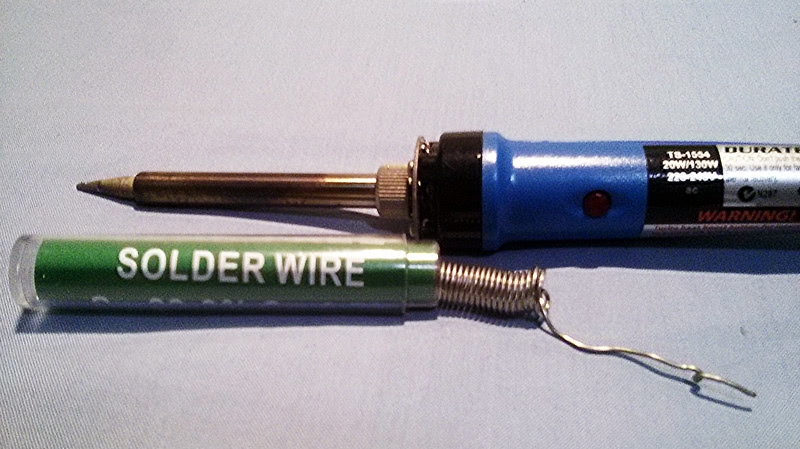
I also have a soldering iron from back in the PS3 days, iron-ically. I'm not very good with the solder but I can do basic cable modding without any clips.
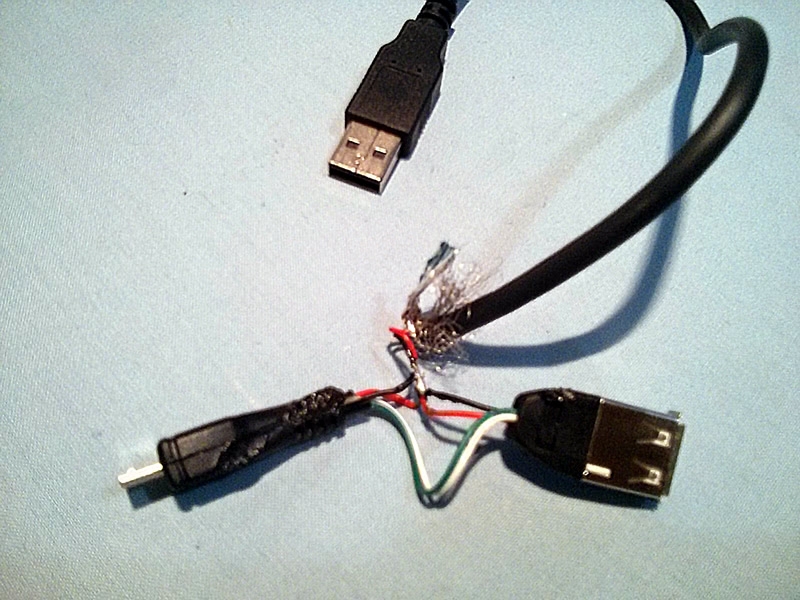
A few snips with the scissors along with peeling the cable shielding back I was able to fashion a very dodgy powered OTG cable. Plugging it in, I was delighted to see the Chromecast power on (and that the dodgy soldering worked!).
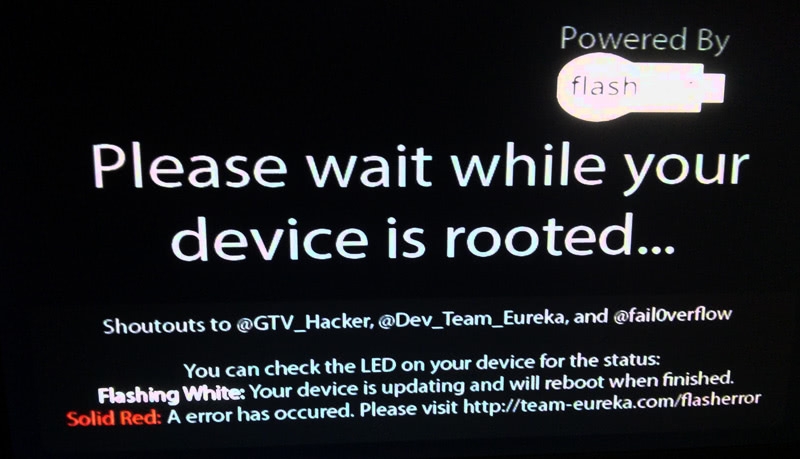
Even using the newly made cable, the Chromecast still didn't want to flash, annoyingly showing me the 'Startup Issues' screen over and over again. I thought it could've been an issue with the Teensy so I kept reflashing over and over to make sure it was perfect...and then it happened...the Teensy began flashing orange!
I carefully plugged the Chromecast into my monitor and sat back relieved.
Finally!:
The Chromecast, USB OTG and power cable:
After it was done, I checked the http://192.168.255.249:8008/setup/eureka_info?options=detail page again to find:
{"bssid":"","build_version":"17977"}SUCCESS AT LAST! Now to clean the mess I made in my room.
This is why you use your garage or basement as your workshop.: