
In Part 3 of my virtualised pfSense installation on ESXi 5.5 we will be configurating the WAN (Internet) interface and finalise our transition from our transitional router to a virtualised pfSense router. Part 1 can be found here and Part 2 can be found here.
Part 3: Configure the WAN
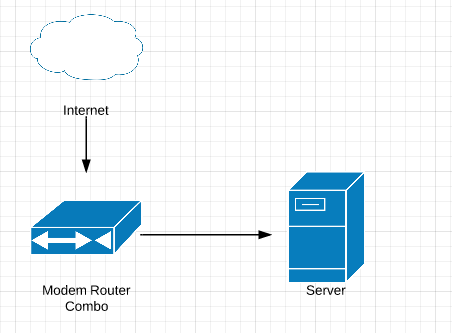
1. Connect back to your original modem/router via a cable or WiFi.
Connect your workstation (not the ESXi host with pfSense) back to your modem/router. You will be needing to change some settings on it to provide an Internet connection to pfSense without creating a 'double NAT' situation in your network.
2. Log into its web interface
Generally 192.168.0.1 or 192.168.1.1, depending on the model and brand. I have a Netgear CG3100D-2 from Telstra so it is 192.168.1.1. Check your network gateway, it is generally the address of the device (run ipconfig or ifconfig from command prompt/terminal).
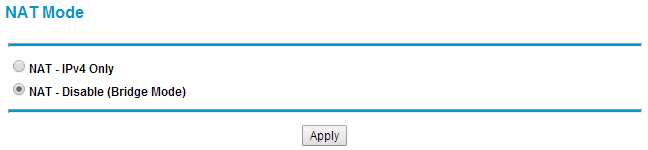
3. Activate bridge mode or disable NAT (same effect)
Find and enable the option in the web interface to disable NAT (network address translation) to turn the device into a simple modem. This activates Bridge Mode. You have have to search your device's manual to find this option and see if it supports it. Restart the device if prompted before continuing.
Disable NAT on your modem router to activate bridge mode.:
4. Log back into the device
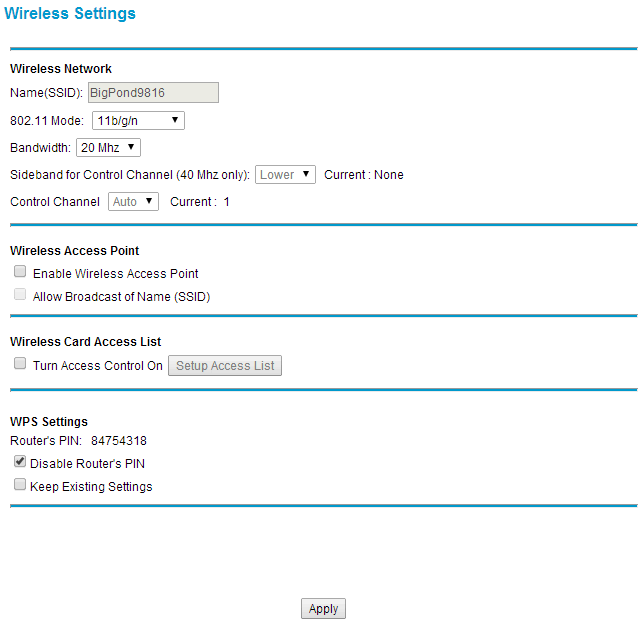
It may have a new IP address. Disable everything you will never use again on it to save some energy. For me, WiFi was still enabled so I disabled it.
Turn off WiFi on your modem router. It is almost useless when in bridge mode.:
5. Connect the WAN interface on your ESXi host
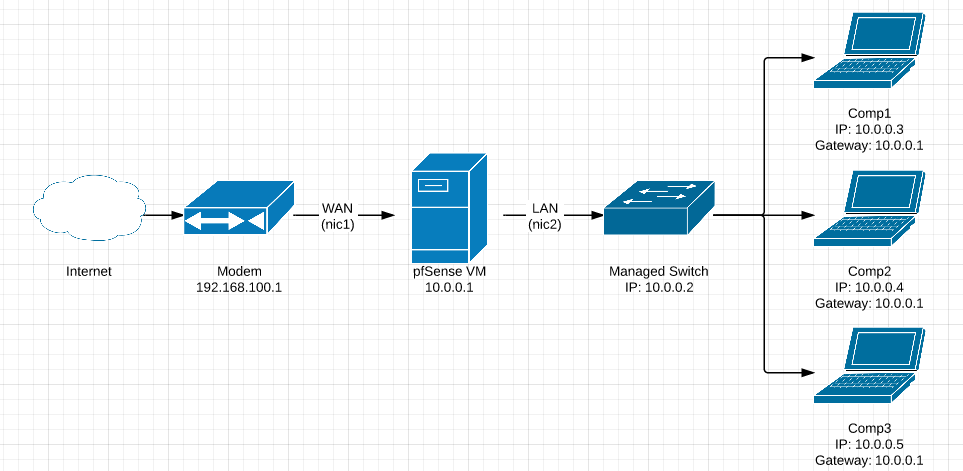
You are ready to connect the WAN port. Connect the NIC from your ESXi host into the any port on the modem. Disconnect your computer from the modem and back into the switch. Your network should look like this:
You can plug in your WAN connection now. Plug a cable from your bridged modem router to the ESXi host running pfSense. Make sure it is into the network card you have specified as your WAN:
Your network is ready. Having a switch allows you to have more LAN connections. pfSense has now become your router, firewall, DHCP and DNS server.:
If successful, you should get an Internet connection! Log back into pfSense and verify your WAN connection has an IP address. If you do not for whatever reason, go into 'Interfaces -> WAN' and give pfSense a hostname under 'DHCP client configuration'.
In Part 4, we will be wrapping up the installation with some necessities.