
I expose a few of my web services over the Internet like SABnzbd, CouchPotato and NZBDrone (now known as Sonarr). Whilst they all have HTTP authentication, they don't support multiple users. LDAP or Active Directory holds multiple user accounts, for authentication purpose. So putting two and two together, kvsp has made a NGINX LDAP module which authenticates users against your LDAP or Active Directory servers when they visit specific web pages.
To use the NGINX LDAP module, NGINX must be built from source with the module included. For this post, I will be using a fresh install of using Ubuntu 14.04.1 LTS.
Download the NGINX source
First thing's first, download the NGINX source here, the .tar.gz files are for Linux and the .zip files are for Windows. The version depends on you, but I picked the highest 'mainline' version. This is what NGINX has to say about the differences between 'stable' and 'mainline'
The mainline branch gets new features and bugfixes sooner but might introduce new bugs as well. Critical bugfixes are backported to the stable branch.In general, the stable release is recommended, but the mainline release is typically quite stable as well.More light reading can be found on the NGINX FAQ. At this time of writing, I've download NGINX 1.7.7.
Download the NGINX LDAP module
The module can be found on GitHub. I recommend doing a git clone to make updates easier. If you're new to git, you may prefer to download the module it as is. Unzip if you have to and place it somewhere you'll remember as well.
To download the module using git, first install git:
sudo apt-get install git-coreClone the repository:
git clone https://github.com/kvspb/nginx-auth-ldap.gitLater on if you need to update the module, browse into its folder and run the command:
git pullDownload the tools and pre-requisites
There are quite a few things that need to be installed for Ubuntu to be able to build NGINX.
You will definitely need build tools. Build Essential will cover most:
sudo apt-get install build-essentialSomething important that's required is the LDAP development library which allows the module to connect to an LDAP server:
sudo apt-get install libldap2-devIf you're planning on using HTTPS/SSL you will also need the OpenSSL library:
sudo apt-get install libssl-devIf you also plan on using HTTP rewrites then you will need the PCRE library. HTTP rewrites are used for URL manipulation.
sudo apt-get install libpcre3-devBuild NGINX
Untar the NGINX source you have downloaded:
tar -xvzf nginx-1.7.7.tar.gzBrowse into the source folder:
cd nginx-1.7.7I've found on Ubuntu (but not CentOS), the configure file is not executable. To make it executable:
chmod +x configureNow you will need to configure your environment for building. I ran into a few problems at the beginning as I forgot a lot of additional modules which come standard in Linux package managers like SSL (HTTPS), IPv6 and even logging. Another disadvantage are the file paths differ from a package manager installation as well as the 'sites-enabled' and 'sites-available' folder structure. I tried my best to make identical to a package manager installation as I could. This is my personal configure script:
note: please change the path of the NGINX LDAP module in the command below if it differs from mine ( --add-module=/home/$USER/nginx-auth-ldap).
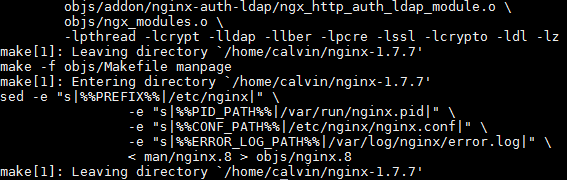
./configure --user=nginx --group=nginx --prefix=/etc/nginx --sbin-path=/usr/sbin/nginx --conf-path=/etc/nginx/nginx.conf --pid-path=/var/run/nginx.pid --lock-path=/var/run/nginx.lock --error-log-path=/var/log/nginx/error.log --http-log-path=/var/log/nginx/access.log --with-http_gzip_static_module --with-http_stub_status_module --with-http_ssl_module --with-pcre --with-file-aio --with-http_realip_module --add-module=/home/$USER/nginx-auth-ldap/ --with-ipv6 --with-debugIf it does not run successfully then there are some dependencies missing. Looking through the output and reading the error messages can determine which specific libraries are missing. The successful output will look like:

Once it runs successfully (thumbs crossed) it's time to build the system. Just this command:
make
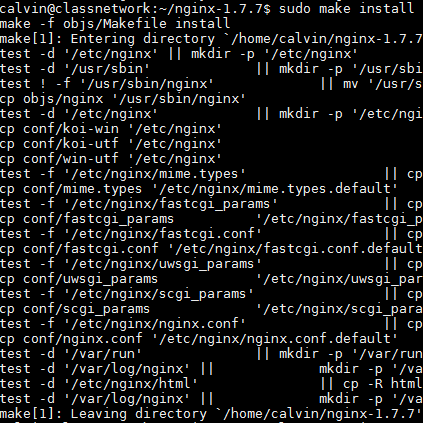
To finish it off, install NGINX with all the paths and modules we've specified.
sudo make install
Init script
The initialisation script allows you to execute 'start', 'restart', 'status' and 'stop' commands to NGINX. Jason Giedyman has a tried and true NGINX init script but I've modified for my own configuration. You may alter either if you have changed the paths differently than I have.
To install the init script:
sudo wget https://raw.githubusercontent.com/calvinbui/nginx-init-ubuntu/master/nginx -O /etc/init.d/nginxMake the file executable:
sudo chmod +x /etc/init.d/nginxMake NGINX startup at boot using upstart
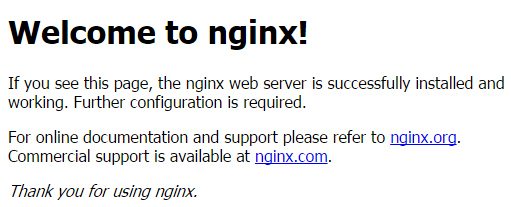
sudo update-rc.d -f nginx defaultsNow you can start NGINX but running:
sudo service nginx startBrowse to the host's IP address or FQDN to see the NGINX page:
(Optional) Package Manager Layout
This is an optional step. The idea is to change the layout to include 'sites-enabled' and 'sites-available'. This is similar to how it would appear when installing NGINX through apt-get. It is a more convenient way of managing virtual hosts but not required.
Rackspace has a perfectly good guide on this so I'll leave it for them instead. Make sure to change the paths around as necessary to '/etc/nginx/'.
Configure NGINX LDAP Module
It's finally time to actually configure the NGINX module we downloaded and built so long ago.
Open up your nginx.conf file for editing:
sudo editor /etc/nginx/nginx.confIn here you will define an LDAP server. It is possible to define multiple servers by creating multiple 'ldap_server' blocks. This is what I use to allow all users to login is:
auth_ldap_cache_enabled on;
auth_ldap_cache_expiration_time 10000;
auth_ldap_cache_size 1000;

ldap_server adds {
    url "ldaps://10.0.0.0/dc=home,dc=net?sAMAccountName?sub?";
    binddn "homenginx";
    binddn_passwd "password";
    require valid_user;
    satisfy any;
}

# 'adds' will be the module reference
# 'ldaps' as I am using SSL. the other option is 'ldap'
# '10.0.0.0' is my Active Directory IP address
# 'dc=home,dc=net' is my domain (home.net)
# 'homenginx' is my domain user. note the double slash.
# 'password' is my domain user's (nginx) password.
So put this into the nginx.conf file, here's mine!
worker_processes 1;

events {
    worker_connections 1024;
}

http
{
    include mime.types;
    default_type application/octet-stream;

    client_body_timeout 12;
    client_header_timeout 12;
    keepalive_timeout 15;
    send_timeout 10;

    gzip on;

    auth_ldap_cache_enabled on;
    auth_ldap_cache_expiration_time 10000;
    auth_ldap_cache_size 1000;

    ldap_server adds {
         url "ldaps://10.0.0.0/dc=home,dc=net?sAMAccountName?sub?";
         binddn "homenginx";
         binddn_passwd "password";
         require valid_user;
         satisfy any;
    }

    server
    {
        ....
    }
}
Now that it's in place, you can apply it under different 'location' blocks. You will need an 'auth_ldap' which displays the message to be shown and the 'auth_ldap_servers' which is the server to authenticate against:
location / {
    # message shown when accessing this location
    auth_ldap "Enter AD credentials e.g. 'calvin'";
    # LDAP block 'adds' I defined earlier
    auth_ldap_servers adds;
    root   html;
    index  index.html index.htm;
}
Restart NGINX when done
sudo service nginx restartNow access the page again and if successful you will be prompted to login!

We're done! For extra configurations have a read through the nginx ldap module documentation.
Resources
- http://www.rackspace.com/knowledge_center/article/ubuntu-and-debian-installing-nginx-from-source
- http://wiki.nginx.org/Install#Building_Nginx_From_Source
- http://demongin.org/
- http://www.allgoodbits.org/articles/view/29
- https://github.com/JasonGiedymin/nginx-init-ubuntu
- https://github.com/kvspb/nginx-auth-ldap