
Create a RAID1 (mirroring) array and install Ubuntu 18.04 onto it.
The reason for this post is I haven't been able to find a guide for using mdadm in the Ubuntu Live server installer to create a RAID1 partition. Following this, there are also no guides on installing the GRUB bootloader to both GPT partitioned devices afterwards.
Install Ubuntu with software RAID (mdadm)
For the installation, I'm using the Live server installer for Ubuntu Server 18.04.3. It has less problems running from a USB.
Proceed through the installer until you get to Filesystem setup. At this point, choose the Manual option:

Delete all partitions on both drives you will be using for RAID1:

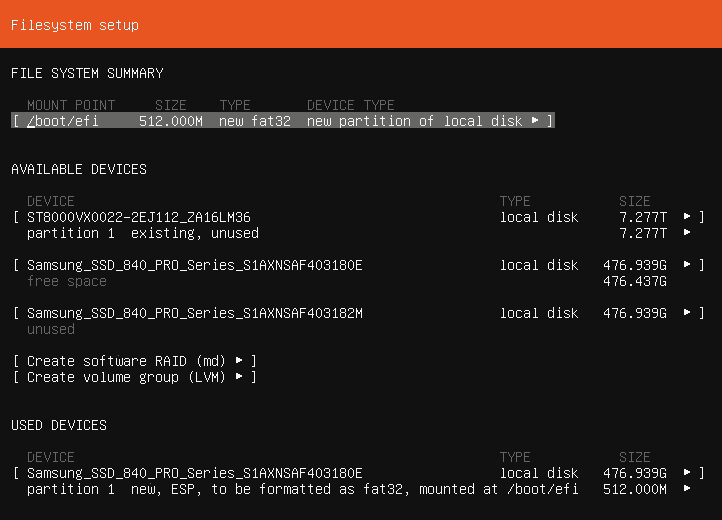
Select a device and choose to Make Boot Device.
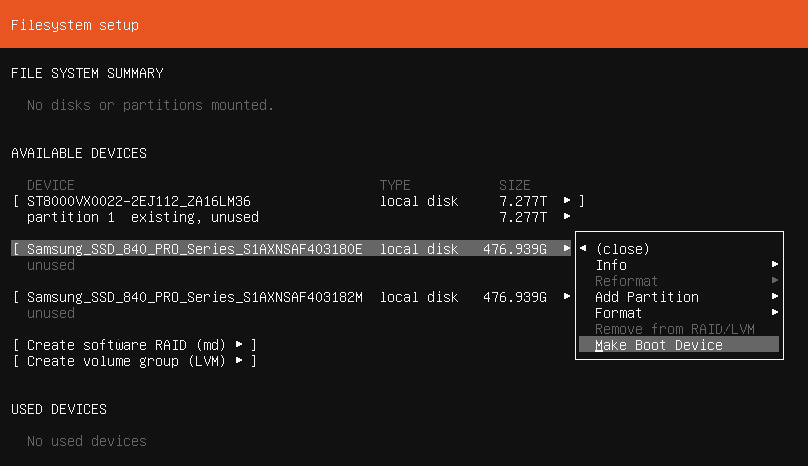
A Boot partition will appear
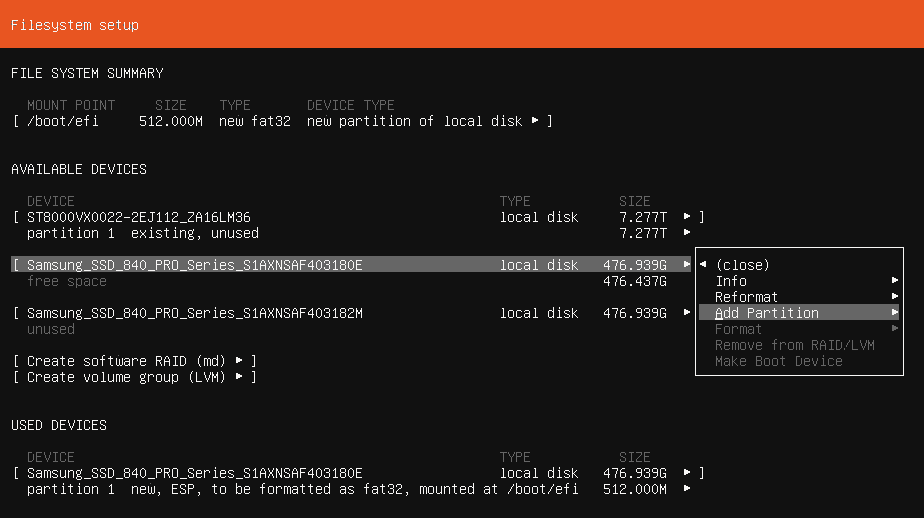
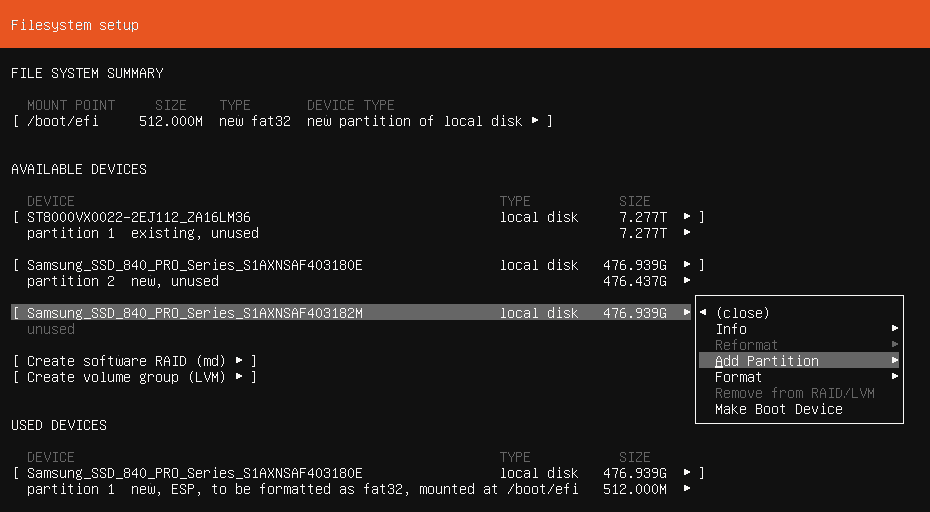
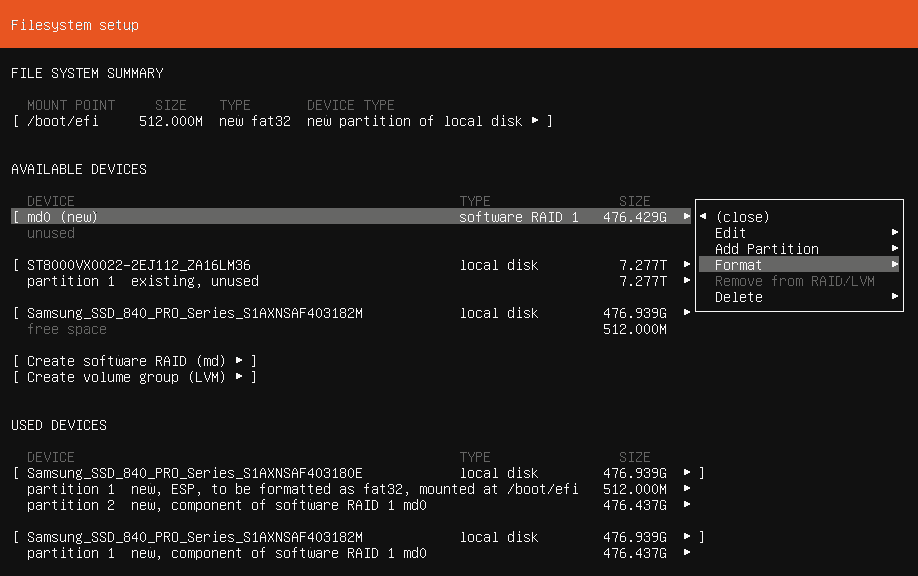
Select the same device as before and choose to Add Partition:
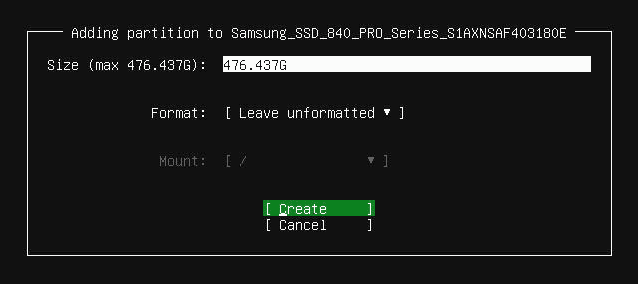
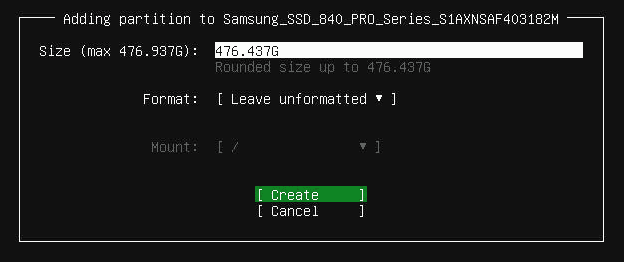
Enter the size you wish to use and leave the drive unformatted. I chose to use the entire drive. Make note of the size:
Select the secondary device and choose to Add Partition:
Enter the same size you used for the first device and also leave this drive unformatted.
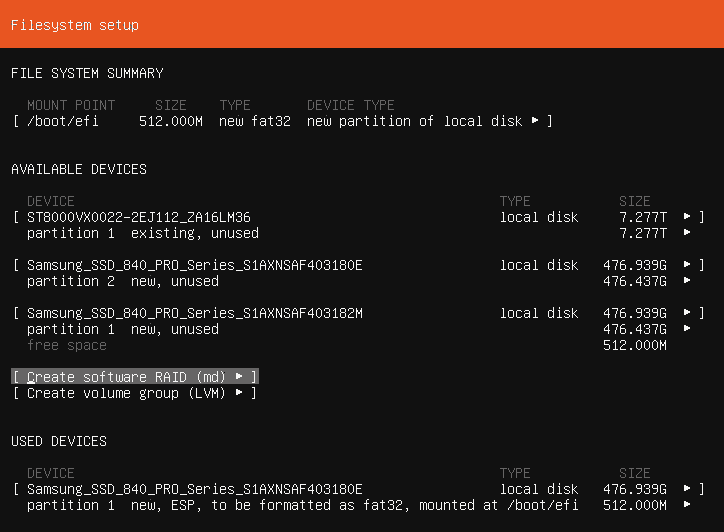
Select the [ Create software RAID (md) ] option
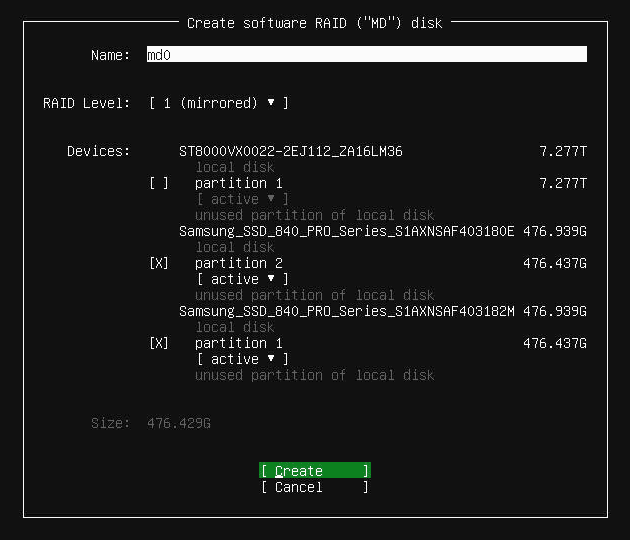
Select RAID1 and then both partitions you have created using the <SPACEBAR> and choose [ Create ] when finished:
Select the new RAID device md0 and choose to the Format option:
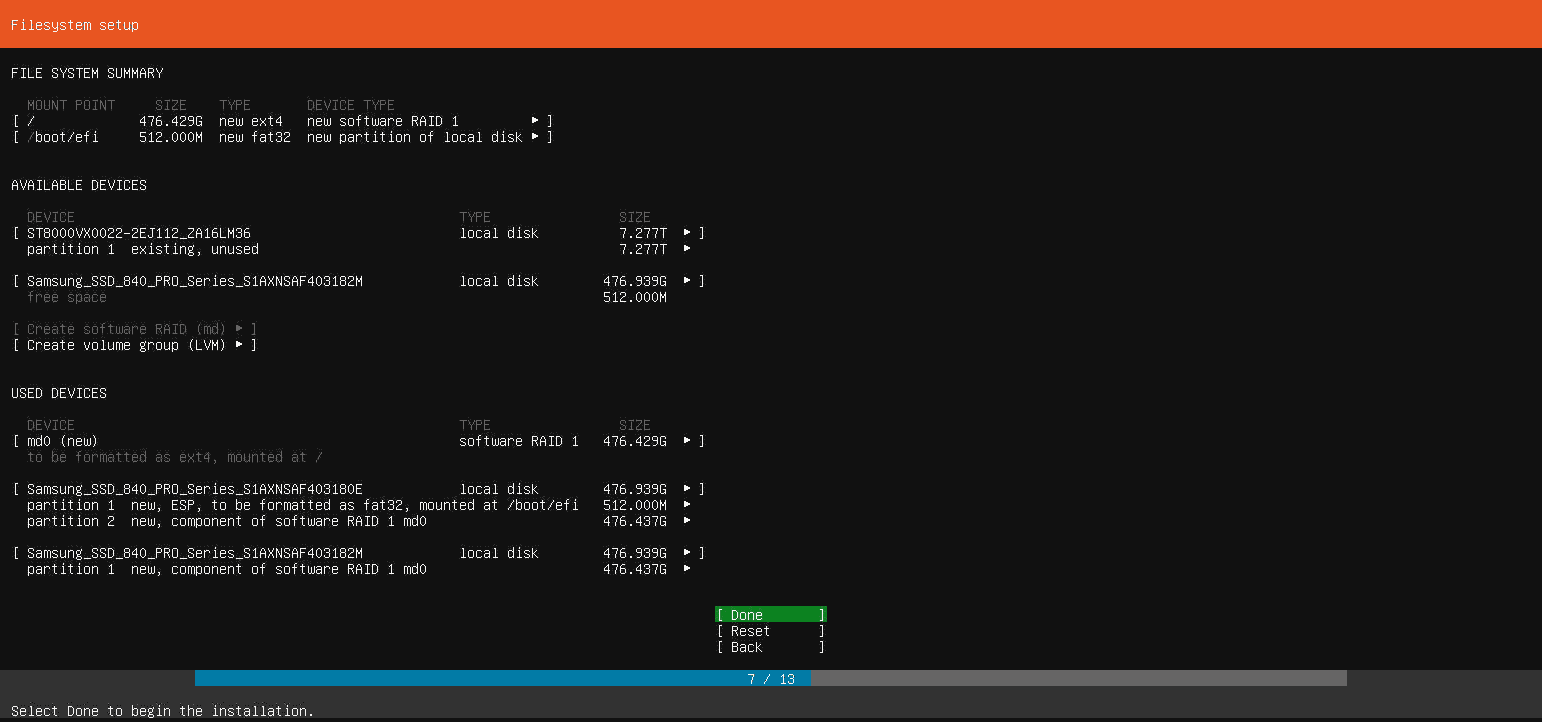
Set the format as ext4 and choose to mount it at /:

Select [ Done ] at the bottom to continue the installation:
If you run into any errors, the Live server installer will fail to 'probe devices' during a reinstall. To fix this, follow this guide from DigitalOcean for resetting existing RAID devices.
Create a Boot Partition on the secondary device
Run lsblk to see the partitions you have:
$ lsblk
NAME    MAJ:MIN RM   SIZE RO TYPE  MOUNTPOINT
sda       8:0    0   477G  0 disk
├─sda1    8:1    0   477G  0 part
│ └─md0   9:0    0 476.8G  0 raid1 /
└─sda2    8:2    0     1M  0 part
sdb       8:16   0   477G  0 disk
└─sdb1    8:17   0   477G  0 part
  └─md0   9:0    0 476.8G  0 raid1 /
You can see that the secondary device (sdb) does not have a 1M partition as we did not create a Boot Device on it. Running parted or fdisk can also confirm this. Here is the parted output:
$ parted /dev/sda print
...
Number  Start   End    Size    File system  Name                 Flags
 1      1049kB  512GB  512GB
 2      512GB   512GB  1049kB               BIOS boot partition  bios_grub

$ parted /dev/sdb print
...
Number  Start   End    Size    File system  Name  Flags
 1      1049kB  512GB  512GB
And here is the fdisk output:
$ fdisk -l /dev/sda
...
Device          Start        End    Sectors  Size Type
/dev/sda1        2048 1000210431 1000208384  477G Linux filesystem
/dev/sda2  1000210432 1000212479       2048    1M BIOS boot

$ fdisk -l /dev/sdb
...
Device          Start        End    Sectors  Size Type
/dev/sdb1        2048 1000212479 1000210432  477G Linux filesystem
The tool we will use this fix this is gdisk, short for GPT fdisk.
Run gdisk on the primary device to see the partition table:
$ gdisk -l /dev/sda
...
Number  Start (sector)    End (sector)  Size       Code  Name
   1            2048      1000210431   476.9 GiB   8300
   2      1000210432      1000212479   1024.0 KiB  EF02
This tells us two important details we will need to create the same partition on the secondary device:
- The GRUB partition size is
1024.0 KiB - The GRUB partition is of type
EF02
Run gdisk on the secondary device:
gdisk /dev/sdbEnter the following to create a new partition:
Command (? for help): n
Partition number (2-128, default 2): 2
First sector (34-1000215182, default = 1000212480) or {+-}size{KMGTP}:
Last sector (1000212480-1000215182, default = 1000215182) or {+-}size{KMGTP}: +1024K
Current type is 'Linux filesystem'
Hex code or GUID (L to show codes, Enter = 8300): EF02
This creates the boot partition:
- sets the partition table to
2 - sets the start sector to be end of the partition table
1(empty = default) - sets the last sector to be
1024 KiBfrom the start sector (as we found out before) - sets the GUID to
EF02which is short-hand for a BIOS Boot Partition
Finally enter w and accept the changes to create the partition table using gdisk:
Command (? for help): w

Final checks complete. About to write GPT data. THIS WILL OVERWRITE EXISTING
PARTITIONS!!

Do you want to proceed? (Y/N): Y
OK; writing new GUID partition table (GPT) to /dev/sdb.
Warning: The kernel is still using the old partition table.
The new table will be used at the next reboot or after you
run partprobe(8) or kpartx(8)
The operation has completed successfully.
As noted by gdisk, you have to run partprobe or kpartx to let the kernel use the new partition tables:
partprobeInstall GRUB to the secondary device
Now that the partition is created, run grub-install to install GRUB to the secondary device:
grub-install /dev/sdb
Installing for i386-pc platform.
Installation finished. No error reported.
Reboot and attempt to boot both the primary and secondary devices!