
This post covers some of my home security camera system. Not a lot of information is shared for obvious reasons, but enough to show its capabilities and configuration.
Cameras
Hikvision DS-2CD2335-I:
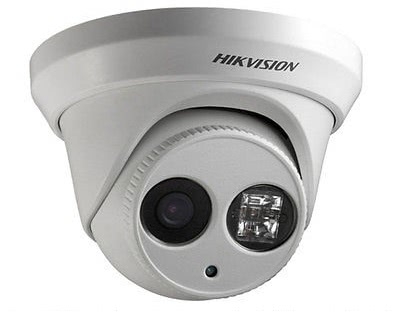
For the most important part of this system, the cameras, I went with the Hikvision 2CD2335 - the successor to the popular and highly recommended Hikvision 2CD2332. Not much has changed between the two, with 25 fps vs 20 fps at 3MP (2048x1536) and H.265 as standouts. PoE (power and data in one cable) comes as standard on the camera but there is a power port if necessary. The camera can be manually rotated and locked into place with a screw.
I ordered two with a 2.8mm lens (narrow) and two with 4mm lens (wider). Two cameras came with firmware 5.3.6 and two with 5.4.0.
The seller was XinRay who is a reputable seller on Aliexpress but also have their own eBay store. A flood had struck their warehouse and it took over a month for the cameras to arrive, however, they made up for it with express shipping from DHL.

PoE Switch
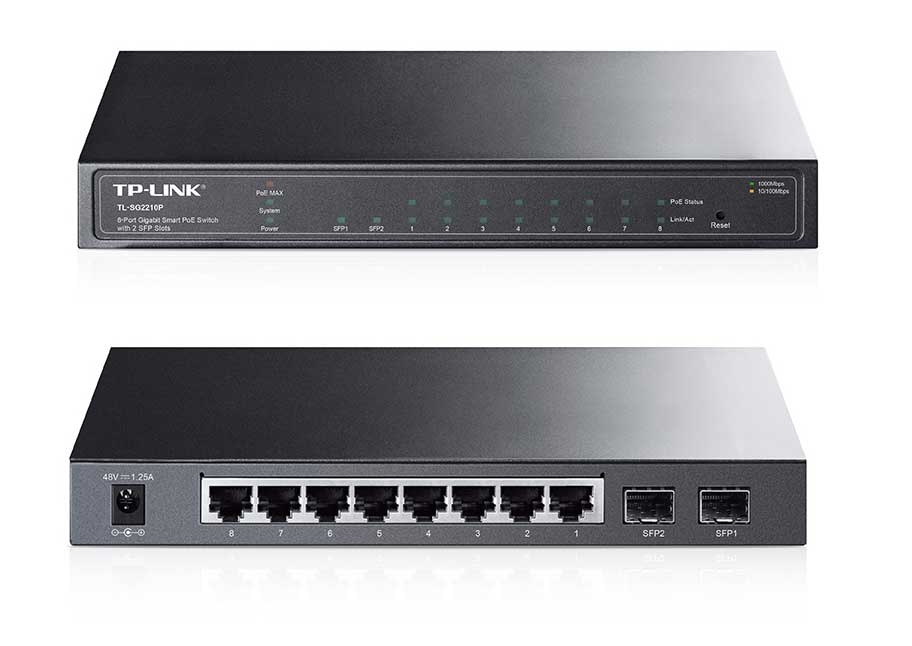
I went with the TP-Link TL-SG2210P to power the cameras (using PoE) and provide networking. It is an 8-Port gigabit switch with 2 SFP Slots for a theoretical maximum of 7 cameras as one port is a dedicated connection back to the network. I could not find any similarly priced alternative with 8 PoE ports. It uses the 802.3af PoE standard and is rated up to 53W however each camera only consumes 3W. Head over to the TP-Link's website for more details.
Along with the PoE switch, I ordered a couple of 30M CAT6 RJ45 cables for wiring.
I connected the switch to my UPS system for when an intruder decides to turn off the power before coming in.
Video Management System - Milestone XProtect Essential
EDIT: 16/10/16: Milestone XProtect Essential is now free! An upgrade over XProtect Go
Software (Video Management System) must be used for recording actual footage unless the camera has its own storage (e.g. microSD card) or network storage (NFS/CIFS/SMB). The alternative is to buy an NVR which is a self-contained recording system (an appliance) which the cameras and hard drives plug into. As I already had my own storage and wanted more flexibility, I went did not go down this route.
After trialling a few programs including Blue Iris, Hikvision iVMS-4200 and Genius Vision, I went with Milestone XProtect Go. Go is the free version of their market-leading XProtect video management software.
Comparison with other VMS
The limitations of the Go version are:
- 5 days of recording: small, but considering the amount of hard drive space required for 3MP @ 15fps, it would be similar to what I would have had with an unlimited amount of days.
- 8 cameras max: this is okay for now with only 4 cameras. My theoretical maximum being 7 cameras (1 port on the PoE switch is to connect back to the server)
- No motion detection/alerts: built-in motion detection and alerts on the camera itself can overcome with . I will be recording 24/7 so having the cameras only record when it senses motion is not important.
- Popups when starting the Smart Client: easily closed.
- Logo on video exports: The logo is quite big and sits in the bottom right corner. It doesn't appear on playback and live previews however.
The benefits I found of XProtect Go over other Blue Iris, iVMS and Genius Vision are:
- Free program (renew it every year) compared to $80 for Blue Iris.
- Free desktop client separate from the server. All apps tested do not have this feature
- Free mobile apps that are really polished. The Blue Iris app costs $15 and looks like it was released 5 years ago. iVMS also has a good-looking app.
- Accessible through a web interface. Blue Iris has this but it is limited and really ugly.
- Good CPU performance. Blue Iris was chewing up 80% of CPU while XProtect is only at ~10%
The main selling point to me was how good the mobile apps were. This system isn't just for me to use, I'm sure my relatives would like to check in once in a while.
A full comparison of this product and other Milestone XProtect products can be found here, along with the aforementioned limitations.
Camera Configuration
For editing multiple cameras at once, I recommend using HikVision's Batch Configuration Tool. It's better to just configure one manually through its web interface then copy it onto the other devices (take care of network settings if using a static IP).
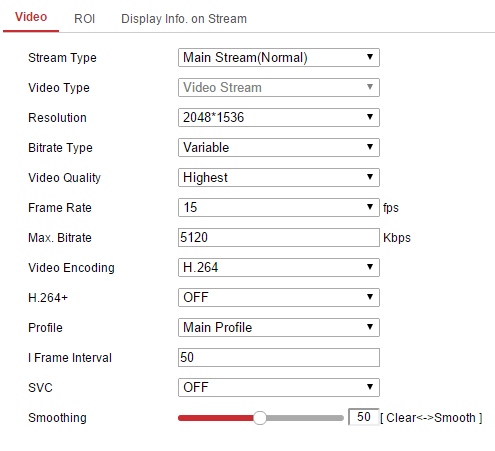
For my video settings I went with 15 fps @ 2048*1536 (3MP), 5120 Kbps variable bitrate, H.264 and Video Quality at Highest.
The FPS sweet spot in a recording is 15 fps. This video shows and explains it well. Not much is lost between 25/30fps and 15fps and it would likely catch fast hand movements when going back and pausing at a specific frame. Even 7fps is pretty good if tight on storage, everything you need to see is still captured although a little choppy. As long as the resolution is high enough, most details will be picked up.
The correct bitrate settings (video quality) are based on Hikvision's very own recommendations (3MP @ 15fps):

I could not get H.264+ or H.265 working with Milestone or Blue Iris. I suspect iVMS should support it. The difference would be minimal, however (3 Mb/s vs 1 Mb/s on a 1 Gb/s capable switch).
With four cameras recording 24/7, this has equated to around 1.4TB of storage over the 5-day retention limit of XProtect Go.
VMS Configuration
Once the cameras are configured, I set up Milestone XProtect Go on a Windows 10 LTSB virtual machine with 4 CPU cores and 2GB of memory. The setup was straightforward and went without a hitch. The setup wizards are easy to follow and guided me through connecting the cameras, specifying the recording and archiving path; and finally user access.
As most of the configuration is done on the cameras, there isn't much to do in terms of configuring the VMS. It simply takes footage from the cameras and saves it onto your hard drives.
If I did not use a VMS for whatever purpose, the cameras are still able to record to a network drive using CIFS/SMB or NFS. The disadvantage of this, however, is the ability to playback all cameras at once in a single video, having to manually delete old footage and change storage limits as new cameras are added & having simplified access to all cameras through one portal (web client, mobile app). While there are workarounds to this and a lot of fiddling around, I don't see it as a bad alternative at all if someone couldn't spare a computer for whatever reason.
Motion Detection Screen Captures
Milestone Go does not feature any motion detection/alert notifications. This is a paid feature for their other products. Having images saved to the cloud when there was motion detected was a must-have feature as I felt an intruder could simply smash/steal the cameras and computer with all the footage on it.
The workaround I used to overcome this was to use the built-in motion detection feature found in the cameras along with its FTP feature to upload them to Microsoft OneDrive.
Microsoft OneDrive
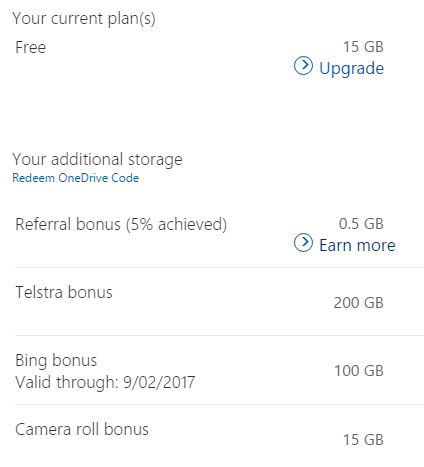
As I already had a Windows PC running the VMS, I installed Microsoft OneDrive on it. As I already signed up a while back I had 15GB (new users only receive 5GB) as well as 15GB of Camera Roll Bonus (uploading photos). I could further increase this number by referring others (or just myself a 20 times) to get another 10GB. This is 40GB of OneDrive storage which is around 300,000 possible motion detection photos, as each is anywhere from 100kB-150kB.
With that in mind, I made a script (.bat file) which would just delete anything older than 30 days. Windows Task Scheduler runs it once daily . The photos would also be deleted on OneDrive as they are located in its folder.
forfiles /P "C:PathGoesHere" /S /D -30 /C "cmd /c del /q @path"A script that deletes photos after the folder reaches a certain size or amount of files is inefficient as the intruder could stick something in front of the camera for a couple of hours to overwrite previous footage.
Of course, you can also use any other cloud storage solution you have lying around. I primarily use Dropbox (35.85GB) day-to-day so did not want to take up space there. Google Drive (19GB) connects to my Gmail storage so I didn’t want to mess with that either.
FTP Server
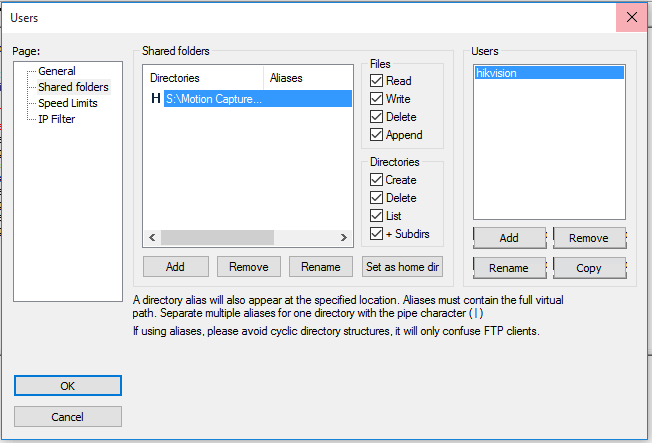
I used Filezilla as my FTP server running on the VMS server. Setup is straightforward, create a new user and specify the directories on the computer they can access and what permissions they have. I would recommend turning off any limits to ensure the cameras can connect to the FTP server without any issues.
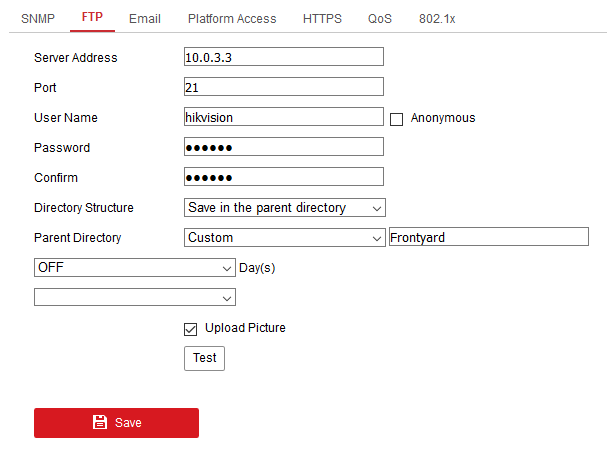
The camera’s FTP configuration can be found under ‘Configuration > Network > Advanced Settings > FTP’. There are fields to specify the server, port, username, password and the option to save in different directories to sort out each camera.
Motion Detection / Intrusion Detection
I found the basic motion detection to trip on almost anything even with the lowest possible sensitively. Instead, I used the Intrusion Detection Feature under 'Event > Smart Event'. Select the entire area or draw the areas to sense motion detection and then choose 'Upload to FTP' under Linkage Method.
Network Configuration
Now that everything's set up and should be humming along, I tackled remote/internet access.
The ports that you need to forward (but you can change) are:
- 80 - The server itself (I changed it to 81)
- 8081 - HTTP (insecure) web and mobile connection
- 8082 - HTTPS (secure) web and mobile connection
Milestone NGINX Proxy Configuration
If by chance you are like me and perhaps you're running other web servers at home, here's a working NGINX Proxy configuration. I found other configurations would allow the mobile apps to work but the web interface would show cameras as unavailable. Using a proxy also meant I didn't have to put in the port numbers (8081, 8082) when accessing the web interface.
server {
listen 80;
listen 8081;
server_name xxxx;
root /var/www/nvr/.well-known;
location / {
proxy_pass http://vms-dmz:8081;
proxy_buffering off;
proxy_http_version 1.1;
proxy_set_header Upgrade $http_upgrade;
proxy_set_header Connection "upgrade";
proxy_set_header Host $host;
proxy_set_header X-Forwarded-Proto $scheme;
proxy_set_header X-Forwarded-For $remote_addr;
proxy_set_header X-Forwarded-Port $server_port;
proxy_set_header X-Request-Start $msec;
proxy_set_header X-Real-IP $remote_addr;
}
location /.well-known {
alias /var/www/nvr/.well-known; # have this as the webroot
}
}
server {
listen 443 ssl;
listen 8082 ssl;
server_name xxxx;
ssl_certificate_key /etc/letsencrypt/live/xxx/privkey.pem;
ssl_trusted_certificate /etc/letsencrypt/live/xxx/chain.pem;
ssl_certificate /etc/letsencrypt/live/xxx/fullchain.pem;
root /var/www/nvr;
location / {
proxy_pass https://vms-dmz:8082;
proxy_buffering off;
proxy_http_version 1.1;
proxy_set_header Upgrade $http_upgrade;
proxy_set_header Connection "upgrade";
proxy_set_header Host $host;
proxy_set_header X-Forwarded-Proto $scheme;
proxy_set_header X-Forwarded-For $remote_addr;
proxy_set_header X-Forwarded-Port $server_port;
proxy_set_header X-Request-Start $msec;
proxy_set_header X-Real-IP $remote_addr;
}
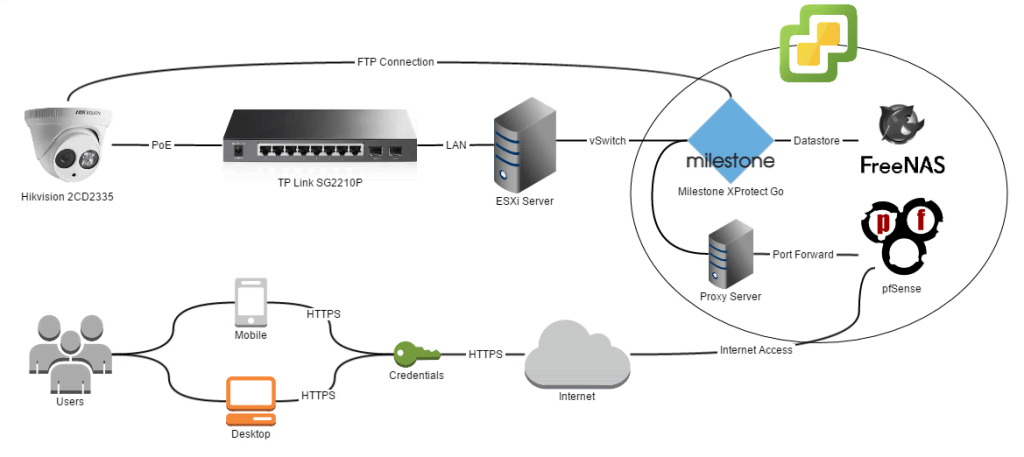
}Network Diagram
A little complicated but I tried to make it as easy to look at as possible. Of course this just my personal configuration and many things you won't even need like FreeNAS or a Proxy Server.
Click for a larger image:
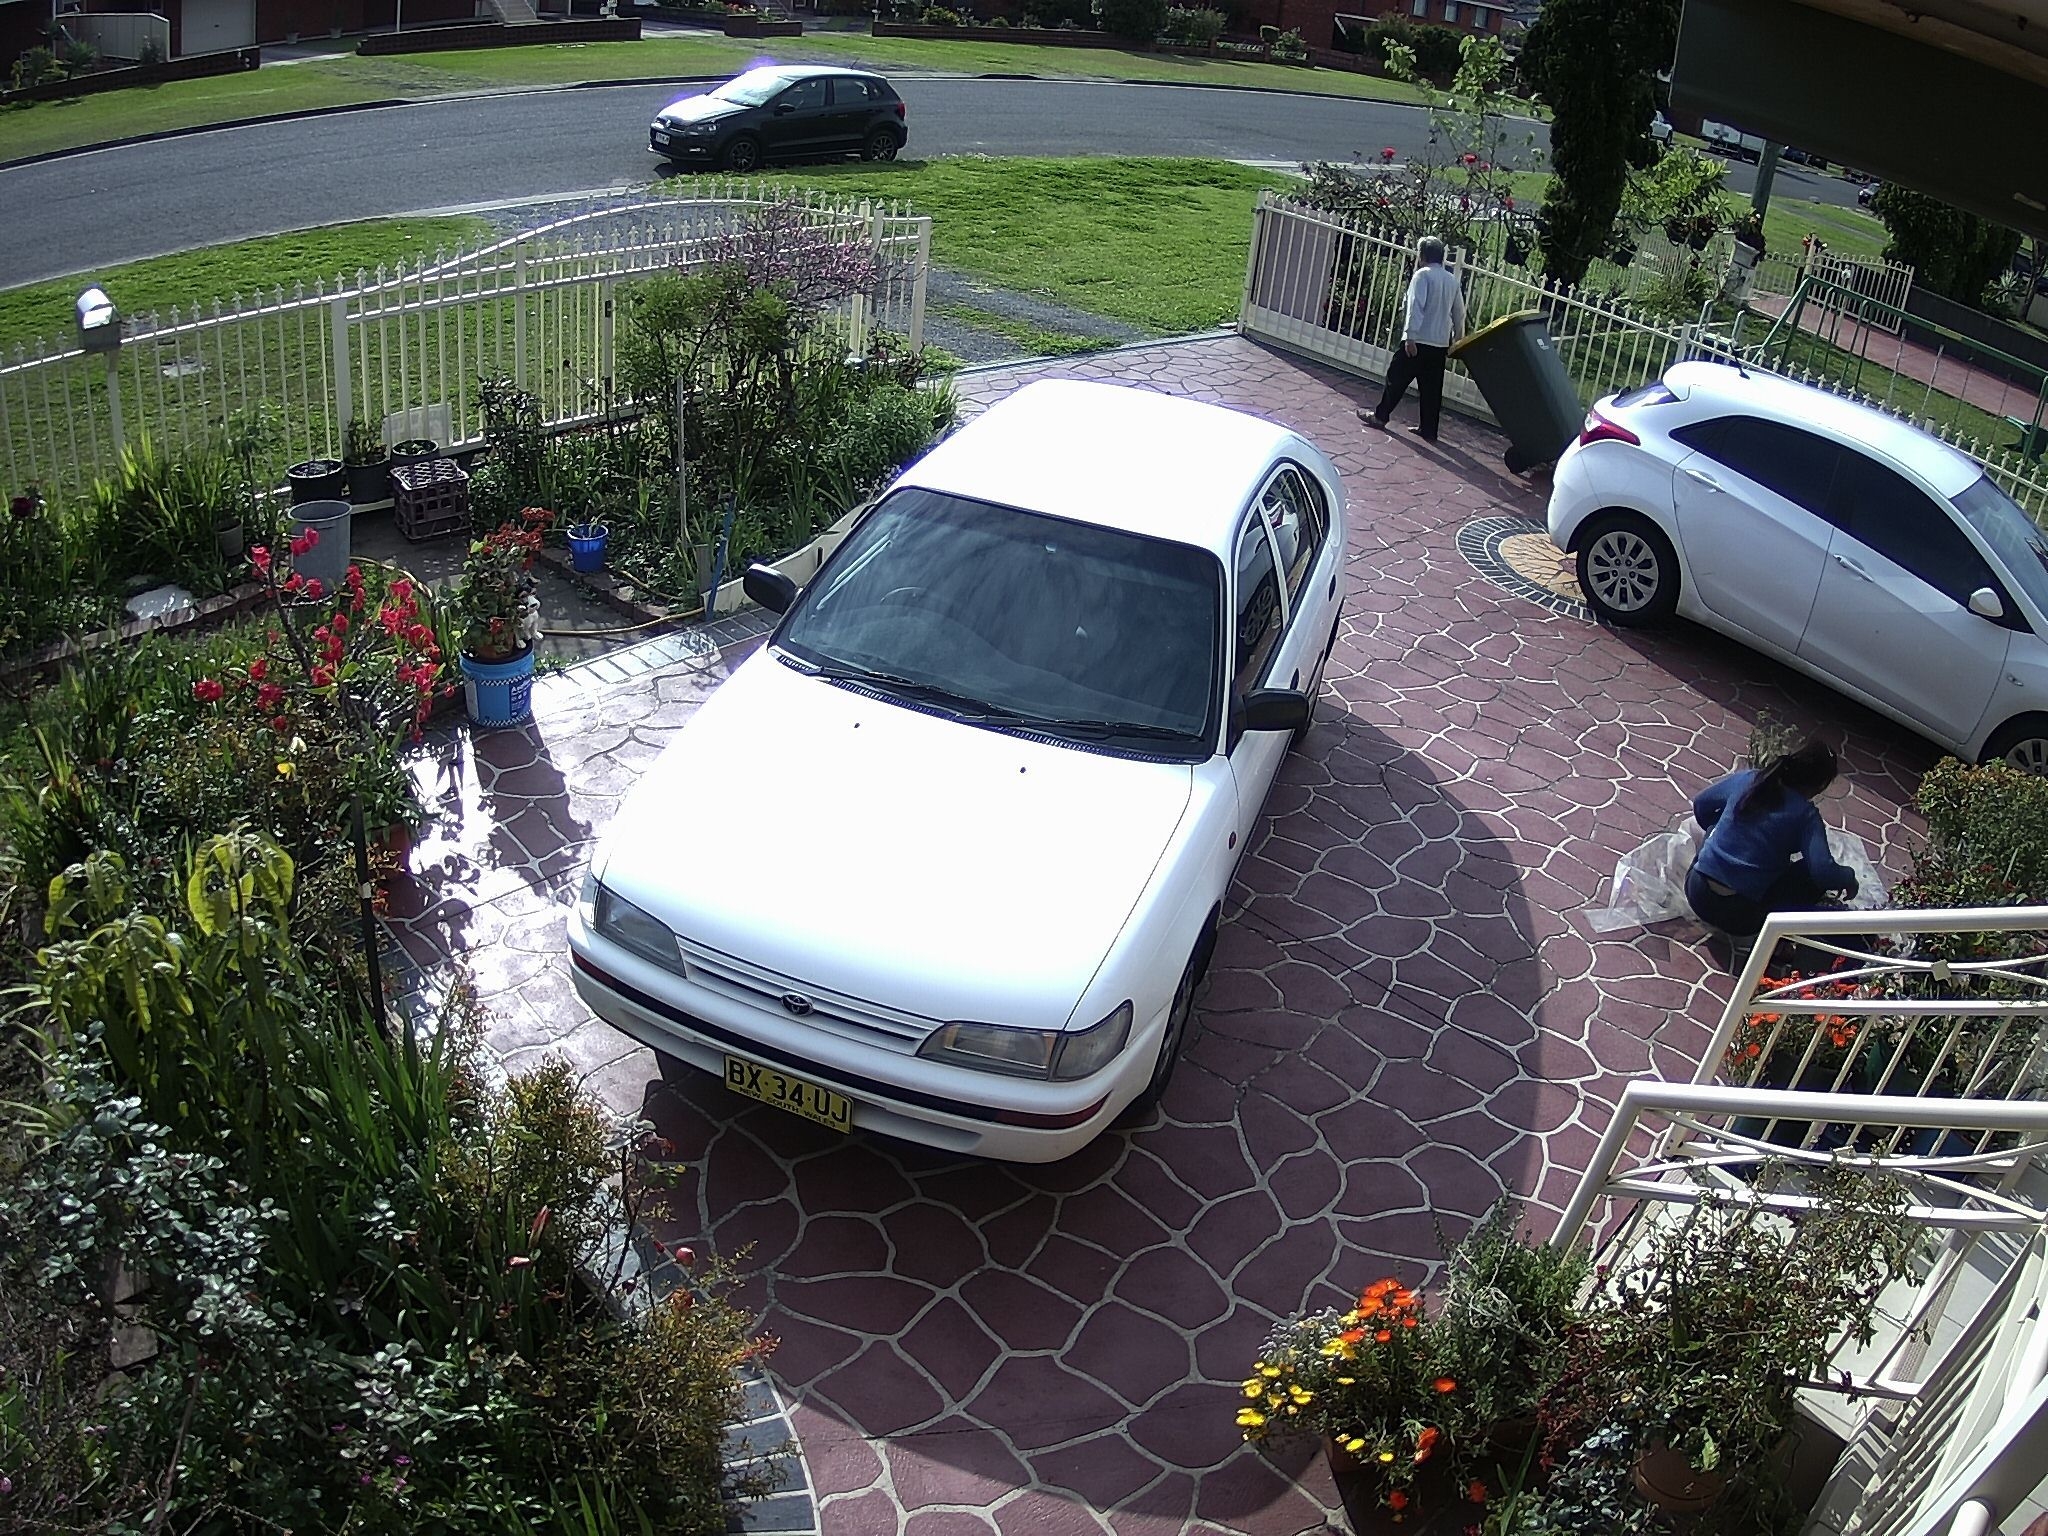
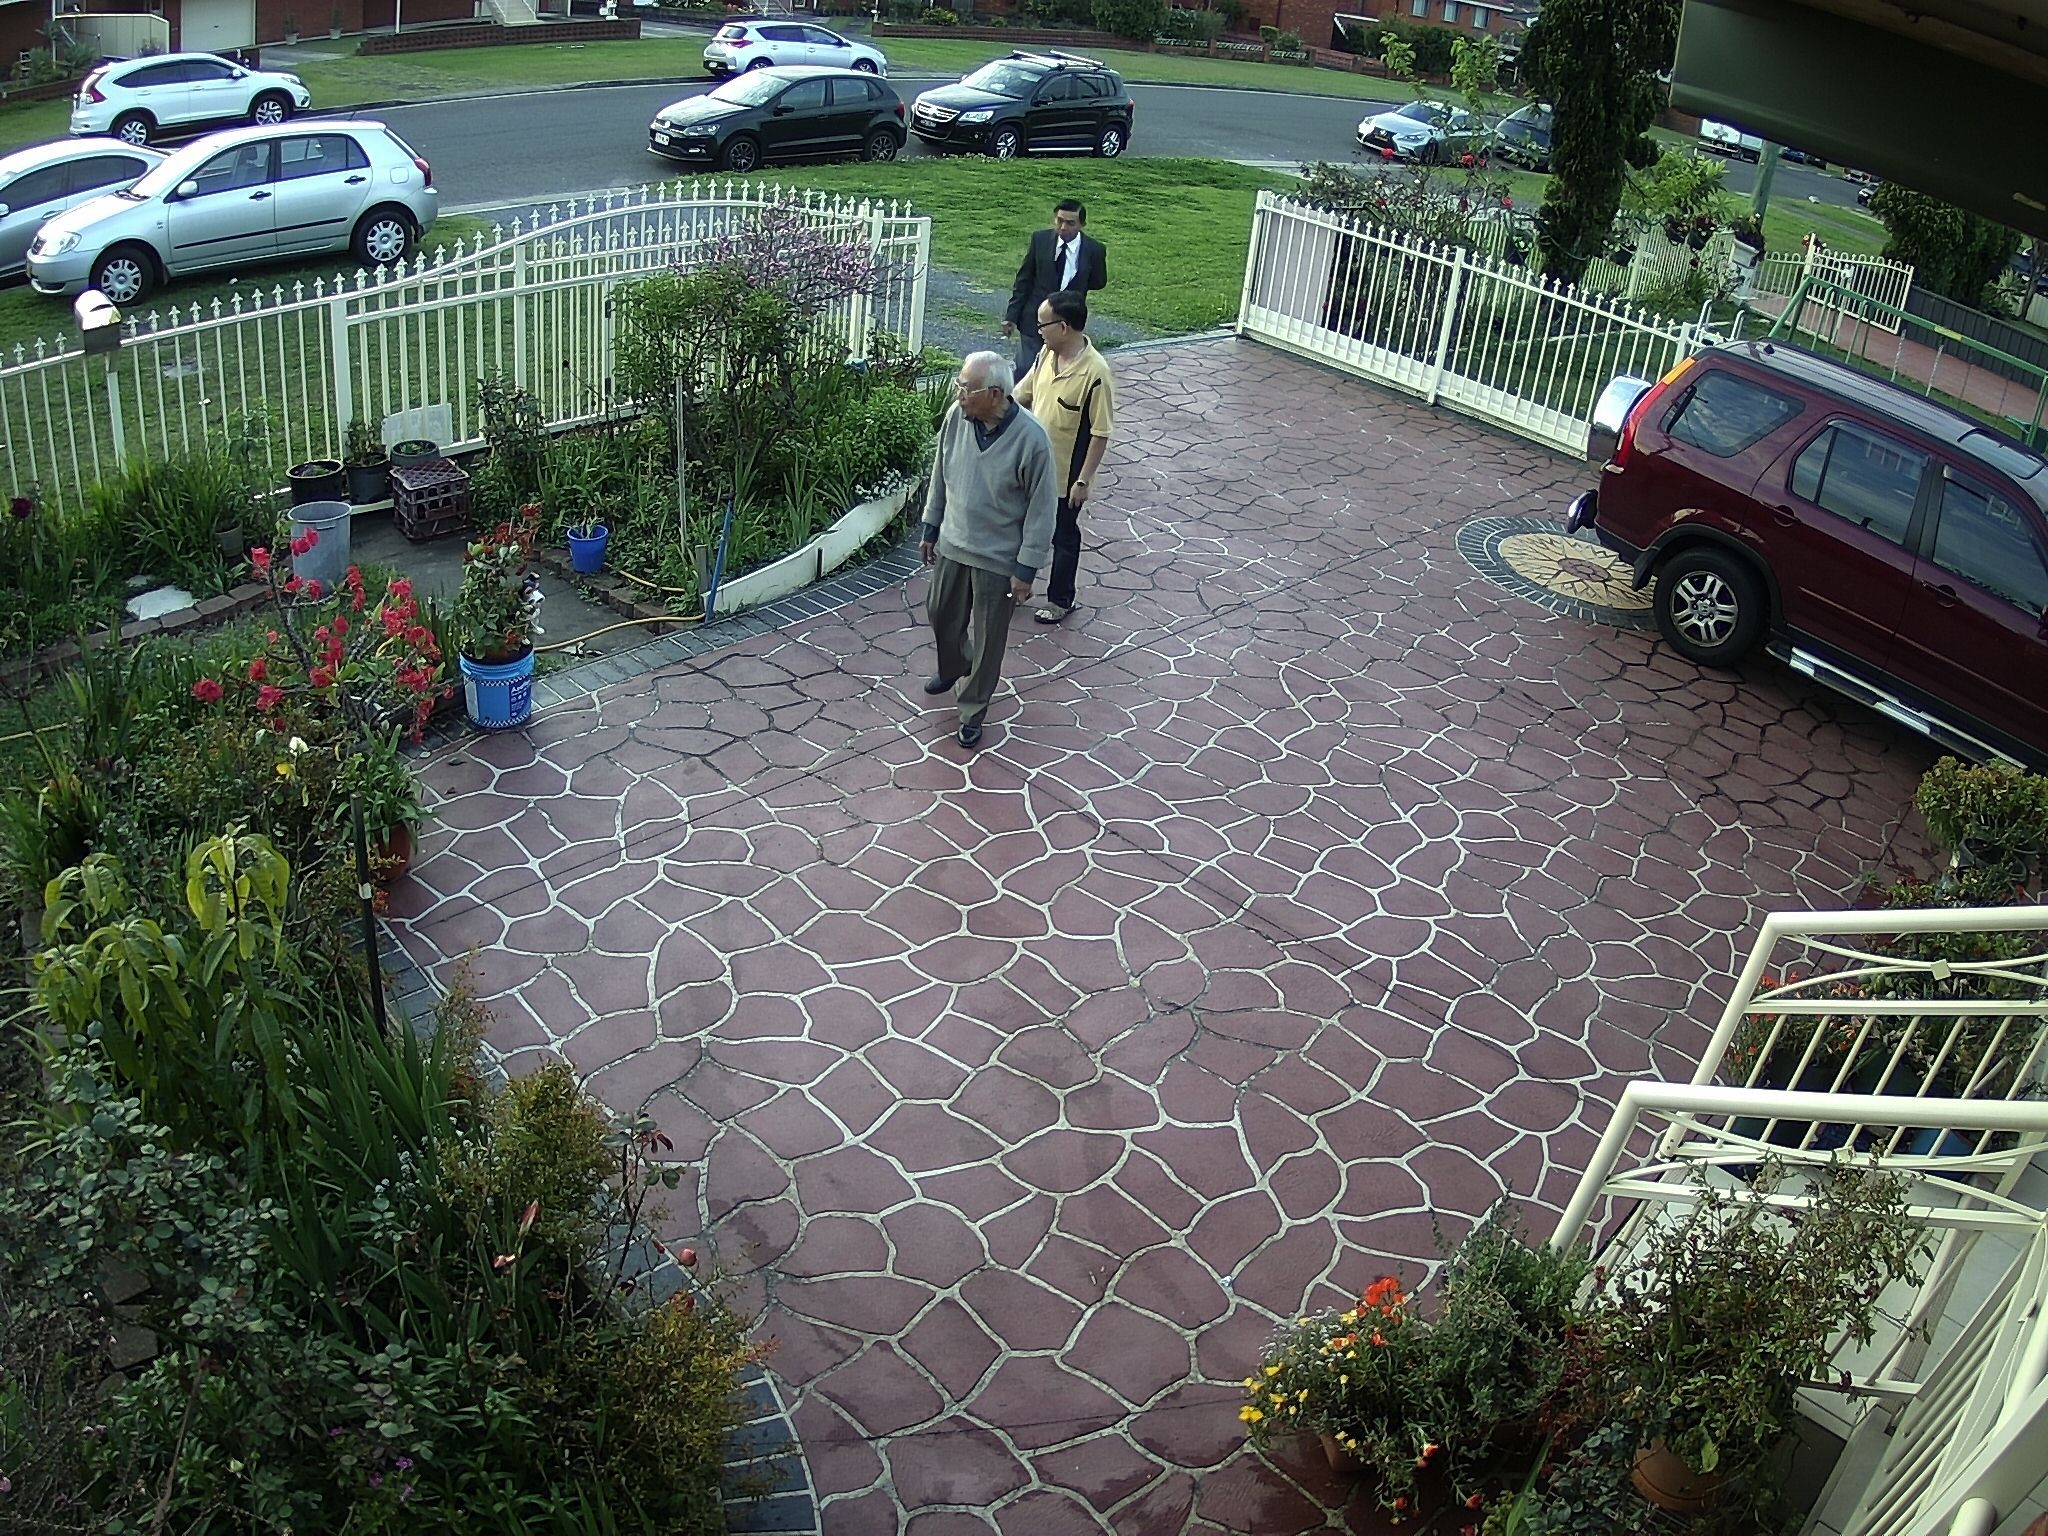
Sample Video & Motion Captures
Morning:
Afternoon:
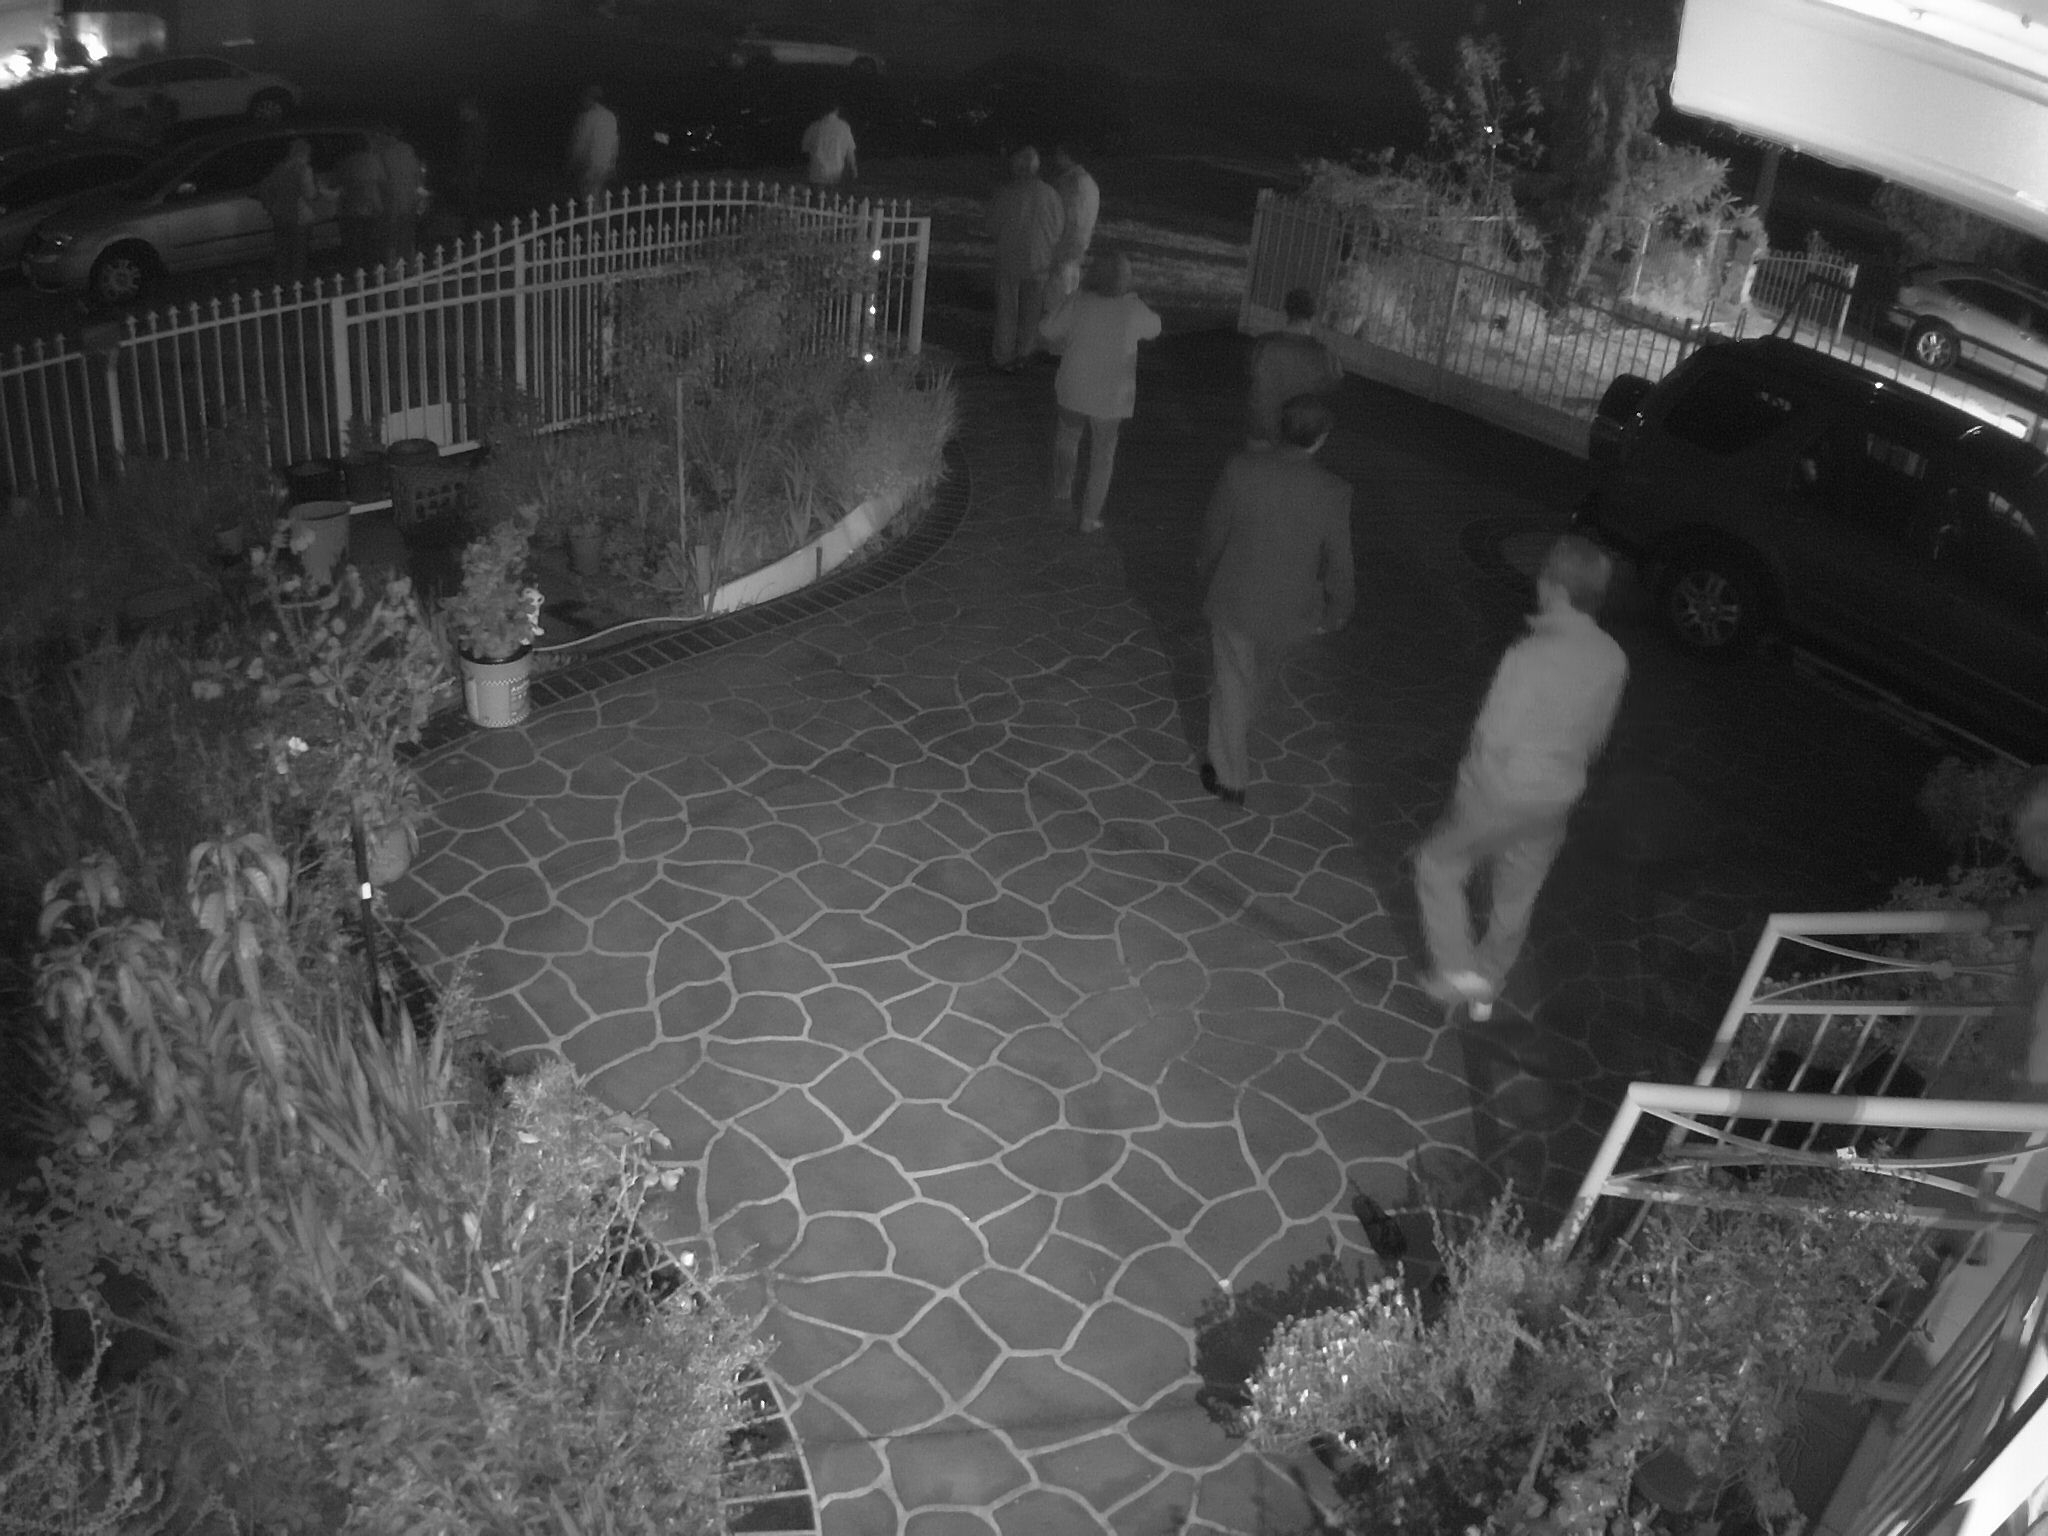
Night:
Future Considerations
- Add 3 indoor cameras
- Separate Recording and Archival storage to different hard drives. This would reduce the lag and slowdowns during playback.