This is an up-to-date collation of everything to get a good working base for Arch Linux on the Samsung ARM Chromebook XE303C12.
I took my Chromebook out of retirement over the week and experimented around with a few distros. This is an old device and there's not a lot of information going around on the Internet. I've taken everything I've found and updated it to work on latest Arch release. I've also included some of my own configurations together into this post.
I assume you are familiar with Linux so I won't be explaining what everything is and what it does.
Install Arch Linux following the official guide
Install Arch on the Chromebook using the official guide.
To install to the internal memory, use /dev/mmcblk0 as the path after launching Arch from a USB. For this to work you will need Internet (wifi-menu), wget and cgpt (pacman -S cgpt wget).
Set up Wi-Fi
On the first boot without a GUI, the command wifi-menu should work out of the box to pick a simple network. It does not support WPA2 Enterprise or Hidden Networks however.
Proper networking will be explained later on once we have a GUI ready.
Update the system
Simply run:
pacman -Syuthen reboot and hope everything still works.
Create a user
The next few steps require some files to be created in a user's home directory or preferences changed under their profile. This is would be a good time to do that unless you plan to use 'root' forever.
Create a new user
useradd -m -G wheel -s /bin/bash calvinSet a new password
passwd calvinInstall sudo
pacman -S sudoAdd user to sudoers
$ visudo

...
...
calvin ALL=(ALL) ALL
Login to your new user and let's begin.
Get a GUI
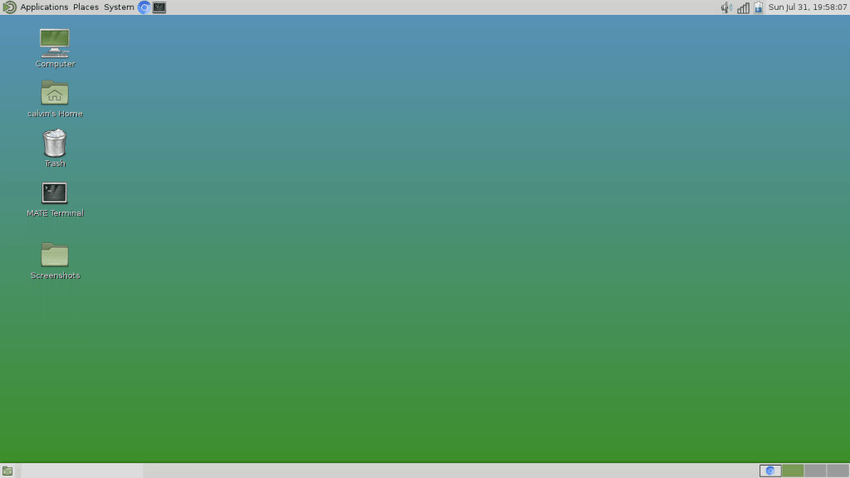
I prefer MATE as it's light on resources (lighter than XFCE in my tests) and pretty usable. There a list to choose from on the wiki.
To install MATE and everything required for a desktop environment, run:
pacman -S mate mate-extra xorg-serverThe Disk Utility and Account Manager are optional packages if you wish to install them. The built-in account manager seems to work but throws an error when launching.
pacman -S mate-disk-utility mate-accountsdialogFinally if you need a Display Manager (Login screen) to launch MATE (or use xorg-xinit). MATE recommends using LightDM:
pacman -S lightdm lightdm-gtk-greeterThen enable LightDM to run on startup:
systemctl enable lightdm.serviceReboot and try it out.
Fix the trackpad
Now the trackpad will not feel right. This is easily fixed with a config file and driver.
Install the driver first:
pacman -S xf86-input-synapticsThen set-up the config file at /etc/X11/xorg.conf.d/70-synaptics.conf
Section "InputClass"
        Identifier "touchpad"
        Driver "synaptics"
        MatchIsTouchpad "on"
        Option "FingerHigh" "5"
        Option "FingerLow" "5"
        Option "TapButton1" "1"
        Option "TapButton2" "3"
        Option "TapButton3" "2"
        Option "HorizTwoFingerScroll" "on"
        Option "VertTwoFingerScroll" "on"
EndSection
Reboot when done.
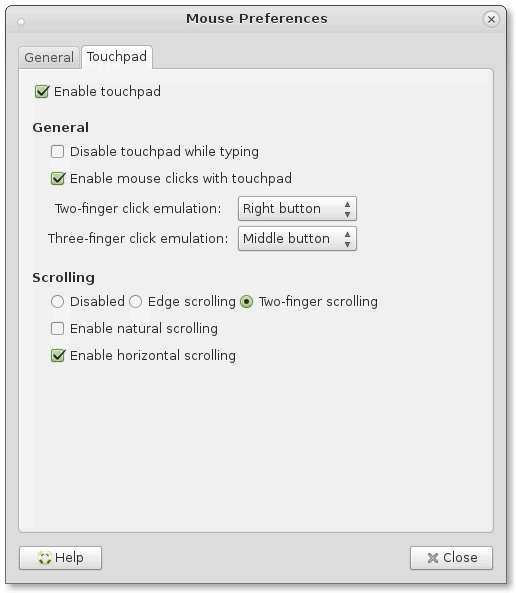
This should enable a good working trackpad on boot with tapping working. Afterwards, you can edit trackpad settings under 'System > Preferences > Hardware > Mouse' to enable two finger scrolling, two finger taps, three finger taps, etc.
Note: if it's really hard navigating with the broken trackpad, press CTRL + ALT + Refresh to return to the command line.
Networking
Install Network Manager and network-manager-applet:
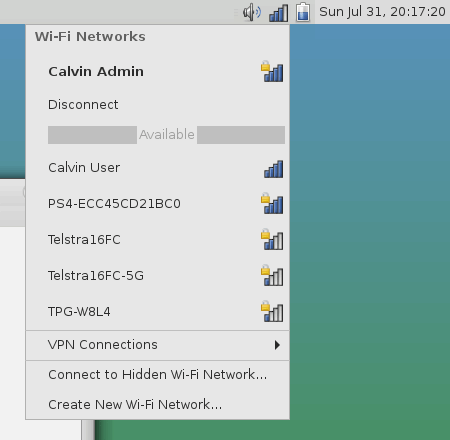
pacman -S networkmanager network-manager-appletThen enable Network Manager and reboot to find the applet:
systemctl enable NetworkManager.serviceBrightness Control
First make controlling brightness available to every user by editing permissions at startup. Create /etc/tmpfiles.d/brightness.conf with:
f /sys/class/backlight/backlight.12/brightness 0666 - - - 800Reboot to activate the new permissions.
Next create this brightness script wherever you want. I used /usr/local/bin/brightness
#!/bin/bash
cur_bri=$(/usr/bin/cat /sys/class/backlight/backlight.12/brightness)

if [ $1 == "up" ] ; then
    bri=$(($cur_bri+200))
    `echo $bri > /sys/class/backlight/backlight.12/brightness`
fi

if [ $1 == "down" ] ; then
    bri=$(($cur_bri-200))
    `echo $bri > /sys/class/backlight/backlight.12/brightness`
fi

if [ $1 == "-s" ]; then
    `echo $2 > /sys/class/backlight/backlight.12/brightness`
fi
Make the scripts executable:
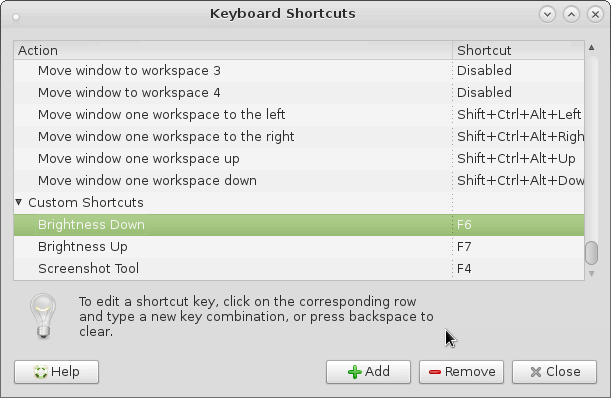
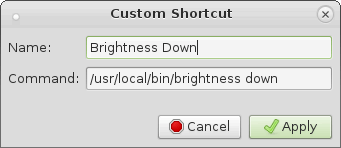
chmod +x /usr/local/bin/brightnessThen create keyboard shortcuts through 'System > Preferences > Hardware > Keyboard Shortcuts' to map:
Name: Brightness Down
Command: /usr/local/bin/brightness down
Shortcut F6

Name: Brightness Up
Command: /usr/local/bin/brightness up
Shortcut F7
If it doesn't work, make sure you have rebooted first to set the right permissions to the brightness file. Try running the scripts manually as well to see what the problem could be.
Sound
First install alsa-utils
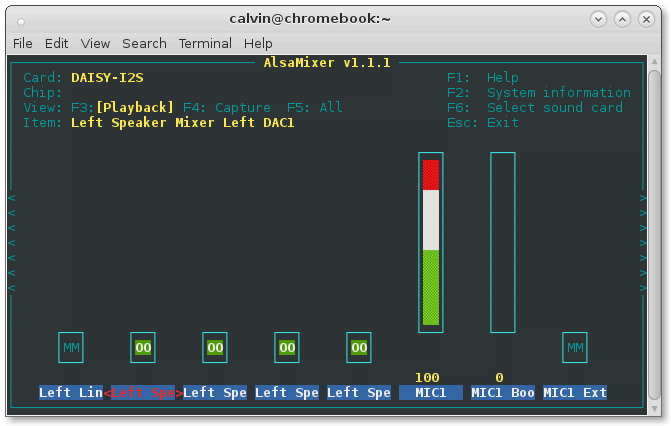
pacman -S alsa-utilsThen run alsamixer
alsamixerGo across the page (arrow keys) and press M to unmute
- Left Speaker Mixer Left DAC1
- Left Speaker Mixer Mono DAC2
- Left Speaker Mixer Mono DAC3
- Left Speaker Mixer Right DAC1
- Right Speaker Mixer Left DAC1
- Right Speaker Mixer Mono DAC2
- Right Speaker Mixer Mono DAC3
- Right Speaker Mixer Right DAC1
Press ESC when down and it should save itself.
Set the volume keyboard shortcuts by going to 'System > Preferences > Hardware > Keyboard Shortcuts'
Suspend on lid close
Forget about acpid and pm-utils in the wiki, sleeping works fine without them and it's easier to manage with systemd.
Install the relevant power manager for your environment, e.g. for MATE it should be:
pacman -S mate-power-managerThe trackpad has a tendency to wake up the computer as almost any movement to the computer will cause it to activate. To disable it from waking the computer during sleep, I use a systemd unit file /etc/systemd/system/tp-wake-disable.service
[Unit]
Description=Disable trackpad waking computer

[Service]
Type=oneshot
ExecStart=/bin/sh -c "echo disabled > /sys/devices/12c70000.i2c/i2c-1/1-0067/power/wakeup"

[Install]
WantedBy=multi-user.target
Then enable the unit:
systemctl enable tp-wake-disable.serviceSuspend after idle
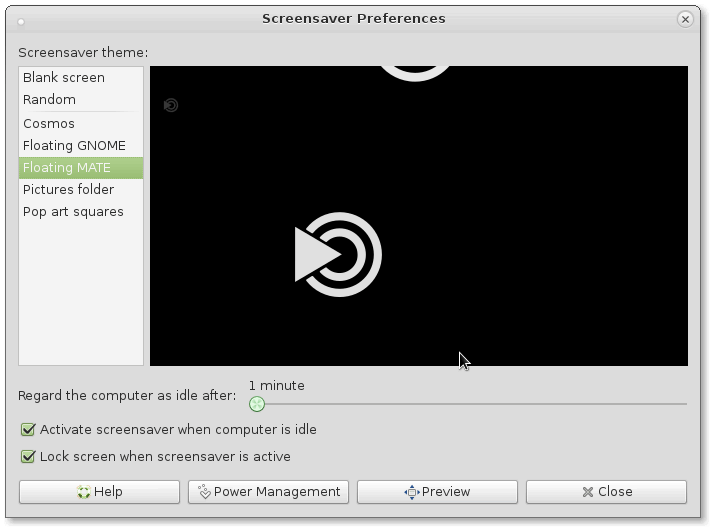
The Chromebook does not suspend after a period of inactivity in my tests, the display goes black and stays that way until woken again. I've found the easiest way to activate suspend is to edit /etc/systemd/logind.conf and change the IdleAction and IdleActionSec fields. This means 1 minute after the display is put to sleep it will suspend. The time for the display to sleep is configured through Screensaver in 'System Preferences > Preferences > Look and Feel > Screensaver'.
...
#HoldoffTimeoutSec=30s
IdleAction=Suspend
IdleActionSec=1min
#RuntimeDirectorySize=10%
...
Reboot to apply.
Note: During startup, LightDM will not suspend the computer if no one logs on, just leaving the laptop awake at the prompt indefinitely. I have experimented with xautolock, running it as a systemd unit and LightDM script but nothing seems to fix it. Closing the lid will also not suspend the computer. Basically, don't leave it on at the login screen without anyone logged in.
Change Search key to Caps Lock
Install xmodmap:
pacman -S xorg-xmodmapBy default, LightDM will read the ~/.Xmodmap file and modify the keymaps listed within it.
keycode 133 = Caps_LockDelete/Home/End/Page Up/Page Down
Install xbindkeys (for creating shortcuts) and xvkbd (emulate keyboard input):
pacman -S xbindkeys xvkbdCreate the configuration file:
touch ~/.xbindkeysrcAdd the following to the configuration file:
"xvkbd -xsendevent -text "[Prior]""
    m:0x4 + c:111
    Control + Up

"xvkbd -xsendevent -text "[Next]""
    m:0x4 + c:116
    Control + Down

"xvkbd -xsendevent -text "[Delete]""
    m:0x4 + c:22
    Control + BackSpace

"xvkbd -xsendevent -text "[End]""
    m:0x4 + c:114
    Control + Right

"xvkbd -xsendevent -text "[Home]""
    m:0x4 + c:113
    Control + Left
I prefer using CTRL + Arrow keys as it's easier than ALT + Arrow keys. If you prefer ALT, change 'm:0x4' to 'm:0x8' and 'Control' to 'Alt'
To run the configuration file at startup, add it to the ~/.xprofile which is executed by LightDM.
echo 'xbindkeys &' >> ~/.xprofileEnable Compositing
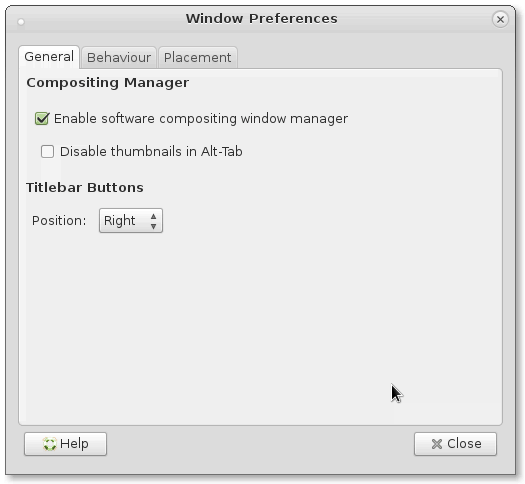
'System > Preferences > Look and Feel > Windows' and tick 'Enable software compositing window manager' in the General tab.
Set Hostname
hostnamectl set-hostname arch-chromebookSet the Time Zone
First find your time zone:
$ timedatectl list-timezones | grep Sydney
Australia/Sydney
Then set the time zone:
timedatectl set-timezone Australia/SydneyOther Notes
- The trackpad sometimes doesn't work on boot. A restart fixes it (press the power button)
- Can't seem to get PulseAudio working
- Two finger clicks that are too wide apart don't register as a right click. Two finger taps do though
- Current RAM usage for me is 123M, A LOT better than Chrome OS which always sits around 1.5GB
- Still can't get 720p video to run smoothly. Chrome OS is a bit better here but even then it dies on a 720p60 video. Sticking to 480p seems to be the best thing to do
- It is possible to get rid having to press CTRL + D on each boot, I did that once and totally forgot how to get it back. I eventually did but it was crazy stuff.
