
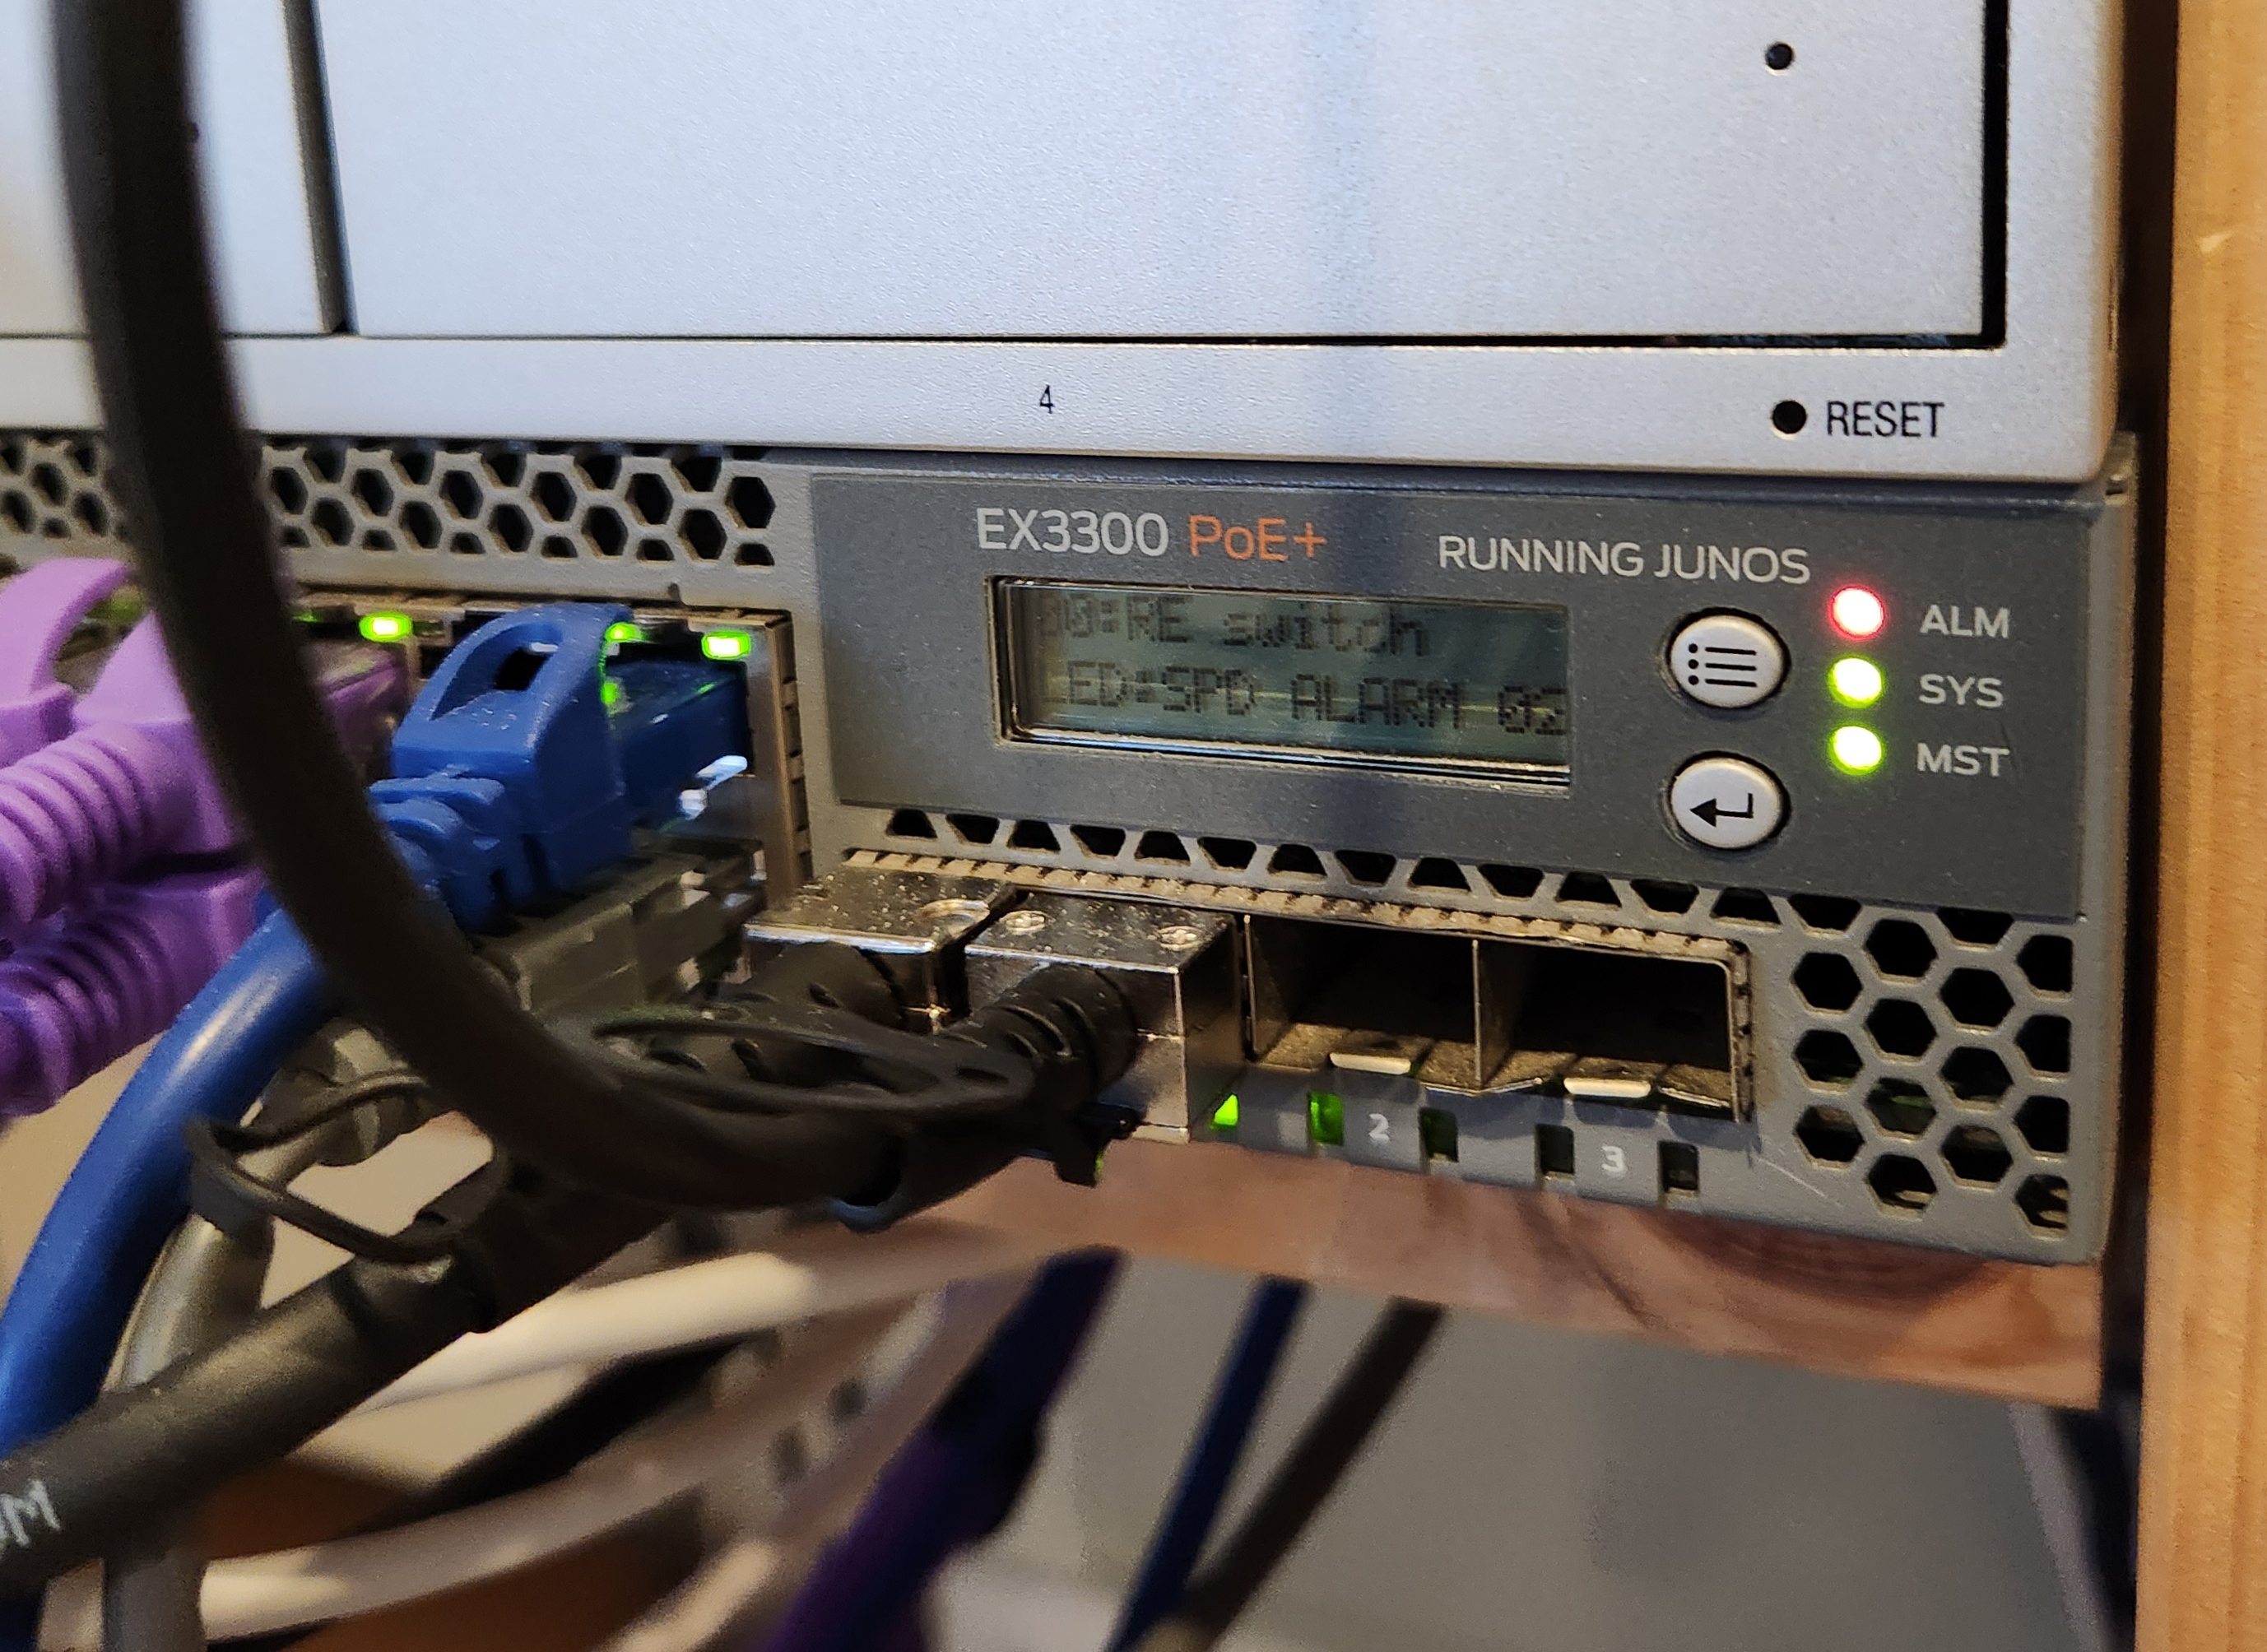
I bought a Juniper EX3300-48P switch at the beginning of the year. It has 4 SFP+ ports capable of 10-gigabit transfer speeds. I thought I'd make use of them, and connect it to a couple of devices I had.
To connect to these SFP+ ports, I needed a network interface card (NIC), SFP+ transceivers and SFP+ cables.
Network Interface Card (NIC)
From my research, the two most popular 10GbE NICs were:
With Intel, there are many fake clones, but luckily many websites can help identify them.
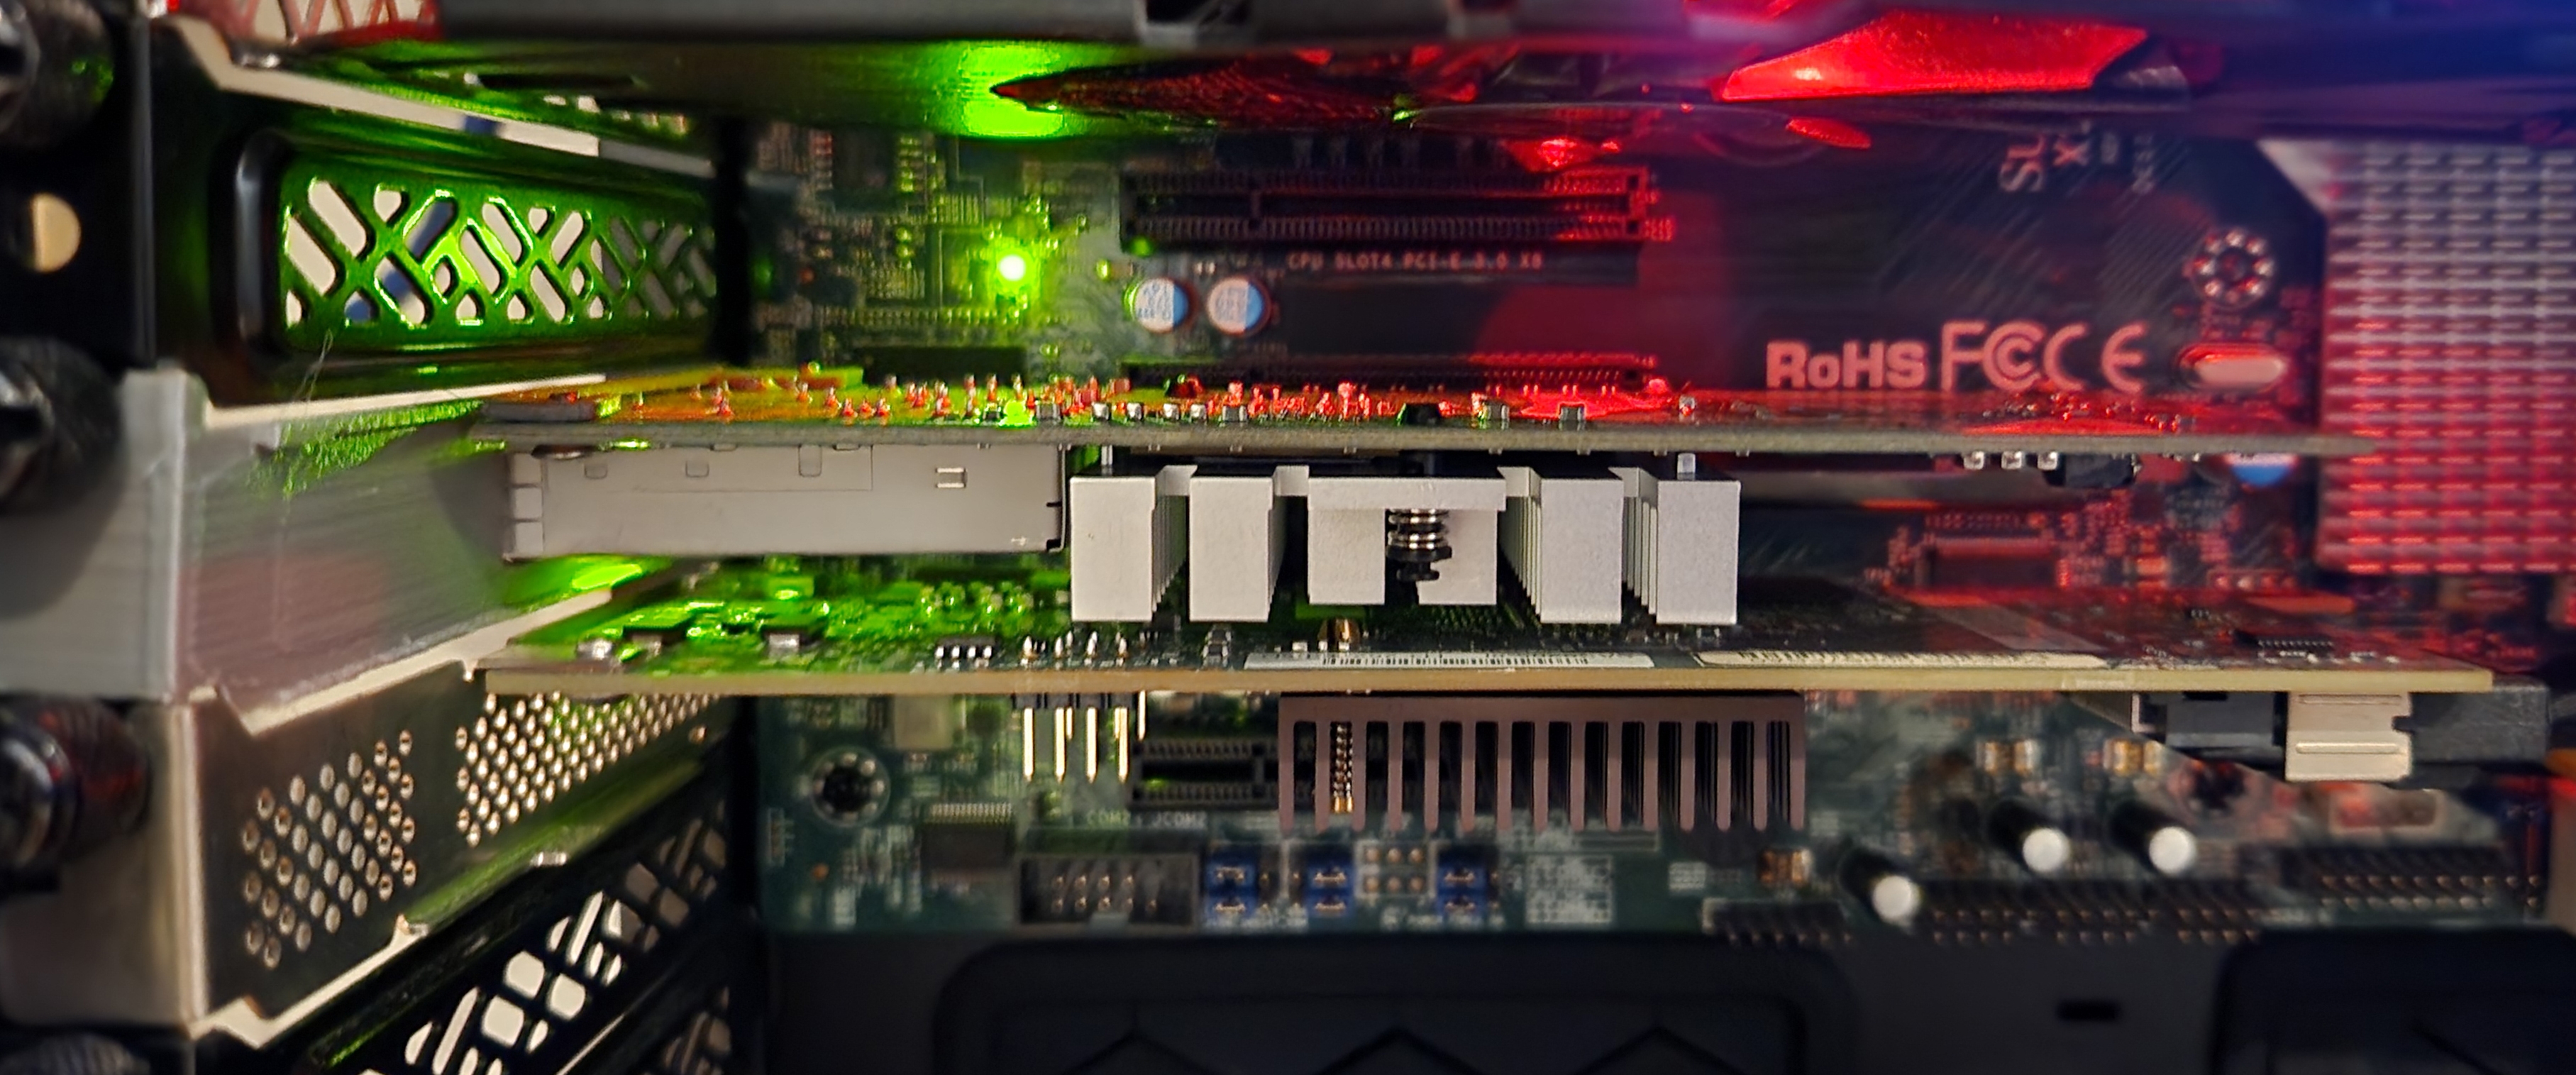
Intel also makes OEM models for IBM, HP and Dell. They perform the same. I went with the IBM 49Y7962 which is identical to the Intel X520 DA-2. It came with a low-profile bracket, so I printed this design by RiHi from Thingiverse.
SFP+ Cable and Transceivers
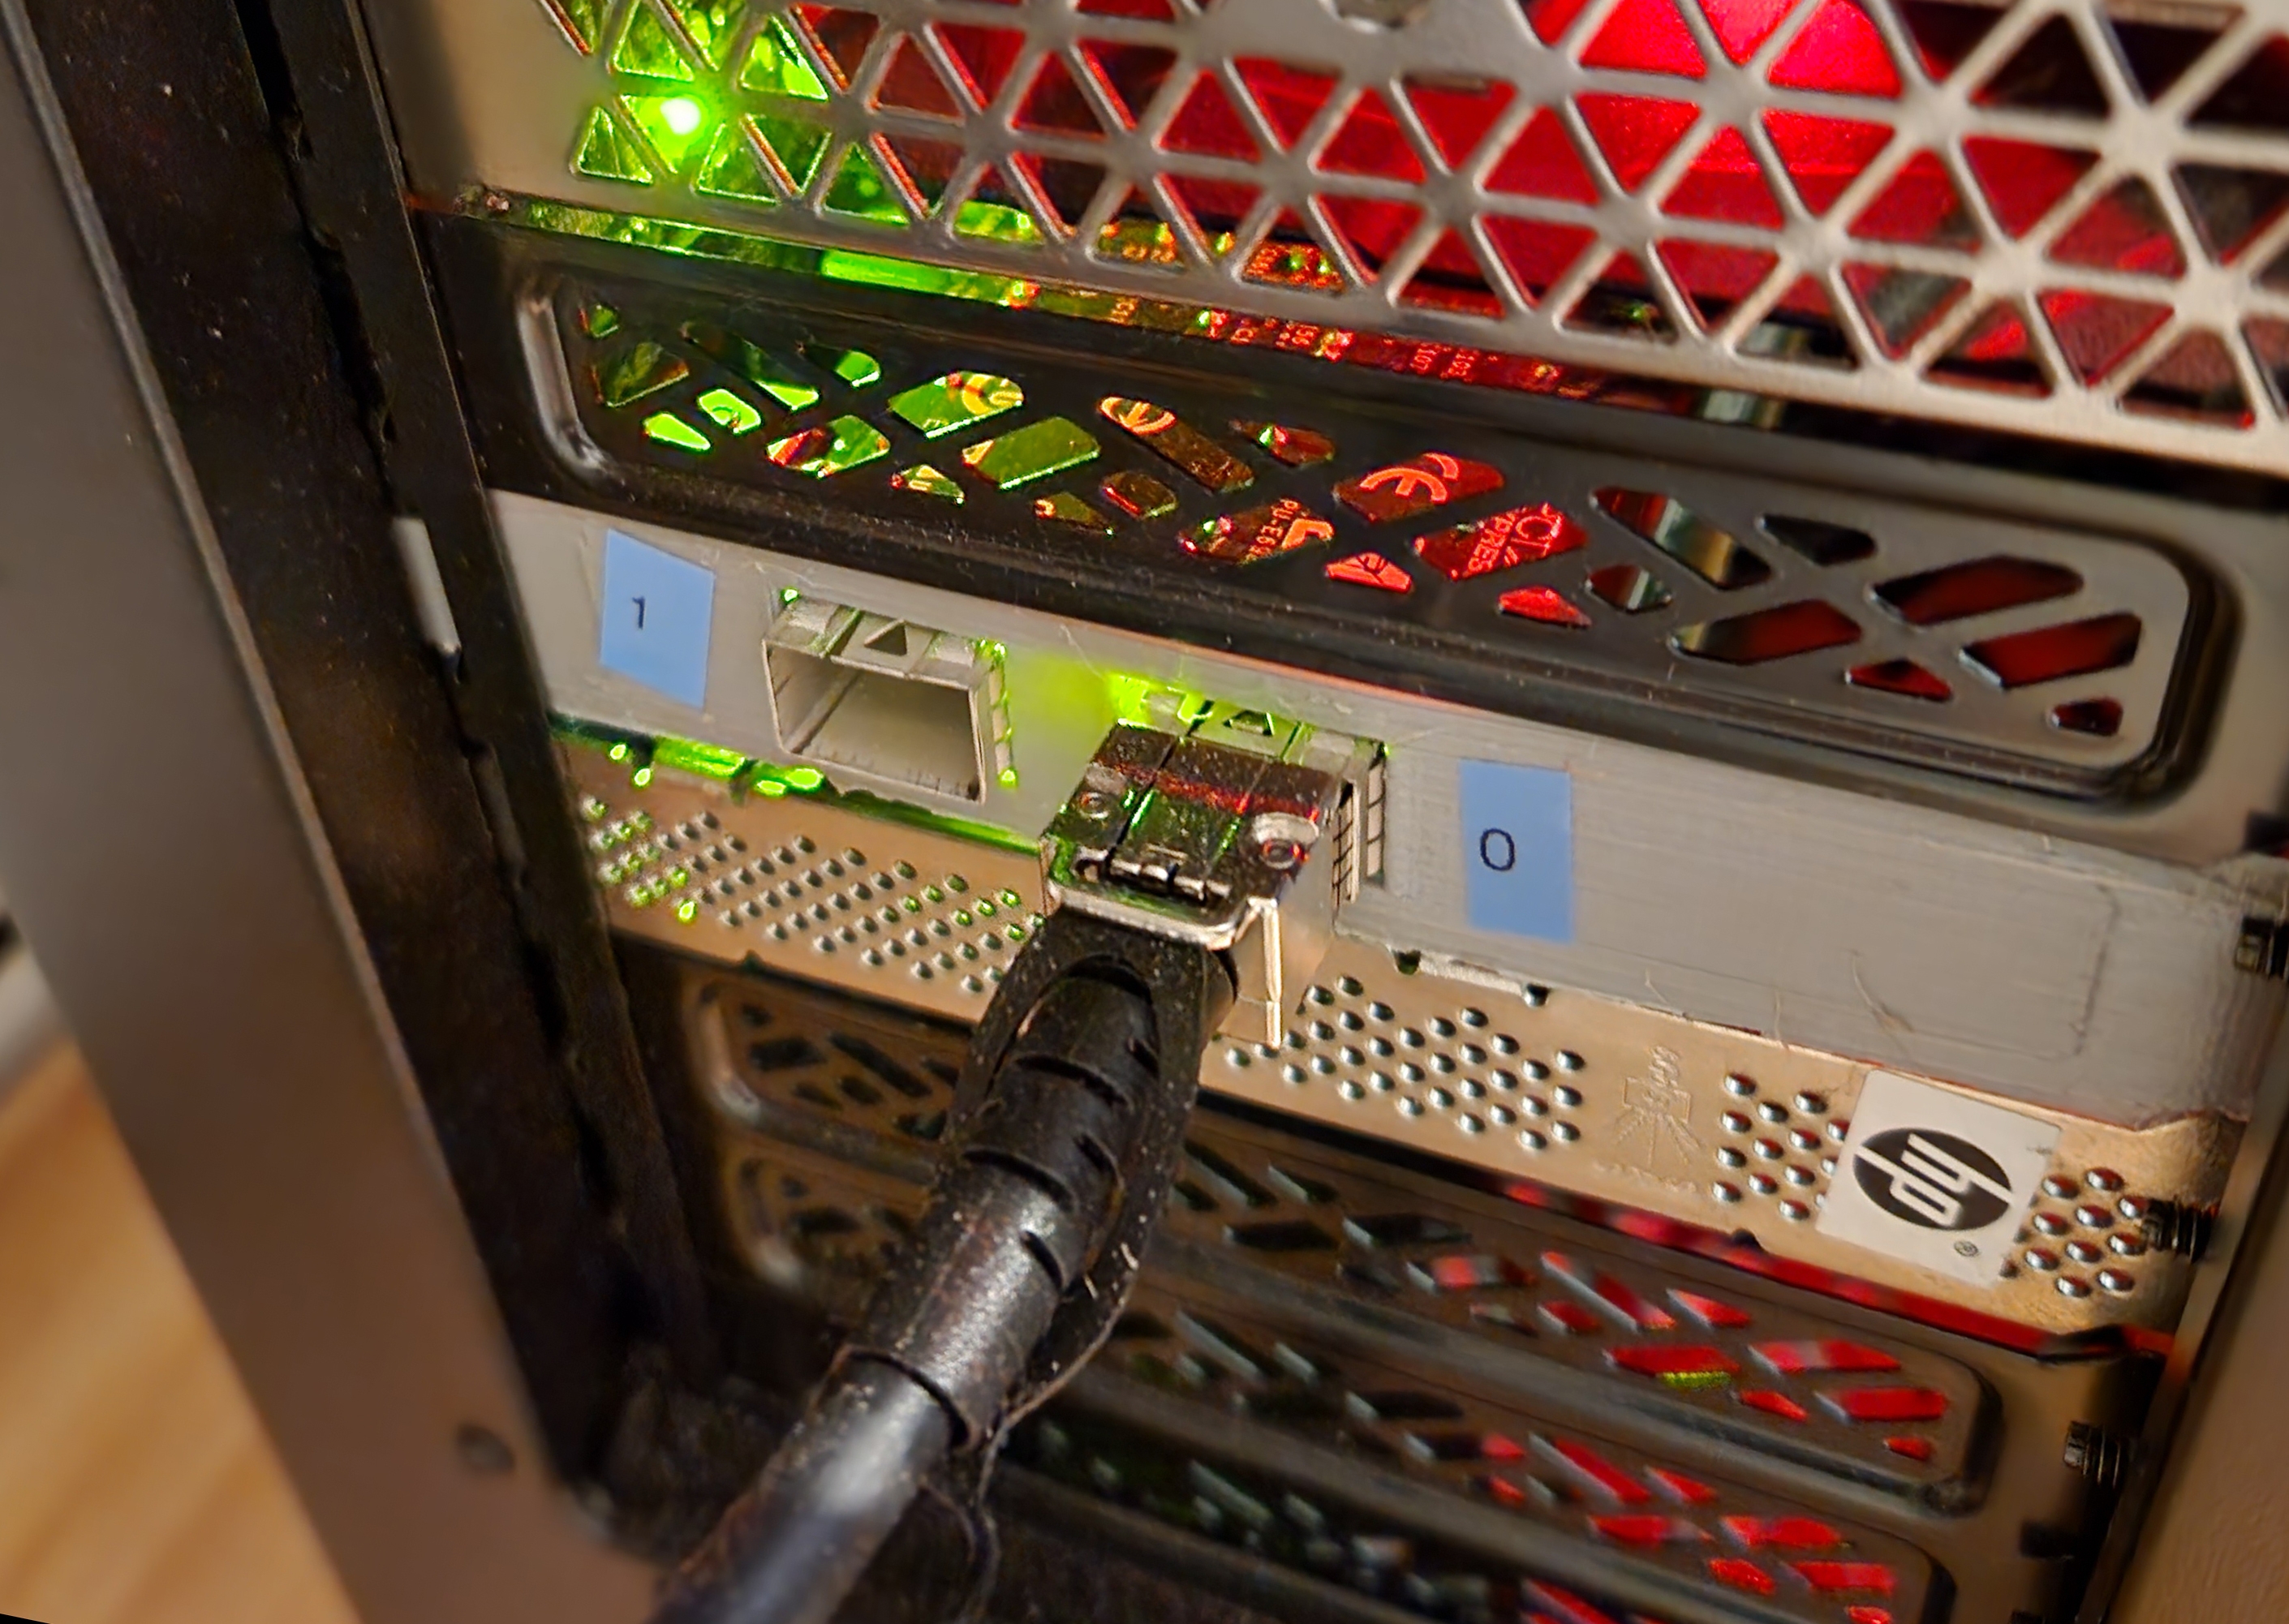
I bought an SFP+ Twinax Direct Attach Copper (DAC) SFP+ Passive cable from eBay without any issues. This saves having to purchase transceivers and fiber cables separately. This worked for both the Intel X520 and my UniFi Protect NVR which has an SFP+ port built-in.
Juniper Configuration
On the Juniper, the interface is named xe (10-gigabit ethernet) instead of the usual ge (gigabit ethernet). It was the same process as setting up a ge port, with trunks, descriptions and port numbers.
Ubuntu Configuration
I am using Ubuntu 22.04 as my operating system.
After installing the NIC, check if the device is connected using sudo lshw -class network
❯ sudo lshw -class network
  *-network:0
       description: Ethernet interface
       product: 82599ES 10-Gigabit SFI/SFP+ Network Connection
       vendor: Intel Corporation
       physical id: 0
       bus info: pci@0000:01:00.0
       logical name: ens3f0
       version: 01
       serial: 90:e2:ba:a4:51:78
       size: 10Gbit/s
       capacity: 10Gbit/s
       width: 64 bits
       clock: 33MHz
       capabilities: pm msi msix pciexpress vpd bus_master cap_list rom ethernet physical fibre 10000bt-fd
       configuration: autonegotiation=off broadcast=yes driver=ixgbe driverversion=5.15.0-53-generic duplex=full firmware=0x8000081f latency=0 link=yes multicast=yes speed=10Gbit/s
       resources: irq:24 memory:fb200000-fb2fffff ioport:e020(size=32) memory:fb404000-fb407fff memory:fb380000-fb3fffff memory:90000000-900fffff memory:90100000-901fffff
  *-network:1 DISABLED
       description: Ethernet interface
       product: 82599ES 10-Gigabit SFI/SFP+ Network Connection
       vendor: Intel Corporation
       physical id: 0.1
       bus info: pci@0000:01:00.1
       logical name: ens3f1
       version: 01
       serial: 90:e2:ba:a4:51:79
       capacity: 10Gbit/s
       width: 64 bits
       clock: 33MHz
       capabilities: pm msi msix pciexpress vpd bus_master cap_list rom ethernet physical fibre 10000bt-fd
       configuration: autonegotiation=off broadcast=yes driver=ixgbe driverversion=5.15.0-53-generic firmware=0x8000081f latency=0 link=no multicast=yes
       resources: irq:75 memory:fb100000-fb1fffff ioport:e000(size=32) memory:fb400000-fb403fff memory:fb300000-fb37ffff memory:90200000-902fffff memory:90300000-903fffff
Find the interface name using sudo ip a. Ubuntu chose ens3f for me.
❯ sudo ip a

4: ens3f0: <BROADCAST,MULTICAST,UP,LOWER_UP> mtu 1500 qdisc mq state UP group default qlen 1000
    link/ether 90:e2:ba:a4:51:78 brd ff:ff:ff:ff:ff:ff
    altname enp1s0f0
    inet6 fe80::92e2:baff:fea4:5178/64 scope link
       valid_lft forever preferred_lft forever
5: ens3f1: <BROADCAST,MULTICAST> mtu 1500 qdisc noop state DOWN group default qlen 1000
    link/ether 90:e2:ba:a4:51:79 brd ff:ff:ff:ff:ff:ff
    altname enp1s0f1
Create a new file under /etc/netplan. Replace currently interface (eno1) with new one (ens3f0). Move the old NIC configuration out then apply.
$ sed s/eno1/ens3f0/g > ens3f0.yaml
$ sudo mv eno1.yaml ~/eno1.yaml
$ sudo netplan apply
Update all Docker to use the new network interface. I used Ansible to create my Docker networks so it was simply changing the parent interface on the MacVLAN networks.
TASK [Create Docker networks] **************************************************************************************************************************
--- before
+++ after
@@ -1,14 +1,14 @@
 {
-    "connected.alertmanager": false,
-    "connected.blackbox_exporter": false,
-    "connected.grafana": false,
-    "connected.guacamole": false,
-    "connected.guacamole-guacd": false,
-    "connected.guacamole-postgres": false,
-    "connected.junos_exporter": false,
-    "connected.omada": false,
-    "connected.prometheus": false,
-    "connected.unifi-protect-proxy": false,
-    "driver_options.parent": "eno1.20",
+    "connected.alertmanager": true,
+    "connected.blackbox_exporter": true,
+    "connected.grafana": true,
+    "connected.guacamole": true,
+    "connected.guacamole-guacd": true,
+    "connected.guacamole-postgres": true,
+    "connected.junos_exporter": true,
+    "connected.omada": true,
+    "connected.prometheus": true,
+    "connected.unifi-protect-proxy": true,
+    "driver_options.parent": "ens3f0.20",
     "exists": true
 }
Redeploy any containers with a static IP address. For me, these were:
- Authelia
- TP-Link Omada
- Plex
- qBittorrent (opened port)
Finally, restart the host. I preferred this over restarting the Docker daemon. This will also clean ups the deleted VLAN interfaces.